Comprehensive Guide on FTK Imager
FTK Imager is an open-source software by AccessData that is used for creating accurate copies of the original evidence without actually making any changes to it. The Image of the original evidence is remaining the same and allows us to copy data at a much faster rate, which can be soon be preserved and can be analyzed further.
The FTK imager also provides you with the inbuilt integrity checking function which generates a hash report which helps in matching the hash of the evidence before and after creating the image of the original Evidence.
Table of Contents
- Creating a Forensic Image
- Capturing Memory
- Analyzing Image dump
- Mounting Image to Drive
- Custom Content Image using AD encryption
- Decrypt AD Encryption
- Obtain Protected Files
- Detect EFS Encryption
- Export Files
Lets us begin with creating an image copy of the original evidence.
Creating a Forensic Image
Forensic Imaging is one of the most crucial steps involved in digital forensic investigation. It is the process of making an archival or backup copy of the entire hard drive. It is a storage file that contains all the necessary information to boot to the operating system. However, this imaged disk needs to be applied to the hard drive to work. One cannot restore a hard drive by placing the disk image files on it as it needs to be opened and installed on the drive using an imaging program. A single hard drive can store many disk images on it. Disk images can also be stored on flash drives with a larger capacity.
Open FTK Imager by AccessData after installing it, and you will see the window pop-up which is the first page to which this tool opens.

Now, to create a Disk Image. Click on File > Create Disk Image.

Now you can choose the source based on the drive you have. It can be a physical or a logical Drive depending on your evidence.
A Physical Drive is the primary storage hardware or the component within a device, which is used to store, retrieve, and organize data.

A Logical Drive is generally a drive space that is created over a physical hard disk. A logical drive has its parameters and functions because it operates independently.
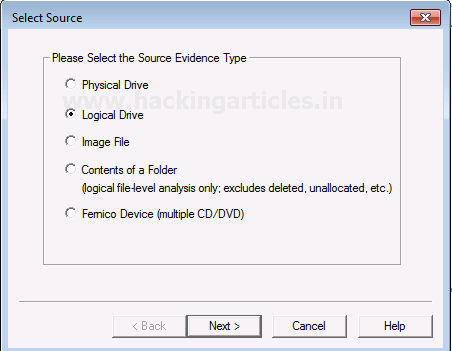
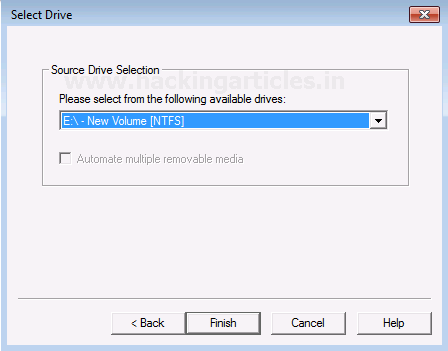
Now choose the source of your drive that you want to create an image copy of.
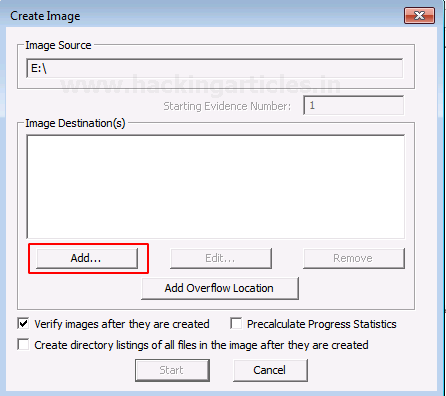
Add the Destination path of the image that is going to be created. From the forensic perspective, It should be copied in a separate hard drive and multiple copies of the original evidence should be created to prevent loss of evidence.
Select the format of the image that you want to create. The different formats for creating the image are:
Raw(dd): It is a bit-by-bit copy of the original evidence which is created without any additions and or deletions. They do not contain any metadata.
SMART: It is an image format that was used for Linux which is not popularly used anymore.
E01: It stands for EnCase Evidence File, which is a commonly used format for imaging and is similar to
AFF: It stands for Advanced Forensic Format that is an open-source format type.

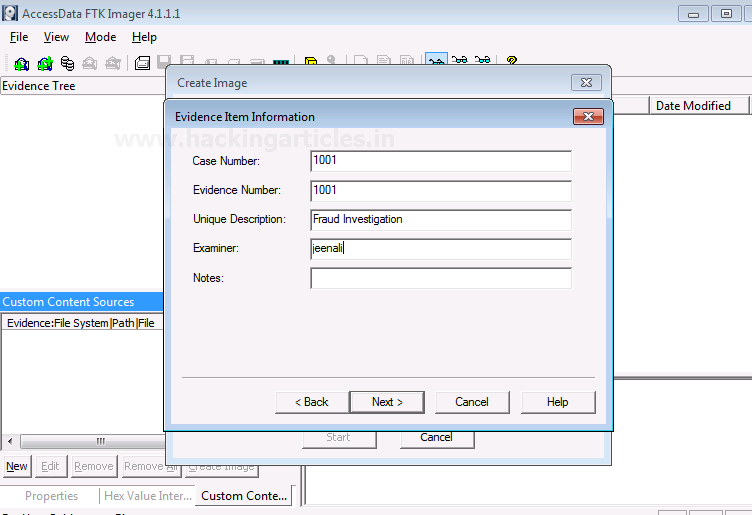
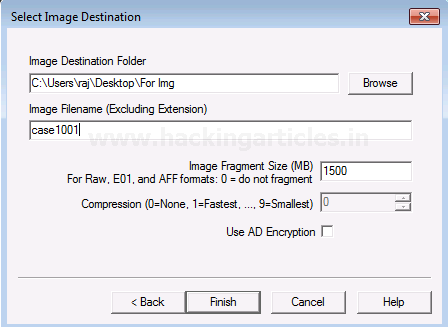
Now, add the details of the image to proceed.
Now finally add the destination of the image file, name the image file and then click on Finish.
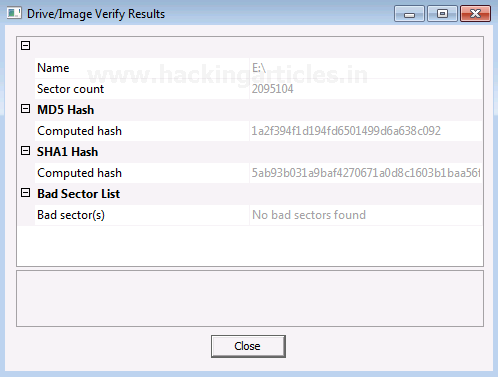
Once you have added the destination path, you can now start with the Imaging and also click on the verify option to generate a hash.

Now let us wait for a few minutes for the image to be created.

After the image is created, a Hash result is generated which verifies the MD5 Hash, SHA1 Hash, and the presence of any bad sector.
Capturing Memory
It is the method of capturing and dumping the contents of a volatile content into a non-volatile storage device to preserve it for further investigation. A ram analysis can only be successfully conducted when the acquisition has been performed accurately without corrupting the image of the volatile memory. In this phase, the investigator has to be careful about his decisions to collect the volatile data as it won’t exist after the system undergoes a reboot.
Now, let us begin with capturing the memory.
To capture the memory, click on File > Capture Memory.

Choose the destination path and the destination file name, and click on capture memory.

Now let us wait for a few minutes till the ram is being captured.

Analyzing Image Dump
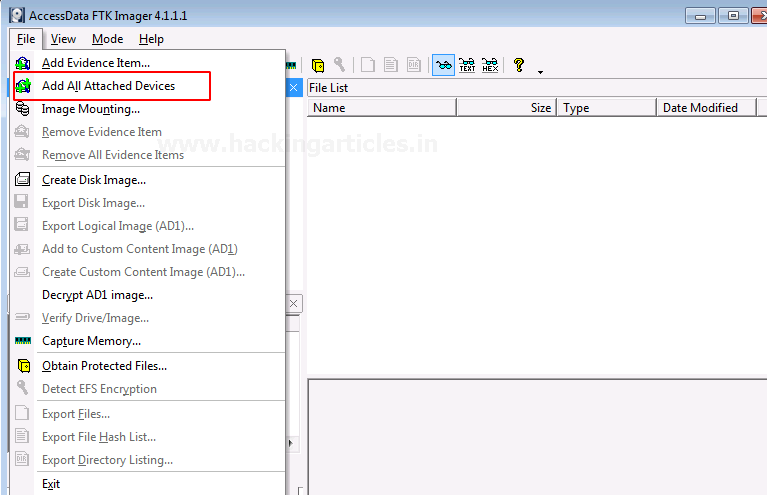
Now let us analyze the Dump RAW Image once it has been acquired using FTK imager. To start with analysis, click on File> Add Evidence Item.

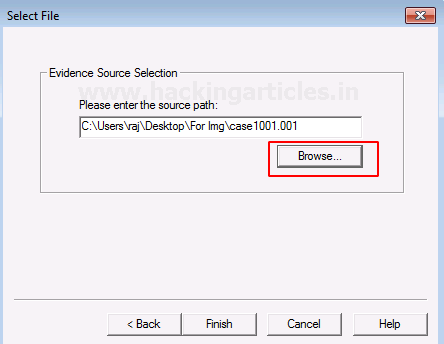
Now select the source of the dump file that you have already created, so here you have to select the image file option and click on Next.

Choose the path of the image dump that you have captured by clicking on Browse.
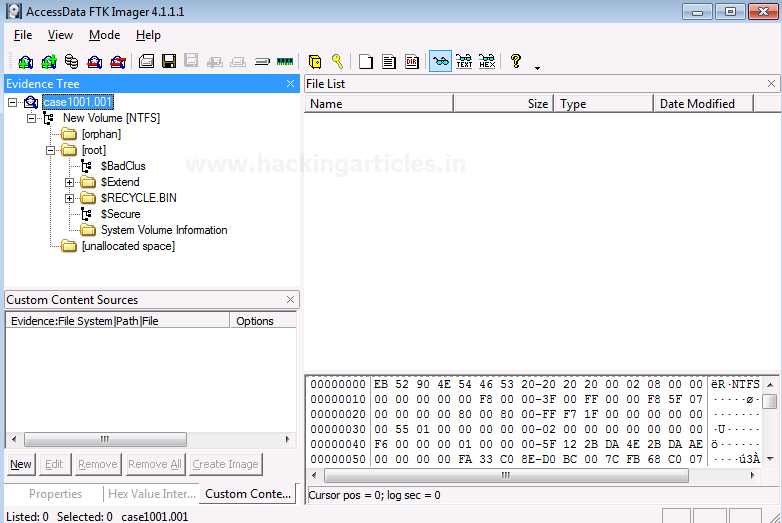
Once the image dump is attached to the analysis part, you will see an evidence tree which has the contents of the files of the image dump. This could have deleted as well as overwritten data.
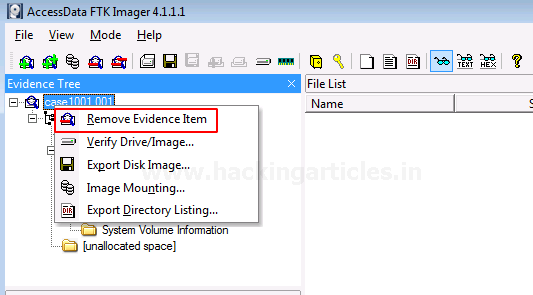
To analyze other things further, we will now remove this evidence item by right-clicking on the case and click on Remove Evidence Item
Mounting Image to Drive
To mount the image as a drive in your system, click on File > Image Mounting
Once the Mount Image to Drive window appears, you can add the path to the image file that you want to mount and click on Mount.

Now you can see that the image file has now been mounted as a drive.

Custom Content Image with AD Encryption
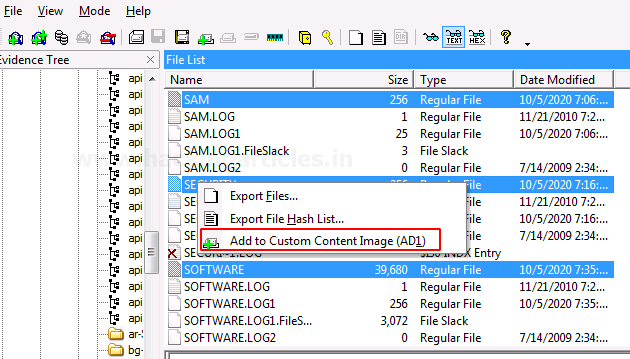
FTK imager has a feature that allows it to encrypt files of a particular type according to the requirement of the examiner. Click on the files that you want to add to the custom content Image along with AD encryption.
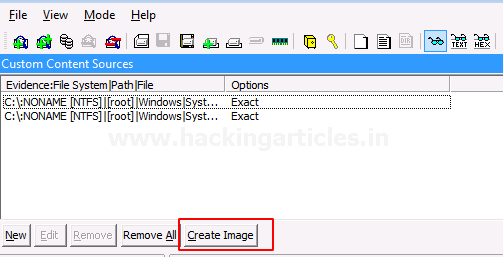
All the selected files will be displayed in a new window and then click on Create Image to proceed.
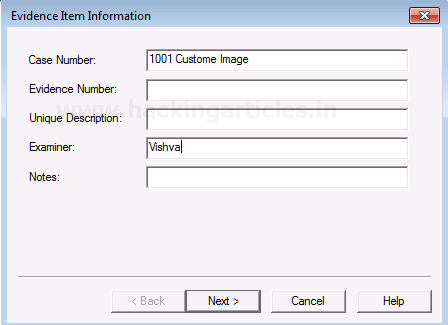
Fill in the required details for the evidence that is to be created.
Now add the destination of the image file that is to be created, name the image file and then check the box with AD encryption, and then click on Finish.

A new window will pop-up to encrypt the image, Now renter and re-enter the password that you want to add for your image.

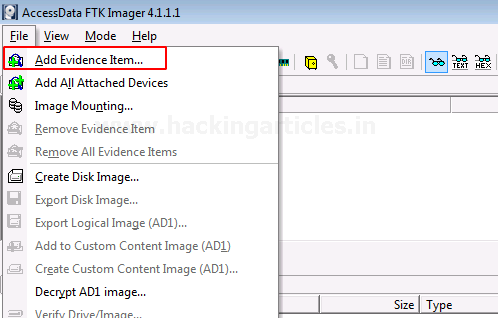
Now to see the encrypted files, click on File> Add Evidence Item…
The window to decrypt the encrypted files will appear once you add the file source. Enter the password and click OK.

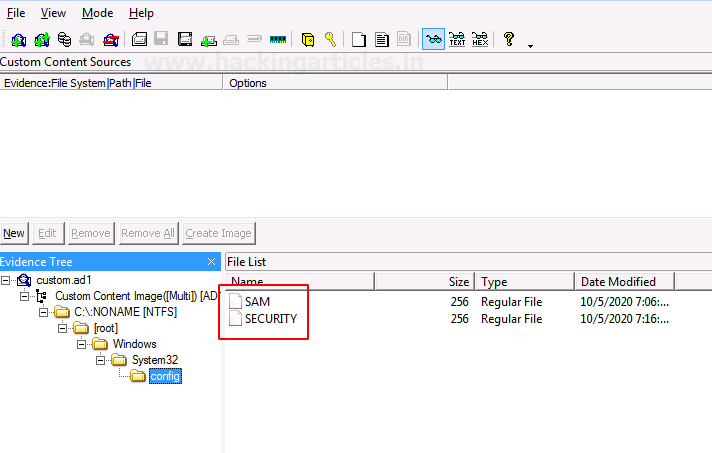
You will now see the two encrypted files on entering the valid passwords.
Decrypt AD1 Image
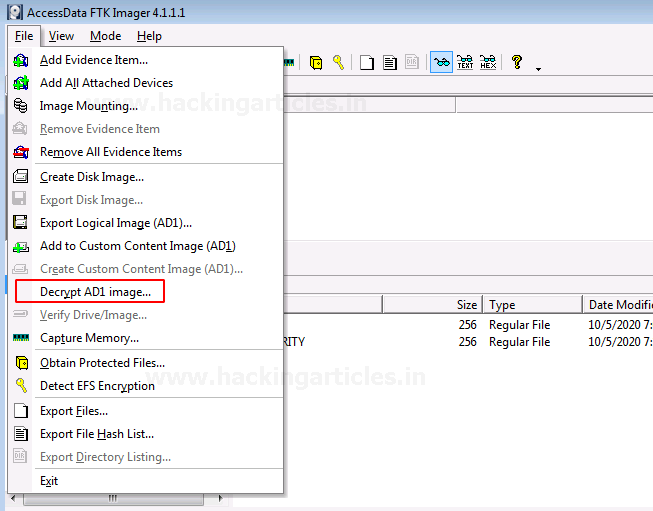
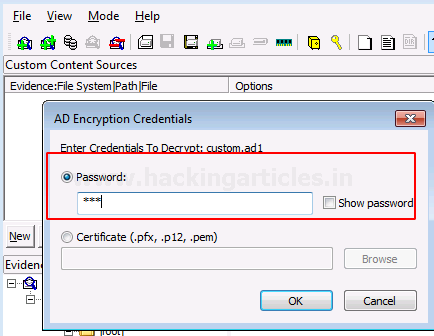
To decrypt the custom content image, click on File> Decrypt AD1 Image.
Now you need to enter the password for the image file that was encrypted and click on Ok.
Now, wait for a few minutes till the decrypted image is created.

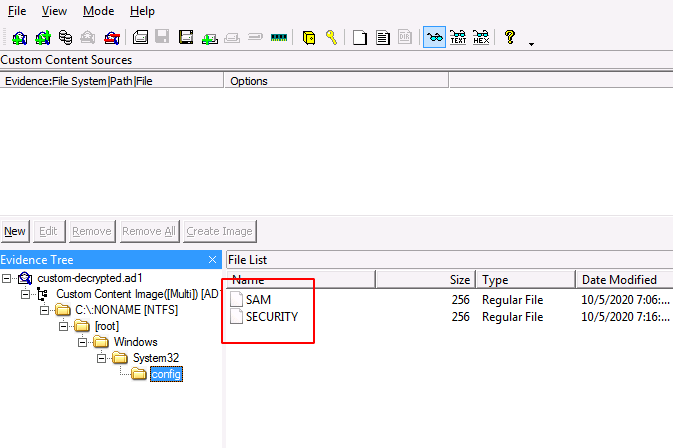
To view the decrypted custom content image, add the path of the decrypted file and click on Finish.

You will now be able to see the encrypted files by using the correct password to decrypt it.
Obtain Protected Files
Certain files are protected on recovery, to obtain those files, click on File> Obtain Protected Files

A new window will pop and click on browse to add the destination of the file that is protected and click on the option that says password recovery and all registry files and click on OK.

Now you will see all the protected files in one place

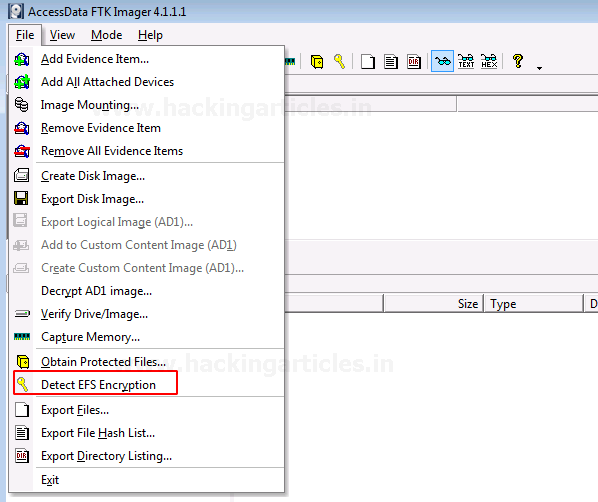
Detect EFS Encryption
When a folder or a file is encrypted, we can detect it using this feature of the FTK Imager.
A file is encrypted in a folder to secure its content.

To detect the EFS encryption, click on File >Detect EFS Encryption
You can see that the encryption is detected.

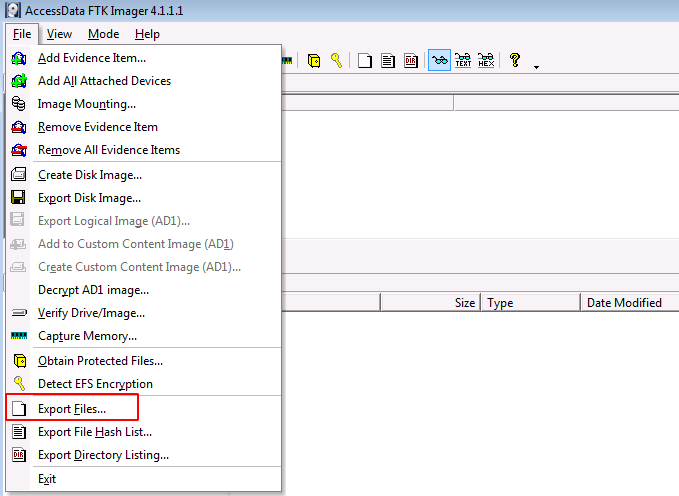
Export Files
To export the files and folders from the imaged file to your folder, you can click File > Export Files.
You can now see the results of the export of the number of files and folders that have been copied to the system.

Author: Jeenali Kothari is a Digital Forensics enthusiast and enjoys technical content writing. You can reach her on Here
Is this FTK Guide available for download and would you have it in a .pdf document for easy referral and later use ???
Just curious, and thanks in advance.
Cheers,
M.
Hi Mike, you can copy and paste this entire document into Word. Just select all, copy, paste and save it. Good luck with everything.
Mike, have you tried printing as a PDF? I believe Windows 10 allows Print to PDF as printer selection.
Joe
why the hash values are extracted while image acquisition?
Wow. Great article. If you need it for reference, just add it to bookmarks. You can also get the “save as pdf” extension on chrome to save web pages as pdf