Beginner’s Guide to Nessus
In this article, we will learn about Nessus which is a network vulnerability scanner. There are various network vulnerability scanners but Nessus is one of the best because of its most successful GUI. Therefore, it is widely used in multiple organizations. The tools were developed by Renuad Deraison in the year 1998.
Table of Content
- Introduction to Nessus
- Linux Installation
- Running Vulnerability Scans
- Windows Installation
Introduction to Nessus
Nessus is a network vulnerability scanner that utilizes the Common Vulnerabilities and Exposures engineering for simple cross-connecting between agreeable security instruments. Nessus utilizes the Nessus Attack Scripting Language (NASL), a basic language that portrays singular dangers and potential assaults. Nessus has a measured design comprising of incorporated servers that direct examining, and remote customers that take into account chairman communication. Executives can incorporate NASL portrayals of every presumed powerlessness to create altered outputs. Noteworthy abilities of Nessus include:
- Compatible with all OS
- Scans for vulnerabilities in the local and remote host
- Informs about missing security in detail
- Applies various attacks in order to pinpoint a vulnerability
- It can schedule security audits
- Runs security tests
Linux Installation
Let’s start the installation on Linux. Here we are installing Nessus on an Ubuntu 18 Machine. Firstly, we will invoke a root shell using sudo bash command. We are going to install Nessus using a deb file that can be downloaded from the Nessus Official Website. We traverse to the directory where we have downloaded the deb file. We will change permission to execute the file and then we will install the Nessus.deb file using the dpkg command.
chmod 777 Nessus-8.2.3-ubuntu910_amd64.deb
dpkg -I Nessus*.deb
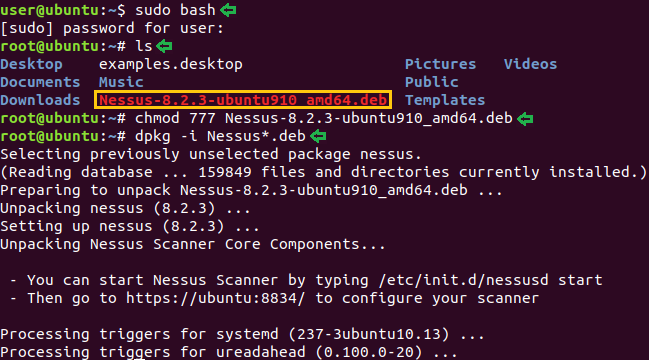
Afterwards, as shown in the image using the following command to run Nessus :
/etc/init.d/nessusd start

This command will open our default browser, which in our case is Mozilla Firefox. And we will be greeted with a Warning about Certificate Installation. To use Nessus, we will have to get through this warning. The first click on Advanced followed by Accept the Risk and Continue.

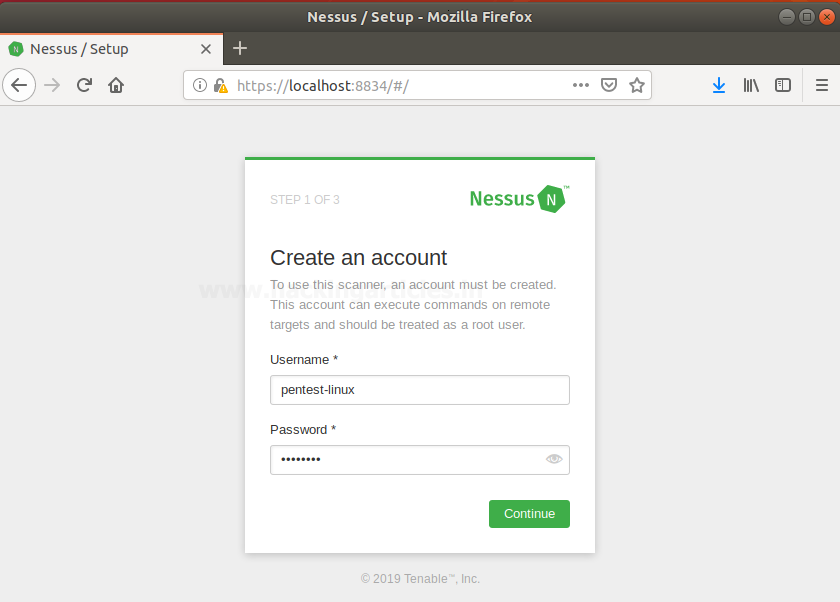
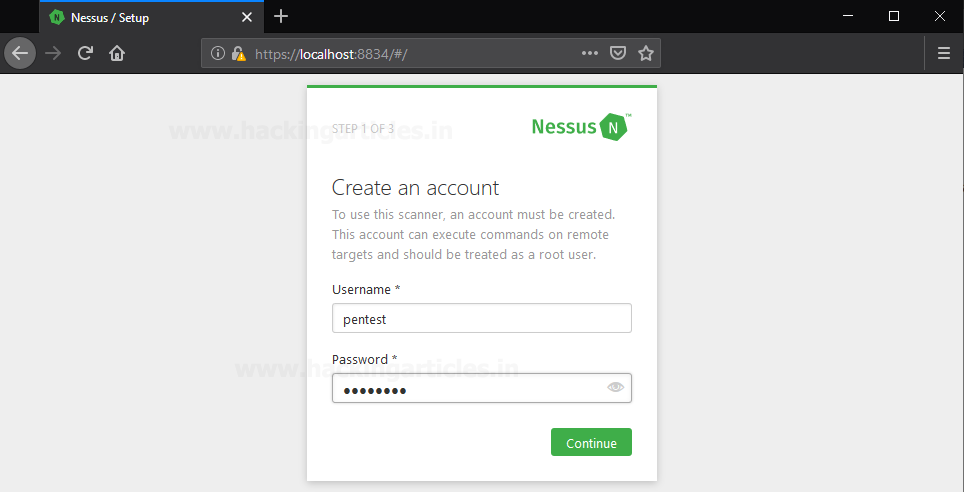
Then it will ask you to create an account, as shown in the image, give the details for it.
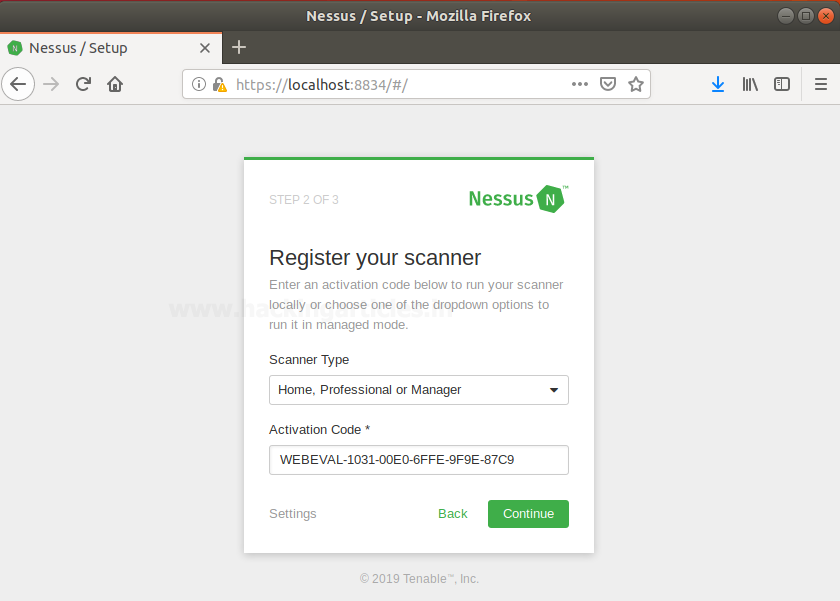
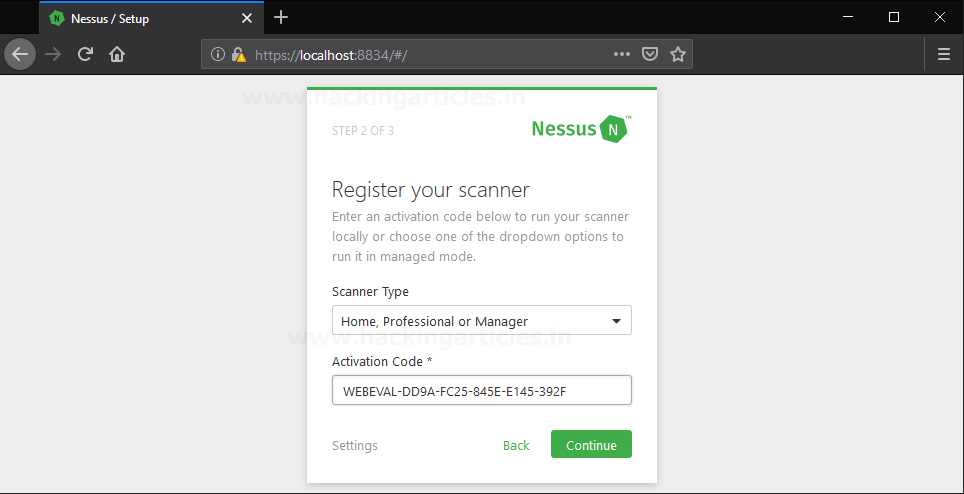
Further, it will ask you for an activation code, provide that just as its shown in the image below :
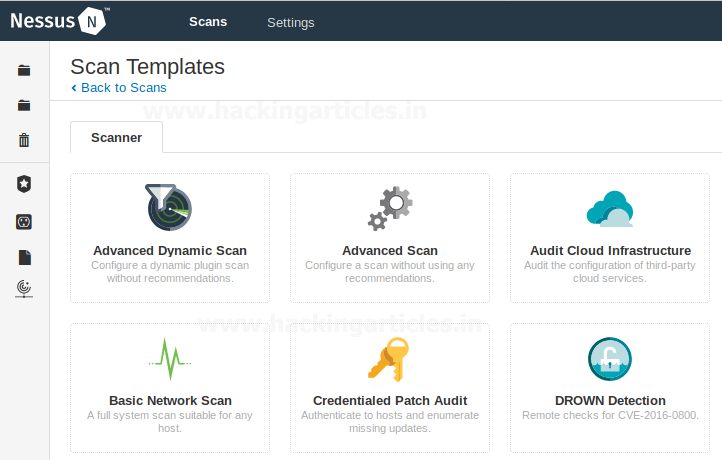
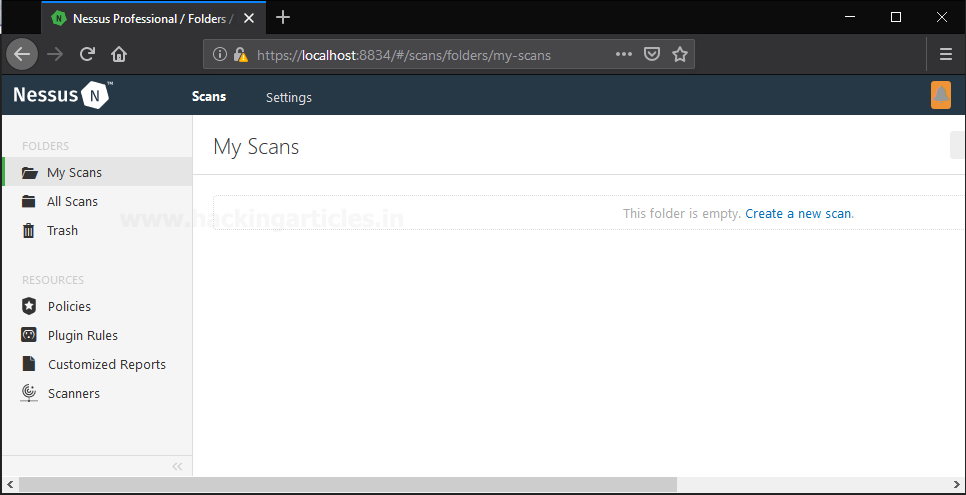
Once all the formalities are done, Nessus will open and will allow you to perform any scan you desire as shown in the image below :

Running Vulnerability Scans
When you click on create new scans, there will be multiple scans that you can see in the following image :
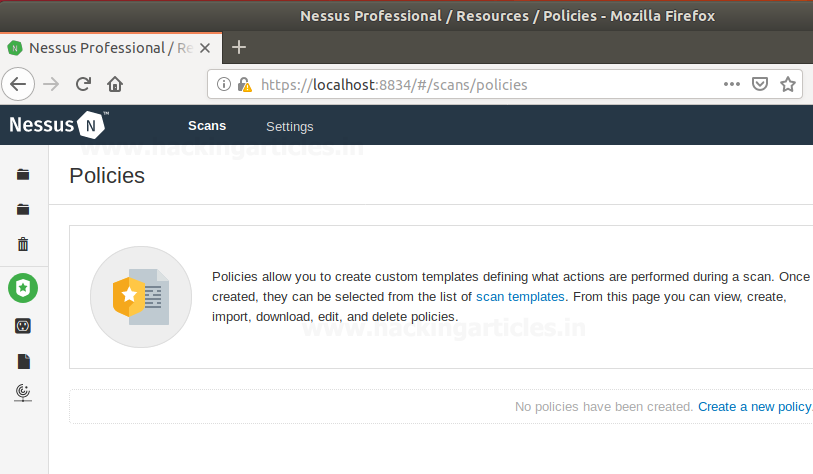
And then in the policies tab, you can generate different policies on which the scans are based.
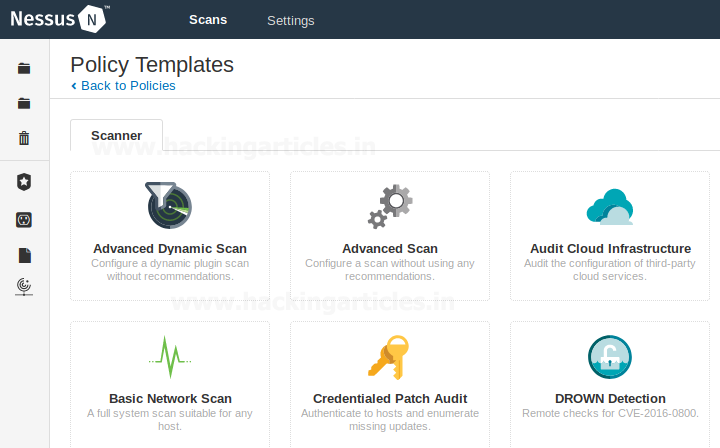
There are various policies templates too, as shown in the image below :
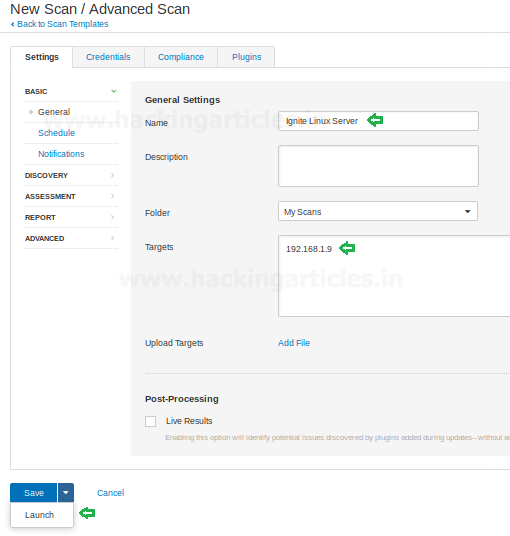
In order to start a new scan, go to scan templates and select a new scan and then give it a name and target IP as shown in the following image :
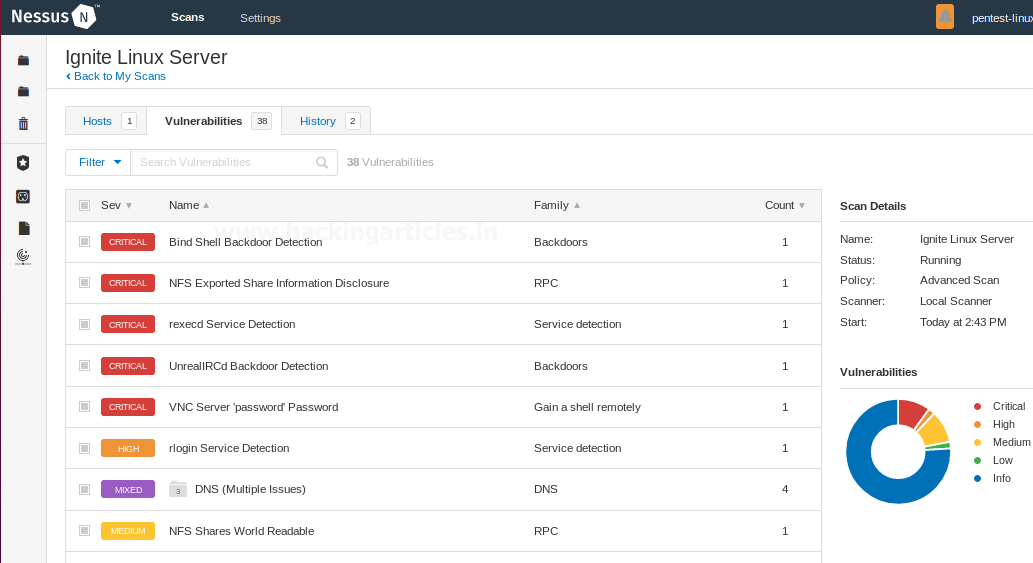
Once the scan is done, it will show you the result; this result will clearly indicate the risk that a vulnerability poses which goes from low to critical.
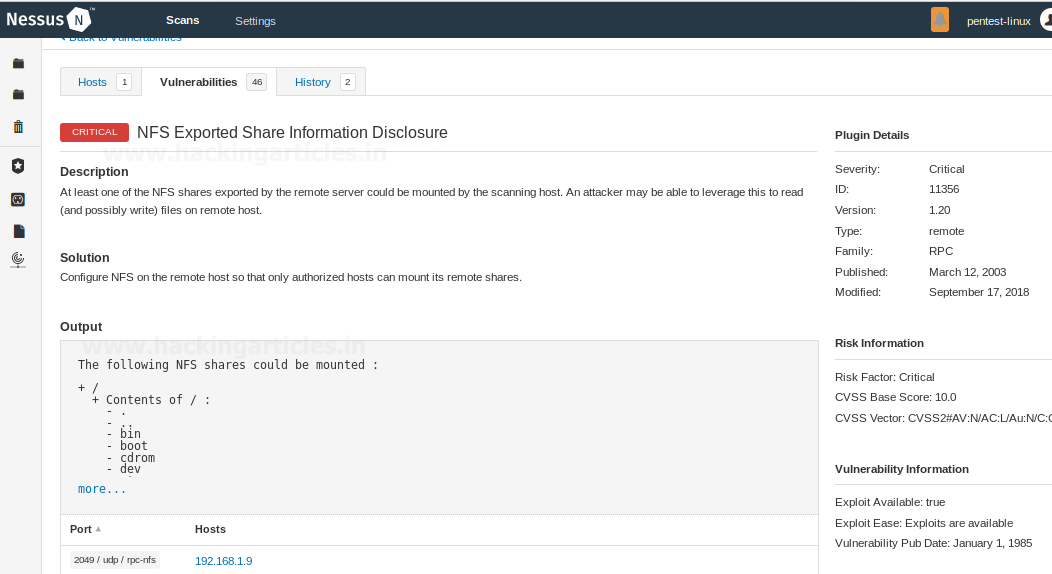
When you click on the vulnerability, for instance here we clicked on the first one which is a critical threat, it will give you details about vulnerability such as its severity, whether its RPC or not, its version, etc. as shown in the image below :
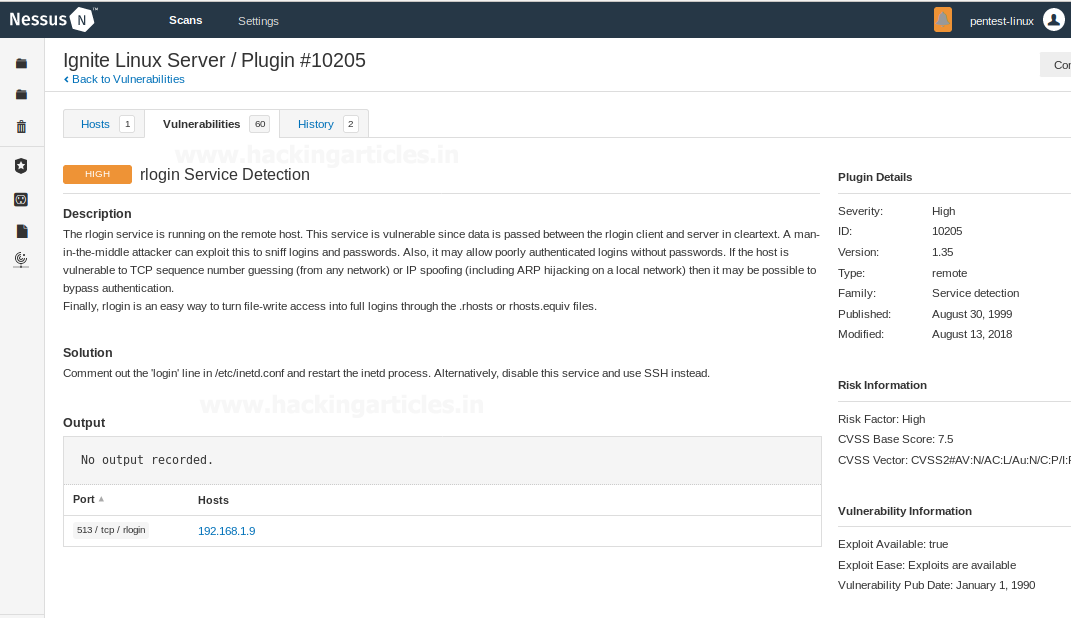
Now, we clicked on the different one which is a high-level threat, it will give you details about vulnerability such as its severity, whether its RPC or not, its version, etc. as shown in the image below :
Windows Installation
Download Nessus for windows from Nessus Official Website. And open it similarly in the browser to set it up.

Just like in Linux, we will be greeted with a Warning about Certificate Installation. To use Nessus, we will have to get through this warning. First click on Advanced followed by Accept the Risk and Continue.

Then it will ask you to create an account, as shown in the image, give the details for it.
Further, it will ask you for an activation code, provide that just as its shown in the image below :
And then you can start your scans in a similar way just as shown above in Linux.
Author: Shubham Sharma is a Cybersecurity enthusiast and Researcher in the field of WebApp Penetration testing. Contact here
Hi! Thank you so much for the detailed instructions! However, I typed the code as shown in the screenshot and Nessus says installation expired.. Is there anything I can do about it? Thank you!
First go to nessus official website and create a account using email id and check email they will provide a key and then install …..