Android Hooking and SSLPinning using Objection Framework
Introduction
Objection is runtime mobile exploration toolkit built on top of frida which is used in Android and iOS pentesting. We can use Objection to perform numerous functions like SSLPinning bypass, root detection bypass, performing memory tasks, heap tasks and more without even being root/ jailbroken. However, it is to be noted that to take full advantage of all the functions it is recommended for the device to be root. In this article, some of the functions demonstrated will require root and some may not. It is recommended to test the application on a root device. Let’s begin.
Table of Content
- Setting up Objection
- Attaching Agent and Help Menu
- SSLPinning Bypass
- Android Hooking
- Shell Execution
- FLAG_SECURE Bypass
- Launching Activity Using Objection
- Root Detection Bypass
- Memory Related Tasks
- Conclusion
Setting up Objection
Frida is a dynamic instrumentation toolkit that is used to deploy scripts into the testing process of apk. Frida provides APIs for developers to make tools on top of it. One such tool is objection. Before setting up objection, we’ll have to deploy Frida server in the android system.
So, to do that we’d go over to this location and download the latest release for android available:

Now we need to deploy this in android system. First, extract the file in the downloaded location and then we type in the following command:
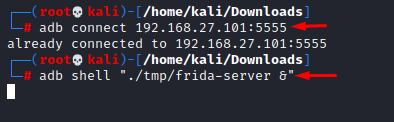
adb connect 192.168.27.101:5555
chmod 777 frida-server-14.1.3-android-x86_64 && adb push frida-server-14.1.3-android-x86_64 /tmp/frida-server

To be able to run objection we’ll have to launch the frida server first by doing:
adb shell "./tmp/frida-server &"
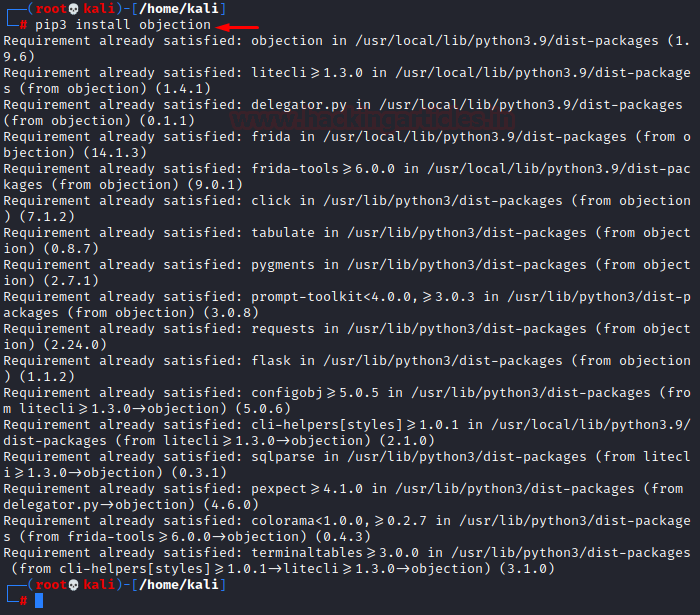
And finally, we need to install objection using pip3:
pip3 install objection
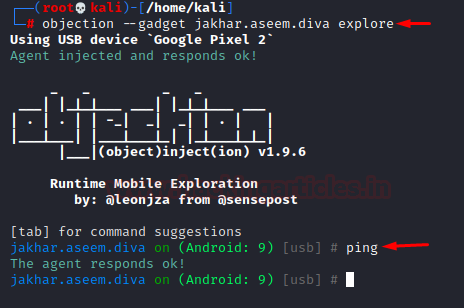
And now we are good to go. Now, the packages (apps) installed in an android device are referred to as gadget in objection and to interact with an application to test, we’ll have to inject our objection agent in the app. To do so:
objection –gadget jakhar.aseem.diva explore
ping
Pinging rechecks if the agent is successfully attached to the app or not.
Help Menu
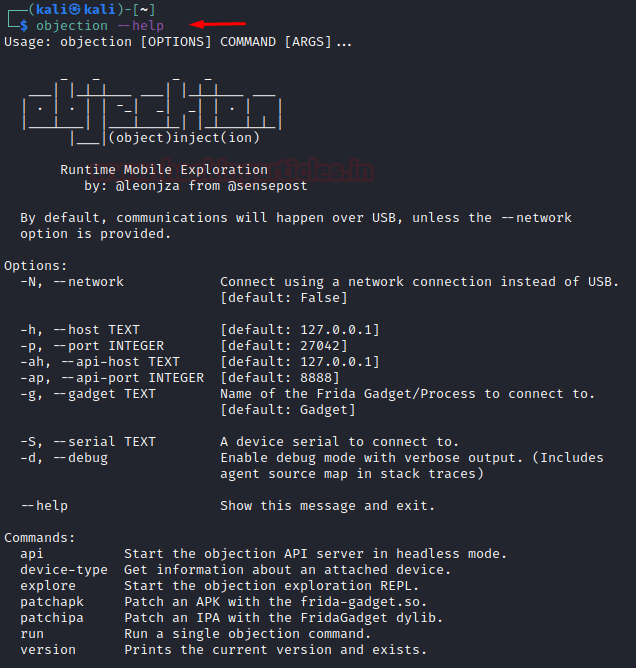
To open the help menu in objection:
objection --help
To launch a help menu in a gadget in Objection, we have two commands:
<tab>
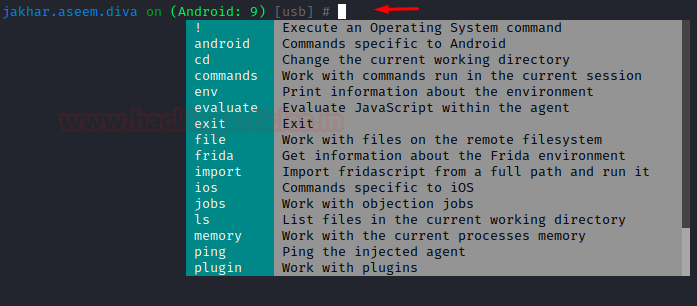
Then further, to elaborate about a specific module:
help android

SSL Pinning Bypass
To understand pinning bypass, we’ll first look at what SSL pinning is.
- Traditional Certificates and self-signed certificate: In traditional server-client architecture, a client validates a connection using a certificate presented by a server during handshake. Certificate is the proof of the identity of a server. This certificate is proved to be valid only if it is signed by a trusted Certificate Authority (eg: RapidSSL, Symantec, digicert). After the certificate is validated, the data transmission begins which is encrypted based on the cipher suite the certificate has been configured to provide.

This can be abused by installing a self-created root CA certificate on the client system. A common example is Burp Suite’s Portswigger CA. Burp is sort of like a Man in the Middle in this situation and traffic coming from server passes through burp, it intercepts it and tries to forward it to browser but the browser doesn’t trust the burp’s certificate, so it throws an error (ERR_CERT_AUTHORITY_INVALID). Some message is also shown like this:
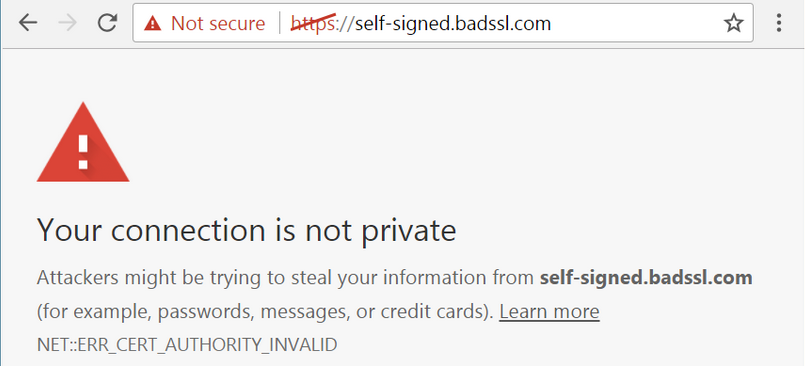
So, to make browser trust burp’s server certificate, a tester installs cacert.der in his own system and adds Burp’s certificate as trusted so that browser starts trusting Burp’s server certificate and the website accessed through burp’s proxy. This way, the attacker is able to read, modify and send requests originating from his system.
- SSL Pinning: Most commonly used in Android APK and iOS IPA, it is a technique deployed by developers in their code at client side to prevent MiTM attacks. It validates server certificates again even after SSL handshaking. The developers adds or pins a list of trusted certificates to the client application’s code itself and uses it to compare against the server certificates during run time.
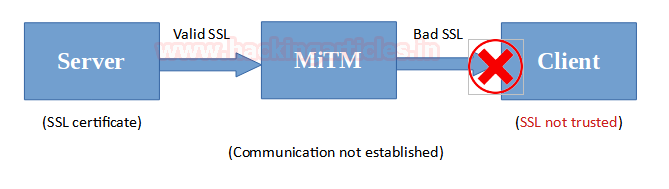
Hence, there is a problem for an attacker now as even if there is a self-generated cert installed on the client device, the communication is still not being intercepted due to the developer embedded certificate pinning code that is within the application. These are generally an x509 cert or a public key.
So, now if there is a mismatch, the connection will be disrupted, and no further communication will take place.
This can be understood as diagrammatically as follows:
More about it can be read on OWASP’s website here.
- SSL Pinning Bypass: To bypass SSL pinning there are further two methods
Method 1:
In Android applications, code having some strings like “checkClientTrusted” or “checkServerTrusted” is generally the code with pinning. It could be some other as well. So, one way to bypass SSL pinning is to decompile the source code, search for this, remove these lines of code, recompile and sign using apktool. More on this would be covered in a further article on reverse engineering Android applications.
Method 2:
To bypass SSL pinning we will inject a custom code into the application, while it is running, so that it adds our self-generated certificate as a trusted certificate for the application. The process of injecting a code while an application is running is called hooking. Frida allows a user to create hooks and change an application’s behavior while run time. Hooking also allows a person to intercept software to hardware calls and modify it.
Frida hooking: Now, Frida alone is very much capable of hooking into android apps using javascript. But the knowledge of javascript is essential to coding this manually. There are various scripts available to do this on github like here but to avoid this hassle altogether with just a few clicks, is where objection comes in the picture.
- SSLPinning bypass using Objection: As stated above, Objection is based over Frida’s API. It also has handsome tools to bypass SSL pinning by generating javascript code and hooking it into the application.
Let’s see how it is done but before that, we’ll set up burpsuite on our android to intercept the communication from an SSLpinned application.
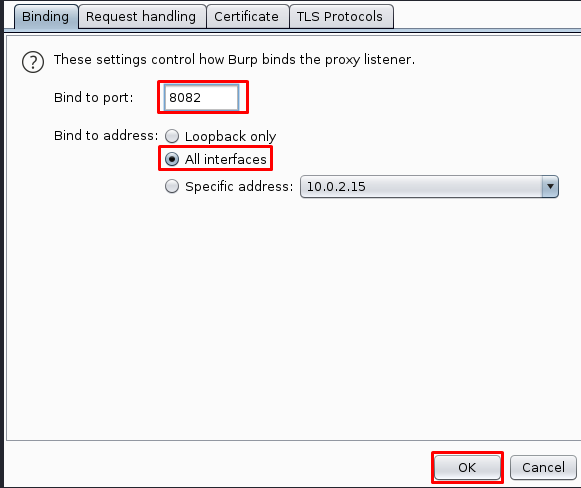
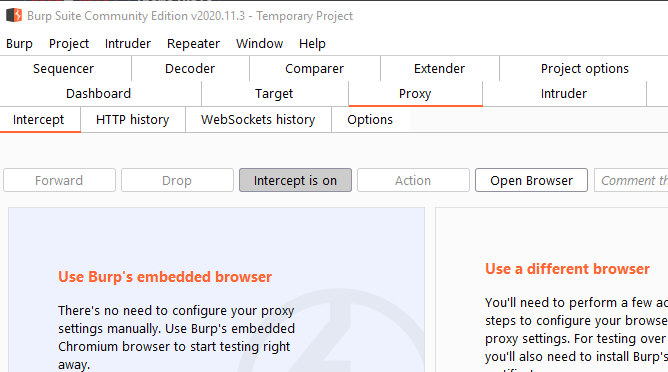
Step 1: Open burp and add an interface.
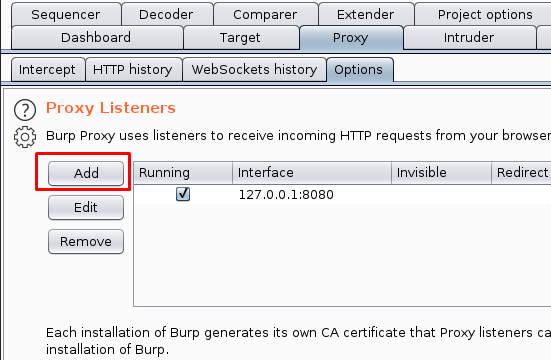
Step 2: Add some other port than already being used, say, port 8082. Change the bind to address option to All interfaces and click ok.
Step 3: Head over to your android Wi-Fi and click on edit connection (pencil icon)
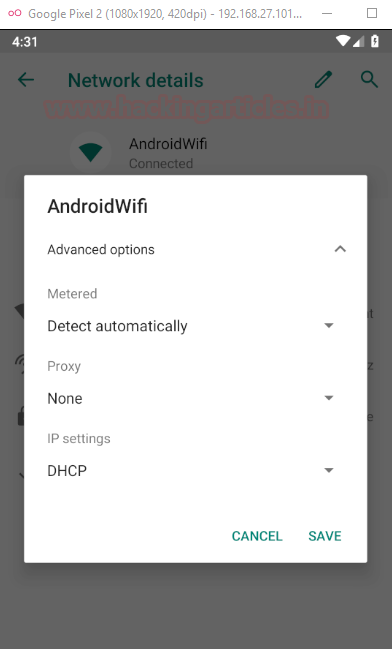
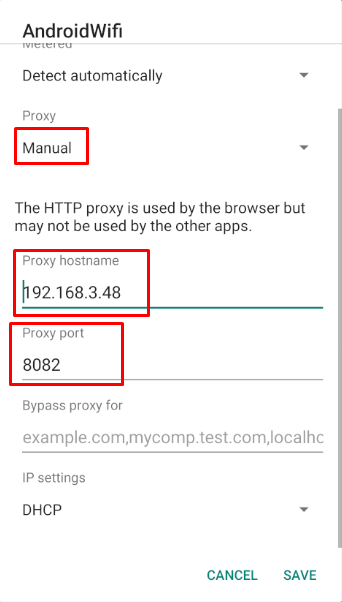
Step 4: Change proxy to manual and add the hostname as your IP on which burp is being run. Also, change your port to 8082 and click save.
Step 5: Move over to your android device and type “http://burp:8082” and download the burp’s cacert.

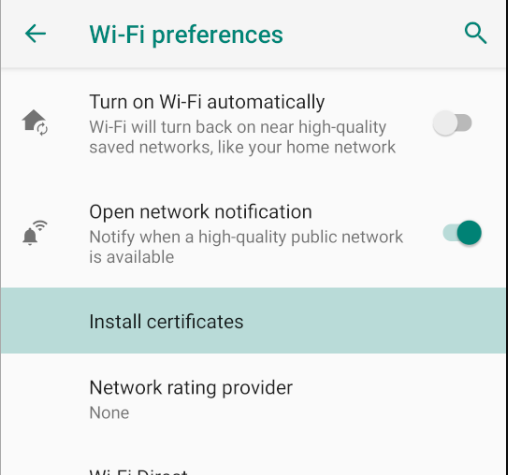
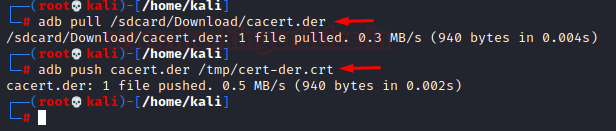
Step 6: Once the certificate is downloaded, head over to Wi-Fi preferences and down at the bottom you’ll find an option “install certificates.” Click on it and choose the certificate you just downloaded. But you’ll note that the downloaded certificate is in *.der format and android doesn’t recognise it as a valid certificate. So, we’ll pull the certificate and rename it as “cert-der.crt”
To rename this, we type in the following command:
adb pull /sdcard/Download/cacert.der
adb push cacert.der /tmp/cert-der.crt
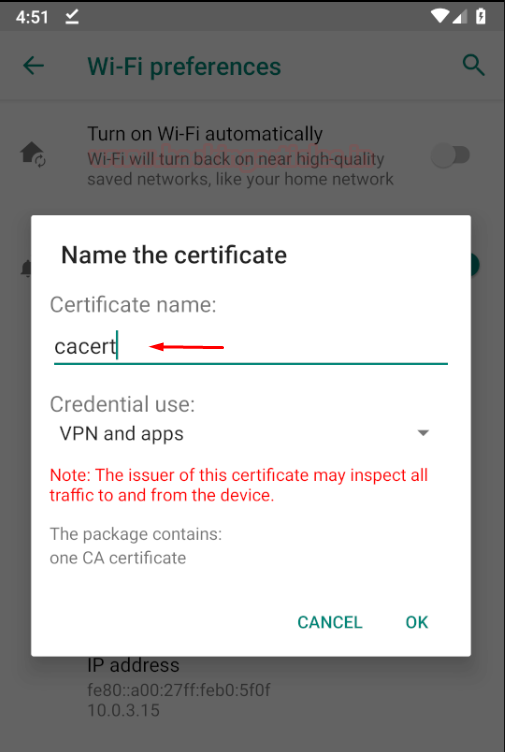
Step 7: Once you have downloaded, you’ll find an option to rename the cert. Just type in “cacert” and make sure in credential use apps is selected.
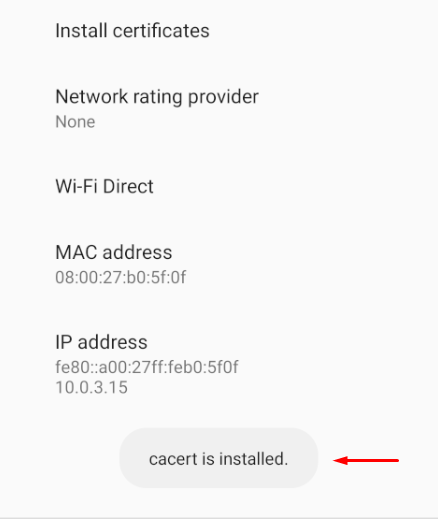
Step 8: cacert would now have been successfully installed and you should note that burp has now started capturing all the traffic from the browser and some apps as well. Note that these are only the apps which don’t have SSL pinning enabled.
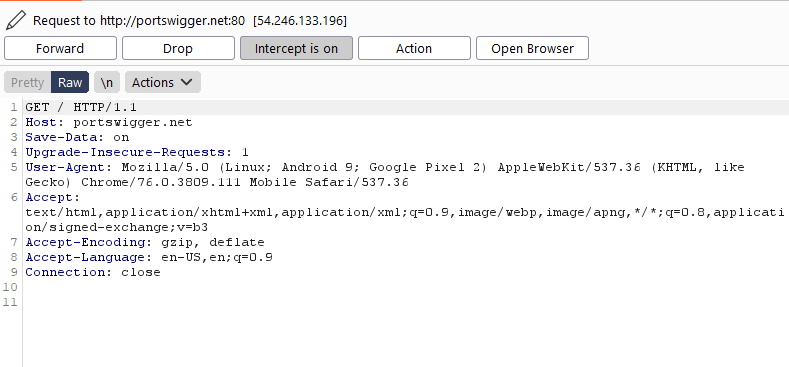
Head over to an HTTPS website and you’ll note the requests are now getting captured. You can verify installed certificate by going in Settings->trusted credentials->users.
After installing it, SSL connections are also getting captured now. For example, portswigger.net
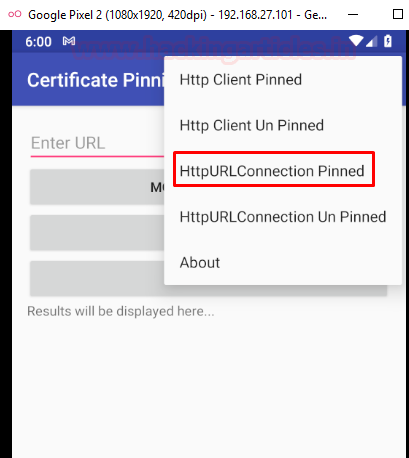
Step 9: Now that everything is set up, we’ll need an application to test SSL Pinning. There is an application in playstore by the name “Certificate Pinning Demo.” This app would help us demonstrate SSL pinning bypass using objection. So, install this on the device.

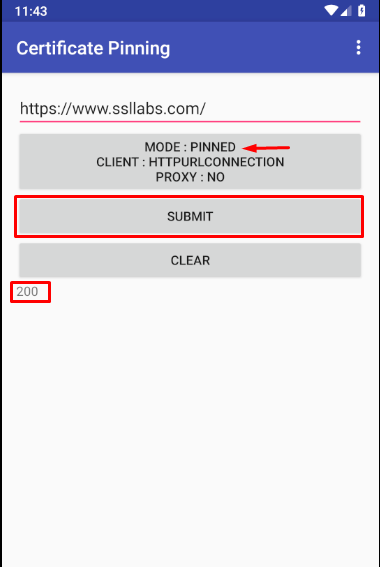
Step 10: Head over to the app and pin the HttpURLConnection.
Now, when you submit the request for the sample URL already provided by default, i.e, ssllabs.com, we’d note that request has failed due to certificate error even after we have installed our cacert in the device.
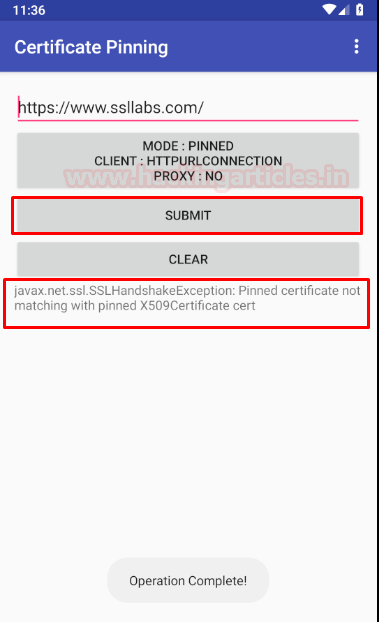
Heading over to burp, we’d see that no request has been captured. Now, here comes the interesting part. Bypassing SSLPinning using objection.
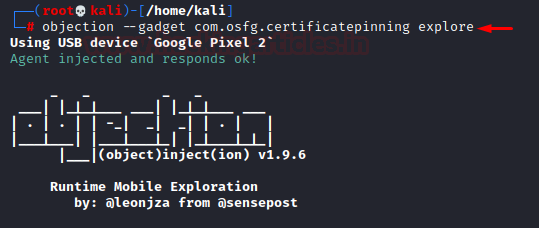
Step 11: Attach the package to objection and run explore command:
objection –gadget com.osfg.certificatepinning explore
Step 12: we’ll use the module android sslpinning to disable SSLPinning while the package is running. Objection is injecting a JavaScript code or “hooking” it using Frida’s agent to do so.
android sslpinning disable

Once it is done, click on submit again in the app and check burp for any possible communication it has intercepted.
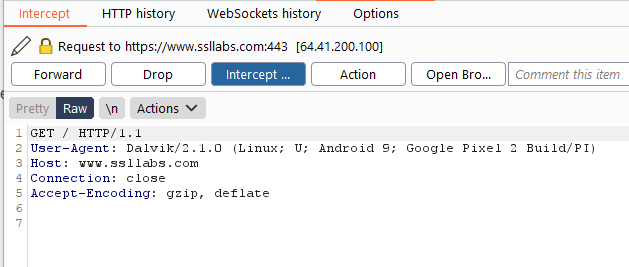
Now, we see a status code of 200, i.e., connection successfully established with no certificate error. Hence, we have bypassed SSLPinning!
Android Hooking
As explained briefly in the SSLPinning Bypass method above, hooking is the process of inserting our code (or hook) while the application is running to modify its behaviour. Hooking enables a client to see the software to hardware communications, modify output/ functions of the methods being used. Frida uses javascript to hook into methods of the application running, so we’ll demonstrate hooking as a concept for a small android application we wrote and use javascript to hook into methods.
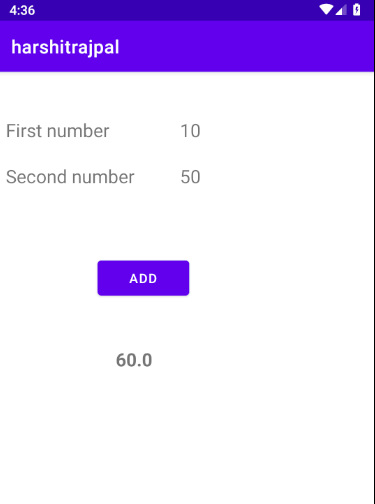
Here, I have written a small code in Java to calculate sum of 10 and 50.
package com.example.harshitrajpal;
import androidx.appcompat.app.AppCompatActivity;
import android.os.Bundle;
import android.view.View;
import android.widget.Button;
import android.widget.EditText;
import android.widget.TextView;
public class MainActivity extends AppCompatActivity {
    Button add_button;
    TextView a,b,sum;
    double add=0;
    @Override
    protected void onCreate(Bundle savedInstanceState) {
        super.onCreate(savedInstanceState);
        setContentView(R.layout.activity_main);
        a=(TextView)findViewById(R.id.num1);
        b=(TextView)findViewById(R.id.num2);
        add_button=(Button) findViewById(R.id.add_button);
        sum=(TextView)findViewById(R.id.sum);
        add_button.setOnClickListener(new View.OnClickListener(){
            public void onClick(View v){
                sum.setText(Double.toString(returnValue()));
            }
        });
    }
    double returnValue(){
        double a1 = 10;
        double b1 = 50;
        add= a1 + b1;
        return add;
    }
}
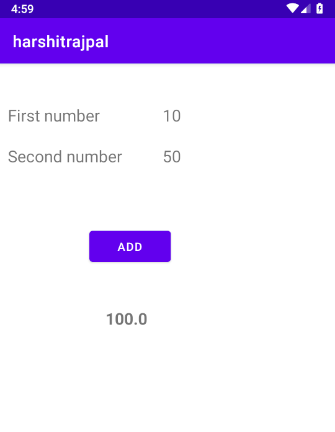
As you can see it is taking two numbers as input and displaying its result.
Note: You can download the source code of the application from here.
Now we’ll create a hook in javascript and try to tamper with the output of the two numbers! As you can see the app is using a function called returnValue to calculate. Maybe we can tamper it.
Following is the hook that I have created in javascript for the above program in which I have changed the return value to 100:
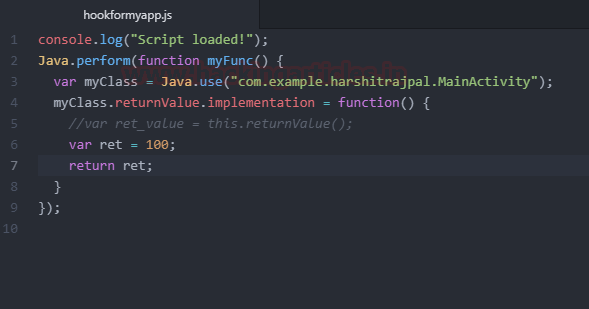
You can download the code for this javascript file from here.
Now, when we manually run this code using frida we see the following:
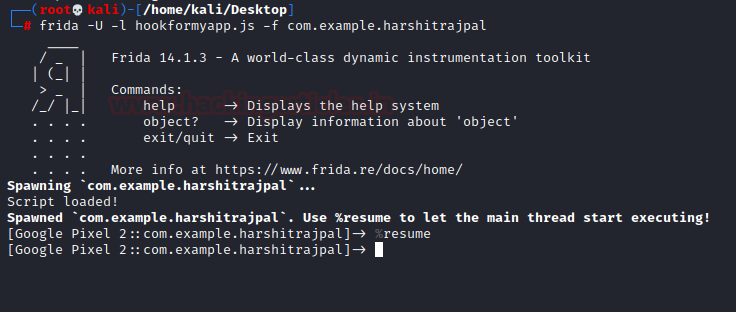
And sure enough, when we click on add we see that hook has worked!
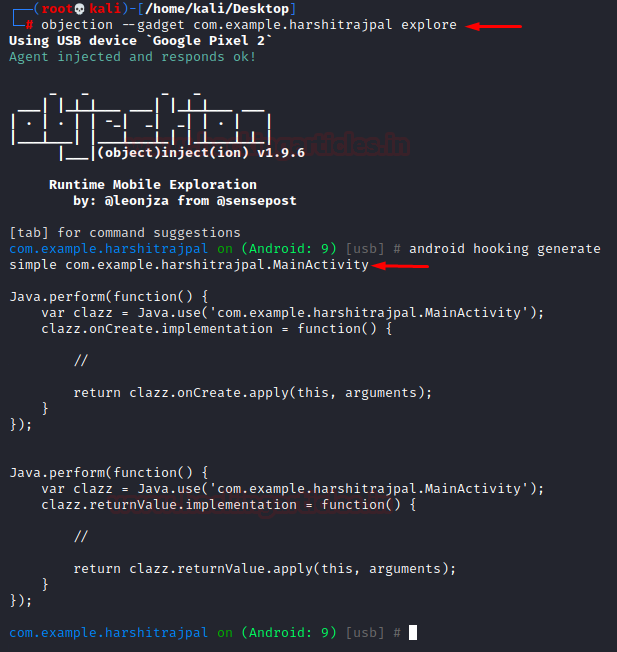
To make javascript hook code creation easy objection can automate this process. Let’s explore what all options do objection have for hooking. Let’s attach the gadget in objection and explore all related hooking options:
objection --gadget com.example.harshitrajpal explore
android hooking generate simple com.example.harshitrajpal.MainActivity
Now, this code needs to be modified only at the places of comments and we can perform whichever function we’d like the code to do so, while at run time! Interesting isn’t it?
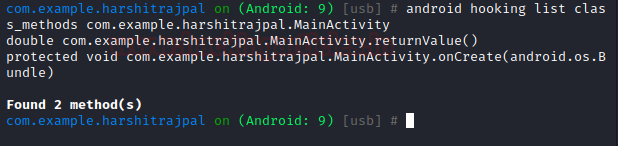
It is worth exploring some other related functions in objection which can make our life easy. For example, exploring all the methods in the application which won’t be normally visible unless we decompile the app. This goes like:
android hooking list class_methods com.example.harshitrajpal.MainActivity
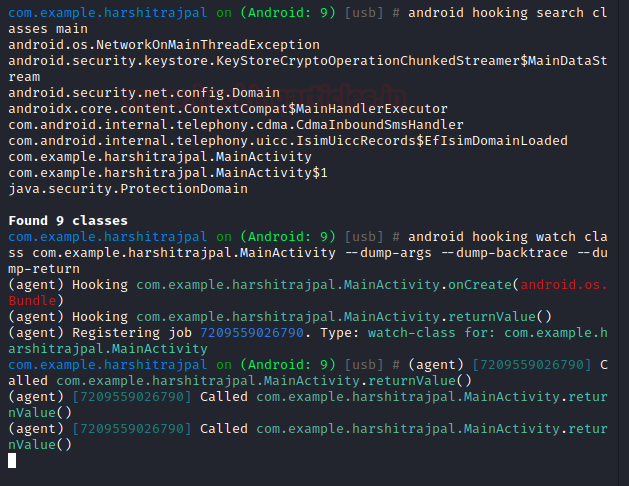
Similarly, we can also search for all the classes that start have the word “main” in them via the following command:
android hooking search classes main
Now, if we want to monitor a particular activity to see what all functions the activity calls and in what logical sequence to better understand how to create hooks, we’d type the following command:
android hooking watch class com.example.harshitrajpal.MainActivity --dump-args --dump-backtrace –dump-return
Shell Execution
Objection is also able to execute a local shell within its own interface. It’s a handy little trick that saves the hassle of opening new tabs.
android shell_exec ls
android shell_exec whoami

FLAG_SECURE Bypass
Often times android developers set a check-in their code known as “FLAG_SECURE” that prevents users to watch contents of an application while it is minimized. This is a critical function as a lot of apps don’t allow users to view materials while the app is minimized. Switching this flag would toggle that security. Objection has the ability to toggle this flag in run time. First, let’s set the flag to true and see what happens:
android ui FLAG_SECURE
android ui FLAG_SECURE true

Now let’s minimize the app to the drawer and see what this has done. Pretty obvious that we are not able to watch any content while it is minimized

Now let’s turn the flag off
android ui FLAG_SECURE false

Let’s see what happens to the app now when it is minimized. Sure enough, now we are able to see the contents!
Launching Activity Using Objection
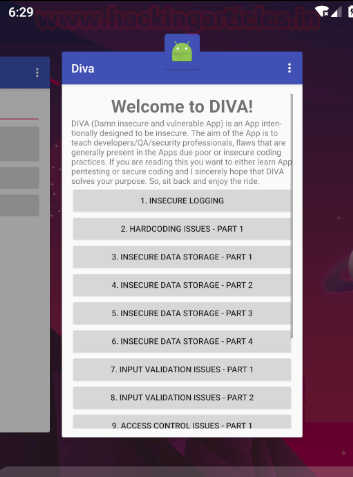
Objection can also be used to launch an activity from within its interface. This is the same as gdb’s am tool with -n option as we saw in the previous article. To start an activity, we type:
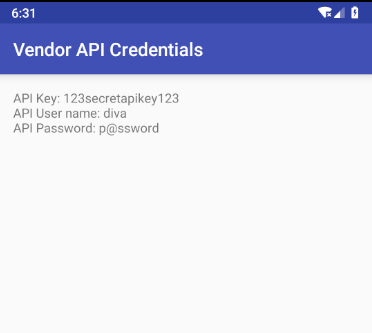
android intent launch_activity
android intent launch_activity jakhar.aseem.diva.APICredsActivity
Note, to launch DIVA’s activity, please attach its gadget first

And sure enough, the activity has now started
Root Detection Bypass
Root detection is a feature that developers code in their application to restrict their apps from running on rooted devices for security purposes. There are again two methods to bypass root detection, one is through reverse-engineering the application and the other is to use a tool like objection.
To do this in objection, I’ll be using the following commands:
android root disable
To simulate root detection again:
android root simulate

Memory Related Tasks
To play with low-level memory, objection has a handy tool called memory module that allows a person to see what a process is exporting to memory, where it is writing and more!
Here, let’s see what all modules are loaded into the memory while the gadget is attached
memory list modules

At the bottom, we would see a Frida module as well.
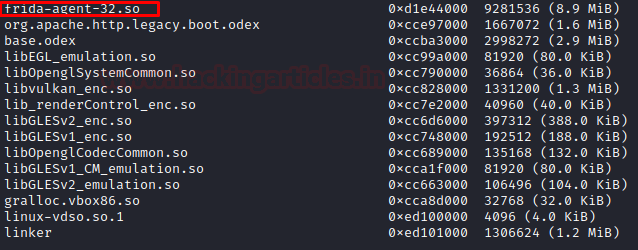
Now, to see what Frida is exporting and its respective address:
memory list exports Frida-agent-32.so

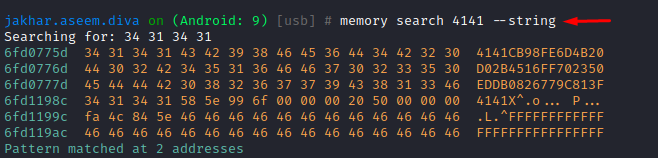
Similarly, we can also search a particular string in the memory and even write over it. To search a string we type:
memory search 4141 –string
And we’d see objection has returned the memory address of the memory block containing the defined string.
To write over the memory we have the following command:
memory write <address> <string> --string
I’ll not be writing into the memory right now and in-depth coverage of memory-related tasks would be covered in detail in an upcoming article.
Conclusion
In this article, we saw a handy tool objection that automates various tasks while doing static and dynamic APK analysis. We also got acquainted with SSLPinning bypass and android hooking. Hope you liked the article.
Author: Harshit Rajpal is an InfoSec researcher and left and right brain thinker. Contact here
Nice