OverTheWire – Bandit Walkthrough (14-21)
Today, we will continue to play the war-game called Bandit. OverTheWire Organization hosts this war-game. To play this war-game, go to the Bandit website by clicking here.
Get the solutions of other levels from below.
OverTheWire – Bandit Walkthrough (1-14)
Overthewire – Bandit Walkthrough (21-34)
Objective
Find the password file. It will give us access to the next level.
Table of Content:
- Level 14-15
- Level 15-16
- Level 16-17
- Level 17-18
- Level 18-19
- Level 19-20
- Level 20-21
Level 14-15
In the previous article, we got the password for level 14 and have successfully connected as user bandit14. We are informed that the password for the next level can be retrieved by submitting the password of the current level to port 30000 on localhost. First, we retrieve the password for the current level. We used the cat command to print the password as shown in the given image. To connect to port 30000, we are using telnet. After connecting we enter the current password it is checked and upon matching the password for the next level is printed on the screen. We will use this password to get an SSH connection as bandit15
cat /etc/bandit_pass/bandit14
telnet localhost 30000
ssh bandit15@localhost

Level 15-16
On this level, we are informed that the password for the next level is retrieved by submitting the password of the current level to port 30001 on localhost using SSL encryption. We use the openssl command with parameters like s_client that implements that we are the connecting as the client using the hostname localhost at port 30001. We use -ign_eof to inhibit shutting the connection when the end of file is reached in the input.
openssl s_client -connect localhost:30001 -ign_eof

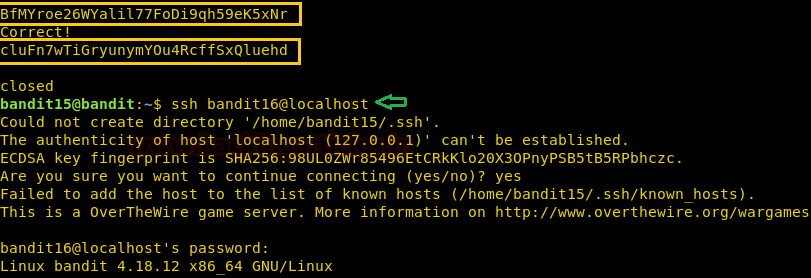
After establishing the connection, we provide it with the password for the bandit15. It is verified and after verification, the password for the next level is provided. We will use this password to get an SSH connection as bandit16.
ssh bandit16@localhost
Level 16-17
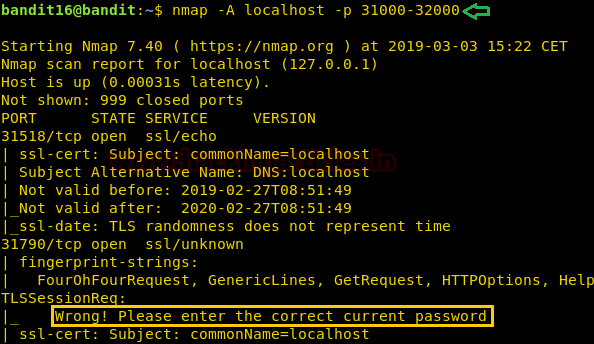
Initially, we are informed that the credentials for the next level can be retrieved by connecting to a port within the range of 31000 to 32000 and submitting the password of bandit16. We use Nmap to scan the ports to get the exact port from the range. As we can see in the output of the Nmap scan that on port 31790 there is a message that hints that we need to enter the password on that port.
nmap -A localhost -p 31000-32000
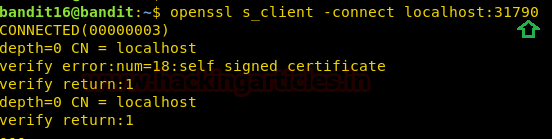
Now we will connect to this port using openssl as localhost.
openssl s_client -connect localhost:31790
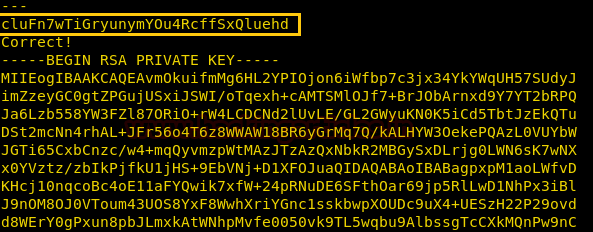
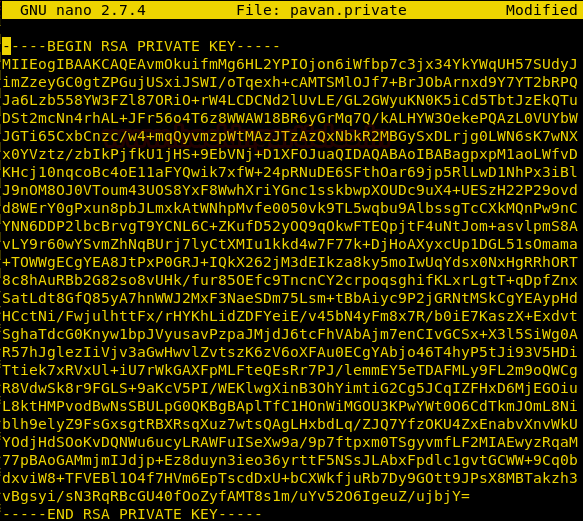
After connecting to the port, we will have to enter the password of bandit16. This password goes under verification. Upon a successful match, we are provided with an RSA key.
Now to use this RSA key, we need to create a private key. But we can’t do this inside the home directory as we lack necessary permissions. So, we create a directory in /tmp directory using mkdir command. On traversing to that newly created directory, we will create a private key. We can name it anything we want. Here we are using the nano editor to create the private key.
mkdir /tmp/pavan_ssh
cd /tmp/pavan_ssh
nano pavan.private
After running the nano command, we will be prompted to press the Enter key to continue. On doing that the private key will be opened to edit using nano. Now we will paste the RSA key we found earlier. Now to exit we will press Ctrl and x keys simultaneously. There would be a prompt asking us to save the updates. We will press ‘y’ followed by this, nano will ask us if we want to rename the file. After this, we would have successfully created a private key using the RSA we were provided before.
SSH won’t allow any private key with such open permissions. So, we will have to change the permissions. We will use the chmod command to apply the permissions equivalent to 600. This means that only the owner can read and write the file. We will use this private key to get an SSH connection as bandit17.
chmod 600 pavan.private
ssh bandit17@localhost -i pavan.private

Level 17-18
Upon logging in as bandit17, we run the ls command to look for any files. We see that we have two files, password.new and password.old. Now we have informed that password for the next level the only line that has been changed between both files. We will use the diff command to find that password. And the diff command gives us the required password. We will use this password to get an SSH connection as bandit18.
ls
diff passwords.old passwords.new
ssh bandit18@localhost
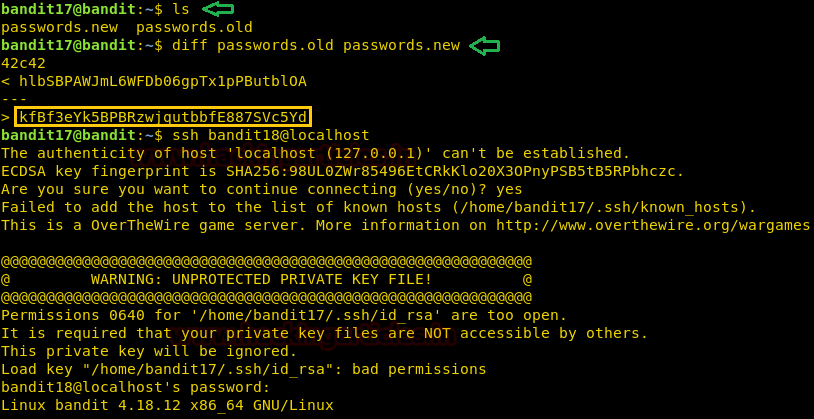
Now on providing with the correct password our connection was closed. This is because the authors of this level have modified the .bashrc file to log us out of ssh. We will use the -t parameter to disable the pseudo -tty allocation. As this is making our session vulnerable to get closed. Let’s connect ssh again as shown in the given image.
ssh -T bandit18@localhost
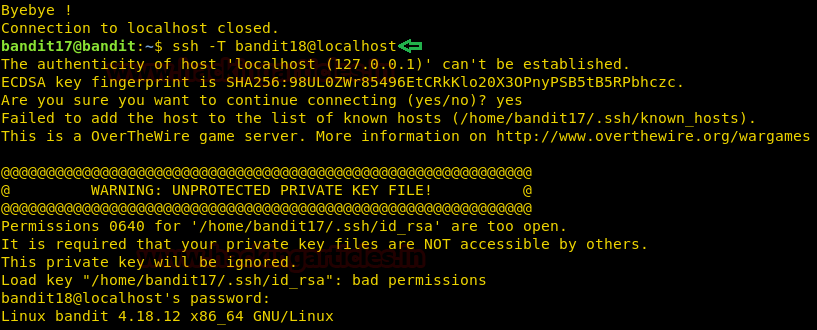
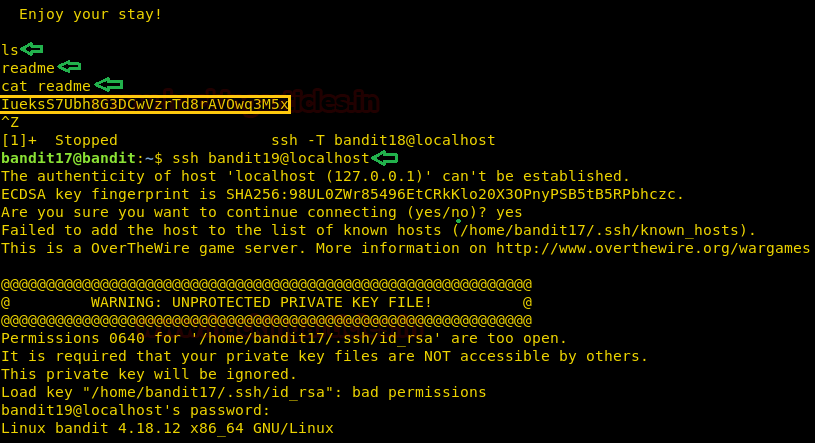
This time we got a shell, it may be not visible but it is there. We can run commands here. First, let’s try the ls command. This gives us the readme file. Upon reading that file, we get what seems like credentials for the next level. We will use this password to get an SSH connection as bandit19.
ls
cat readme
ssh bandit19@localhost
Level 19-20
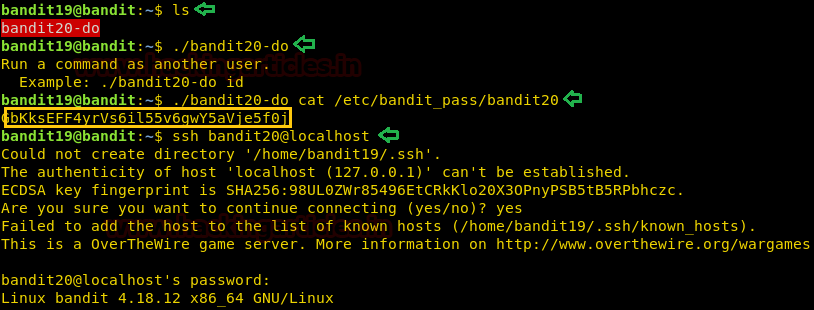
After successfully getting the ssh to user bandit19, we start with ls command to see what we got this time. We have a file that seems like a script. We tried to run to see the working of the script. We are shown that the script runs a command as another user. Now we were informed that the password is stored at /etc/bandit_pass/. So, we run the script with the cat command to read the password for the next level. We will use this password to get an SSH connection as bandit20.
ls
./bandit20-do
./bandit20-do cat /etc/bandit_pass/bandit20
ssh bandit20@localhost
Level 20-21
We are informed that there is a setuid binary in this level whose job is to make a connection to localhost on a port and read the password used to login as bandit20 and then send the password for the next level. First, let’s see the files we have using the command ls. We have a script suconnect. On running this command without any parameters, we see that it requires a port to connect to. Now here is the part where it gets tricky. The image given below is one instance of the shell. We will execute to the point where we run suconnect without parameters and create other instance of the same shell. Run a netcat listener over another instance on the same port we are planning to suconnect. But we need to start listener before running the suconnect. On running the suconnect. Netcat will grab a session. Now we enter the password that we used to login as user bandit20. As we can see that the password, we entered is read by the suconnect and when the password is verified. Password for the next level is sent to the listener.
ls
./suconnect
./suconnect 4444
Image shown below is the execution of the first instance.

nc -lvp 4444
Image shown below is the execution of the second instance.

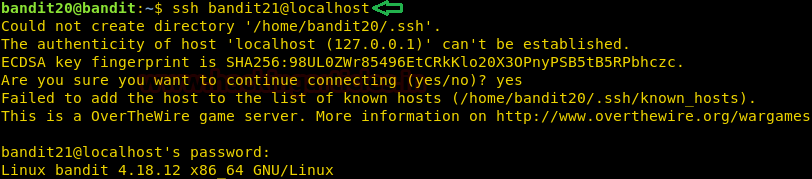
Now that we have the password for the next level, we move back to our first instance and used the password to login as user bandit21 using SSH.
ssh bandit21@localhost
Author: Pavandeep Singh is a Technical Writer, Researcher and Penetration Tester Contact here
In Level 20-21, I run./suconnect 4444.
Display Could not connect?
Why, How can I do
Hey Fred,
This “suconnect” script is trying to make a connection to your local (in this case bandit20) machine on the port that is specified by you – port 4444.
The problem is that there is No-Listener on the other end. Try opening another instance of bandit20 and run “nc – lvp 4444” and send over the password recovered in the previous level.
For multiple instances, another option would be to go via TMUX and SCREEN command.
perfect you have to user tmux
I’m having error messages in openssl commands. What to do?
in bandit16 we made a private key. but while using it connecting through ssh using command ssh bandit17@localhost -i stark.private its asking me to enter the passphrase for star.private , bt we never created any passphrase please reply!