Digital Forensics Investigation through OS Forensics (Part 3)
In Part 2 of this article, we have covered Recent Activity, Deleted File Search, Mismatch File Search, Memory Viewer, and Prefetch Viewer. This article will cover some more features/ functionalities of OSForensics.
To Read Part 2 of this article click here.
Raw Disk Viewer
On a drive, data is generally stored in file system files and directories but when it comes to forensics we need a deeper inspection of drives we can have a piece of evidence within the raw sectors of the drive, image. These sectors are not accessible through the Operating system but we can access the raw sectors through OS Forensic’s Raw Disk Viewer.
Raw Disk Viewer includes text/hex searching, highlighting of relevant disk offsets, and decoding of known disk structures (such as MBR, GPT)
Source: https://www.osforensics.com
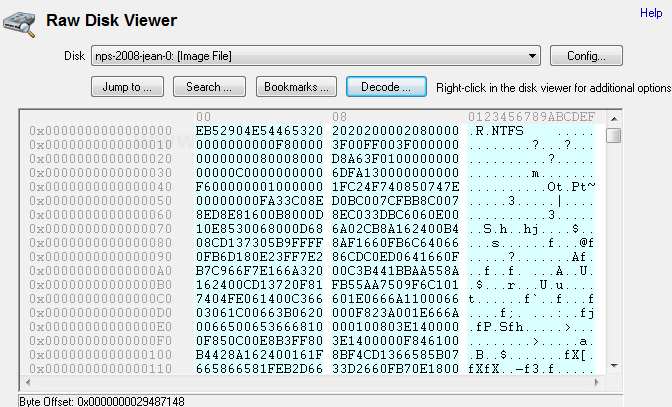
To start with open OSF and click on Raw Disk Viewer

From the disk drop down to select the Evidence we want to investigate.

Click on the config button and make the required changes. We can specify the sector range limit, highlight the file types by different colors, include/exclude file system objects.

To look for a particular file/sector/offset click on Jump To button, we can see a screen to select any particular file or offset.

To get the details of any particular file select file and browse the file.

Click on open and then OK, the file will open in HEX for investigation.
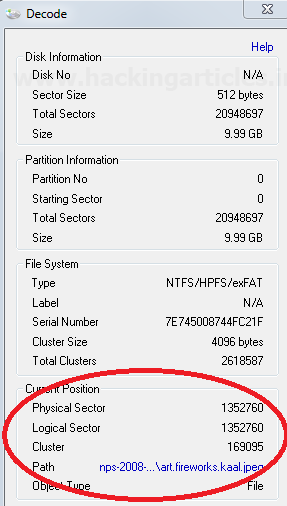
Click on the decode button to get the details of the file. This will provide the cluster number and sector of the file.
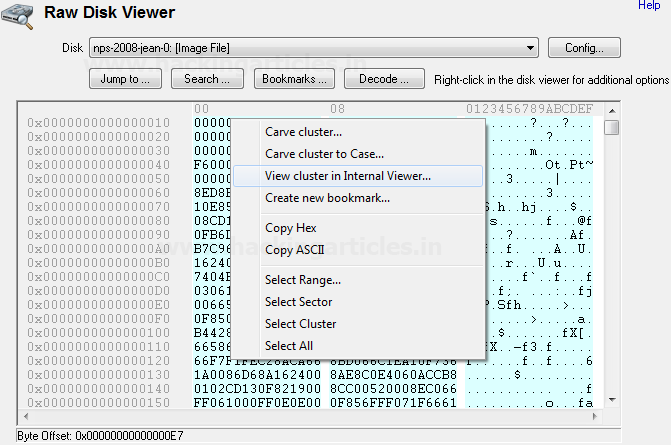
Right click on the file to get all the available options of the file/offset/cluster.
Click on Search button, a screen will appear where we can search for Hex or Text and continue. This will search the particular text or Hex within the raw sectors and will display the result.

Click on bookmark button on the main screen of Raw Disk Viewer. we can create the bookmarks for the relevant evidence.

Create a new bookmark by specifying its start offset and end offset. We can differentiate the bookmark through its color.

The bookmark saved will get listed.

If we click on the bookmark the offset range will get highlighted on the main screen and will mark the starting of the offset with a flag and color of the flag is that of the bookmark.

This concludes the Raw Disk Viewer.
Registry Viewer
Registry viewer enables to investigate the registries of evidence.
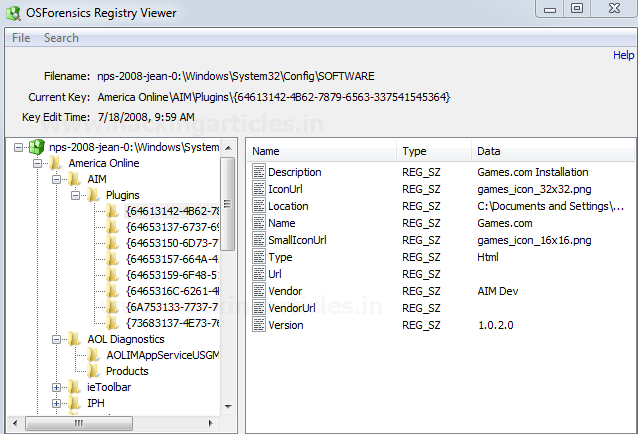
To start with open the registry viewer, we can select the drive/evidence we want to work on. All the registry files in that particular drive/evidence will get listed on the right side.

Double Click on any file and we can navigate to the registries and can get all the details.
This concludes Registry Viewer
File System Browser
File system browser enables us to navigate to the Drive/Evidence.

We can navigate through all the files/directories and perform multiple activities. In file system browser we have the other options of OSF as well like File search, Mismatch search, Create Index, Create signature. Some of these features we have already talked about and some of them we will discuss in coming articles.

We can check the “Show Deleted File” option by clicking on Tools > Option > Show Deleted File.

The deleted files/directories (if any) will also get listed and will be marked with a red cross.

This concludes the File System Browser.
Passwords
Passwords feature enable us to retrieve the password-related information of the evidence. These passwords could be passwords stored within the browser, Windows Login Passwords, WE can also create a rainbow table by making the multiple combinations of the passwords and retrieve the passwords from the rainbow table. Under OSF passwords also have an option to decrypt an encrypted file.
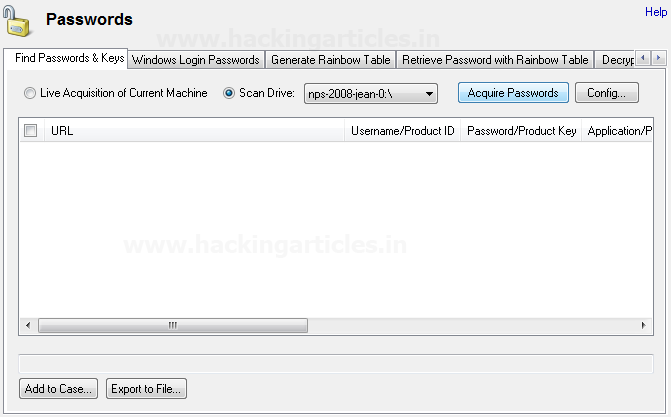
To start with open OSF and select passwords

The first tab is to Find Passwords & Keys, this will allow recovering the stored password from the browser, outlook, windows auto logon passwords, etc. We can either do the live acquisition of current machine or Scan Drive and select any drive or evidence.
Click on the Config button, check the passwords you want to recover. Select the decryption settings based on requirements, we can include our dictionary file or can use an automatic dictionary. If credentials are known we can provide windows login credentials and click OK.

Click on Acquire passwords button to start the process.
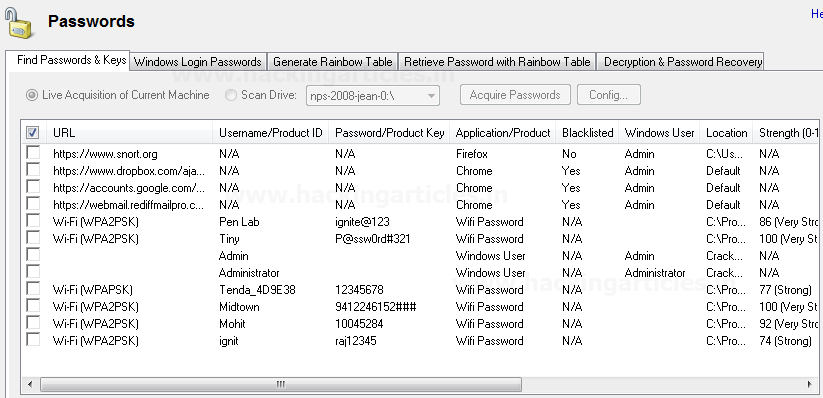
All the passwords/product keys will get listed.

The below image is the passwords acquisition of the Current Machine for better understanding as the evidence we were working on doesn’t any stored wireless network.
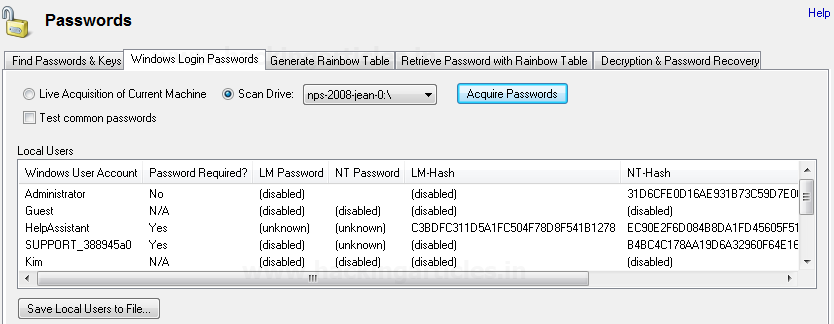
Select Windows Login Password , select the Drive/evidence and click Acquire passwords
All the information will get listed. If there is any saved password it will get listed also we can get info about it also we can get NT hash and LM Hash of the password from which we can recover the password.
We have an option to generate a rainbow table. This is used to create a list of passwords with different combinations and permutations. We can choose from the different options/combinations from the drop down. More huge and complex the inputs are the longer the time it will take.
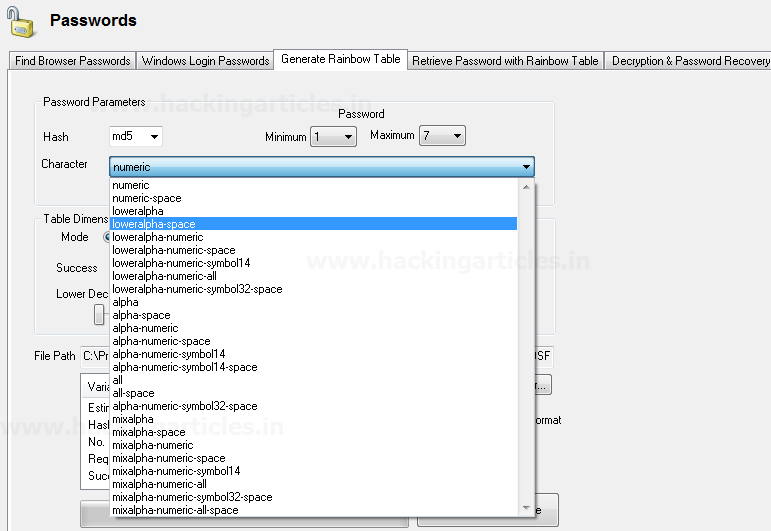
Browse the file path where we want to save the table and if required modify the parameters. Click on create a rainbow table button to start with the process.
Depending on the complexity the process will start.

Password through a rainbow table. If the password is within the rainbow table we have created and we have the NT hash and LM Hash we can recover the passwords (however this ). TO achieve this we need to add the folder of the Rainbow table under “Select Rainbow Table” and can either enter the raw hash or can browse the file which may contain the hash, if the password is present within the rainbow table, we will get the password.
In the image we are browsing the file “hash.txt”, we have saved in windows login password (shown above)and the rainbow table we have created.

Click on recover Password/s button to start the process, if the password present in Hash.txt is found in the rainbow table we will get the result.
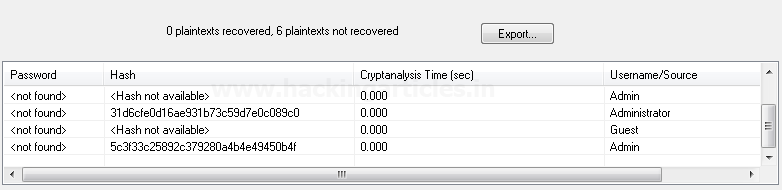
In the above, we haven’t found the password as it must be not present inside the table. Also, these tables have certain limitations and have a success rate of 95 % (approx). There are other methods as well for the recovery of passwords we will be discussing on other articles.
This concludes Passwords.
For more on OSForensics wait for the next article.
Author: Ankit Gupta, the author, and co-founder of this website, an ethical hacker, forensics investigator, penetration testing researcher and telecom expert. He has found his deepest passion to be around the world of telecom, cyber security and digital forensics. Contact Here