Advance Web Application Testing using Burpsuite
Today we are going to discuss the advance option of Burp Suite pro for web penetration testing; here we had used Bwapp lab which you can install from here and acunetix vulnerable web application which is available online for making web application penetration practices.
Burp suite Advanced Usage
- Burp Infiltrator
- Macros
- Burp Clickbandit
Burp Infiltrator
Burp Infiltrator is a tool used to target web applications in order to test them using Burp Scanner. Burp Infiltrator is used to targeting application so that Burp can detect cases where its input can pass unsafe APIs on the server-side.
Burp Infiltrator supports applications which are written in:
- Java, Groovy, Scala, or other JVM languages (JRE versions 1.4 – 1.8)
- C#, VB, or other .NET languages (.NET versions 2.0 and later)
Let’s start!!
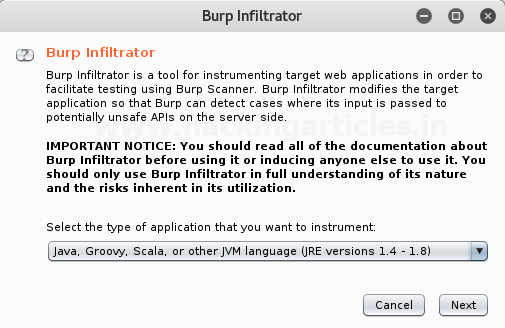
First, we need to enable the Burp Infiltrator from the Burp tab in burpsuite where we have to select the Burp Infiltrator option. Then we will see a Burp Infiltrator box will appear where you have to select the type of application you want to instrument as you shown in the image
After that, we need to select the folder where we want the Infiltrator file to be saved so that we can enable it later using the terminal.
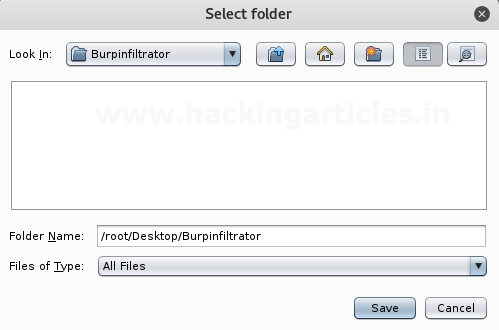
Next, we will give the path of the folder where the infiltrator file will be saved as shown in the image.

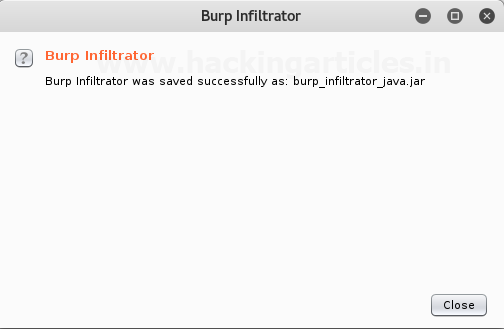
Than the Burp Infiltrator file will be saved as burp_infiltrator_java.jar.
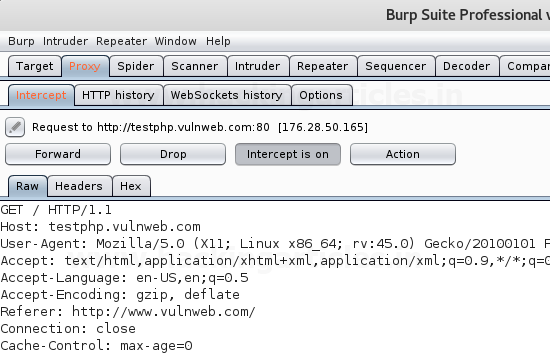
Now to enable the burp infiltrator file we will go to the path of the file using the terminal, then to execute it we need to give the command java –jar burp_infiltrator_java.jar –non-interactive. Then Press Enter the file will be executed.

We have used –non-interactive in our command so that it will automatically configure the default settings else we have to manually configure all the settings. Now we can intercept the request of any website or application based on the supported parameters as shown in the image.
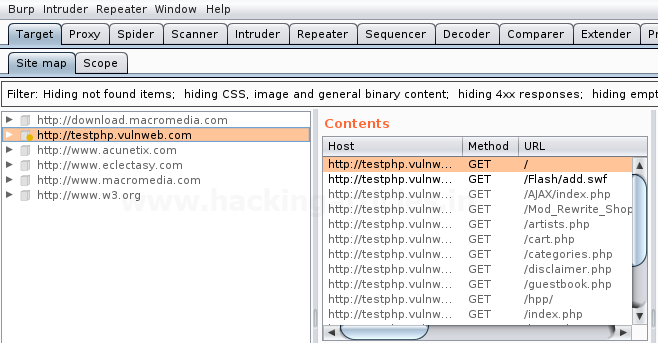
Turn off the Intercept Tab. Select the Target Tab where we can see a SubTab in it as Site Map as shown in the image.
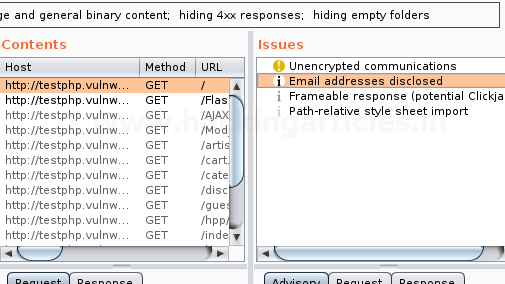
Then select the Url you want to scan using burp infiltrator, just Right click on the Url then select option Actively scan this host this will give all the issues related to the Website or application we want to scan. All the Issues related to the Url scanned can be seen in the Issue box as shown in the image.
Macros
Burp suite has a new session handling ability which can be used to run macros, according to session handling rules. A macro can be said as a predefined sequence of one or more than one request. The cases in Macros may include:
- Fetching a page such as a user’s home page just to check whether the current session is still valid or not.
- By performing a login operation to obtain a new valid session.
- A token or nonce obtained can be used as a parameter in another request.
The Macros can be recorded using your browser. When defining a macro, Burp suite displays the Proxy history, from which you can select the requests to be used for the macro. You can select from previously made requests, or record a fresh macro and select the new items from the history. When you have recorded the macro, the macro editor shows the details of the items in the macro, which you can review and configure as per requirement.
Let’s start!!
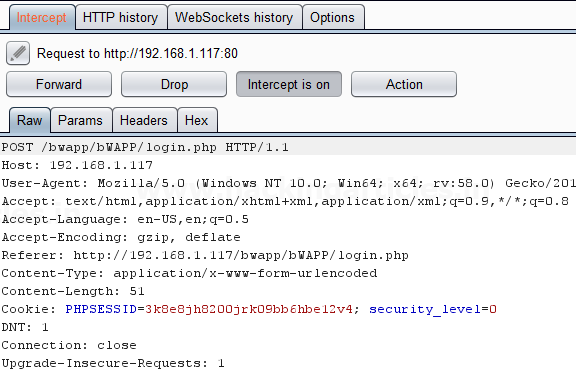
First, we have intercepted the login request of Bwapp Lab where we have given the default username and password as shown in the image.

The request is captured in the Intercept Tab then Right Click anywhere around the captured request, next we need to select the option Do Intercept which has a sub-option Response to this request. Click on it.
Then we have forward the captured request until we are successfully logged into the Bwapp Lab.
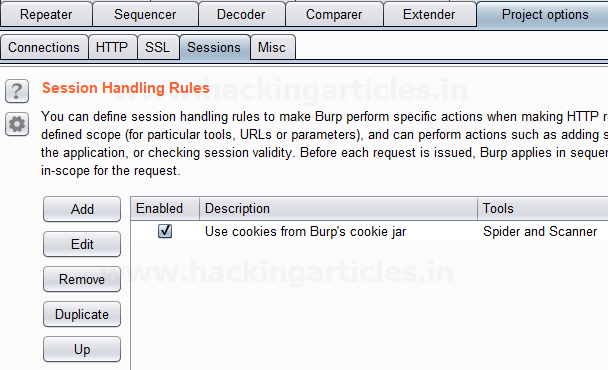
After that go to Project options Tab where we need to select the Sessions Tab as shown in the image.
Click on Add Button under the Session Handling Rules which will open a Session handling rule editor window where we have given a name to the Rule under the Rule description as shown in the image.
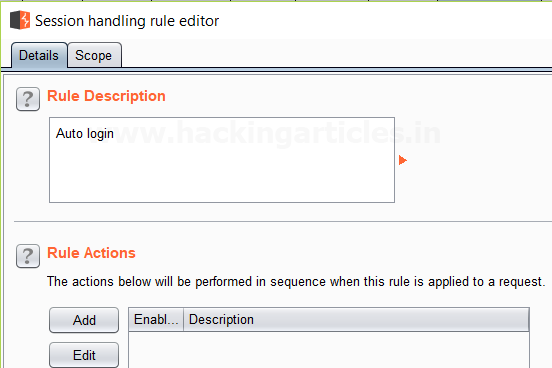
Click on Add Button under Rule Action then select Check session is valid option which will open a window for Session handling action editor then give an expression you want the burp suite to look up in the Url like we have given login.php and Tick the option If session is invalid, perform the action below as shown in the image.

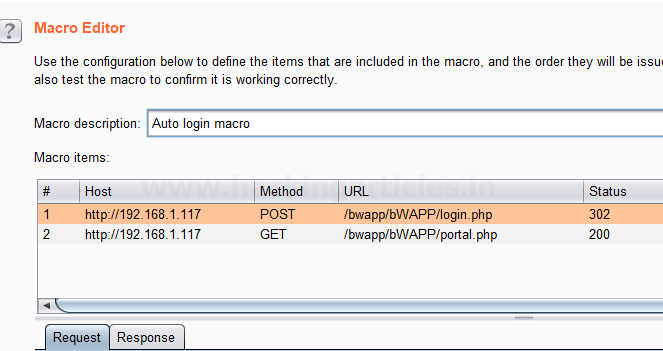
Click on Add Button under Select Macro which opens a window of Macro Recorder where we will select the item from the proxy history that we want to include in the Macro as shown in the image, Click Ok.

Next, the Macro Editor window will open where we will give a name to the macro in the Macro description field as shown in the image. Click Ok.
After this we will get back to Session handling rule editor where we will click on the Scope tab then we need to tick the options Extender, Proxy under Tools Scope and Include all URL’s under URL Scope, Click Ok now the macro will be running in the background.

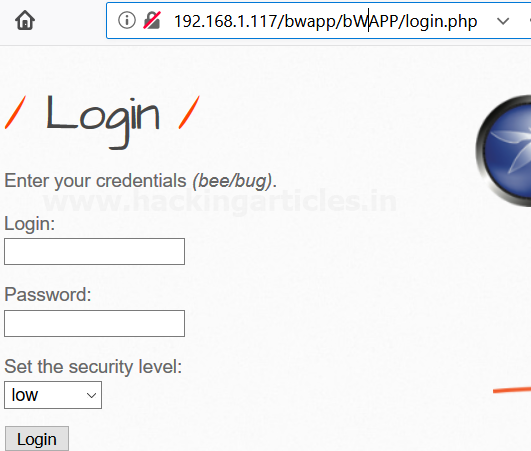
As you can see in the image we are on the login page of the Bwapp Lab where we have not given any login details.
We made a simple change in the URL we replaced login.php with portal.php as shown in the image.
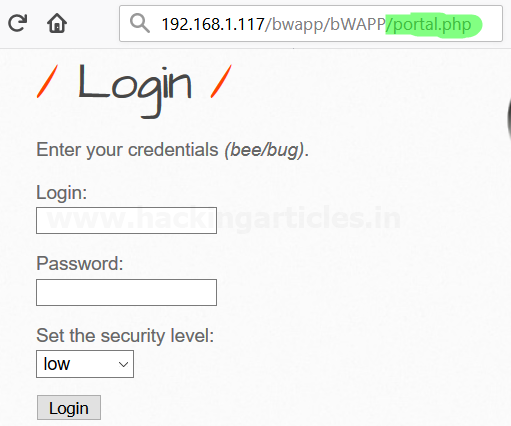
This has successfully logged us into Bwapp Lab without giving any login details.

Burp Clickbandit
Burp Clickbandit option in burp suite is a tool used for generating clickjacking attacks. When you know a web page that is vulnerable to clickjacking, we can use Burp Clickbandit to create an attack and to confirm the vulnerability can be successfully exploited. When running Burp Clickbandit on untrusted websites. Malicious JavaScript from the target site can take the authority of the HTML output that is generated by Burp Clickbandit. There are two modes in Burp Clickbandit as follows:
Record Mode
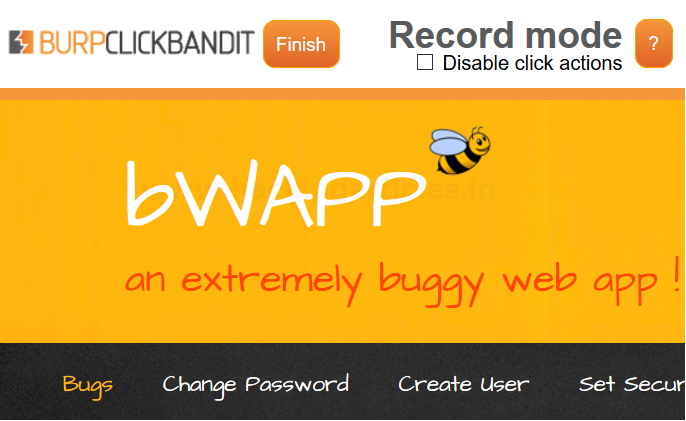
Burp Clickbandit first opens in record mode. Then we need to perform one or more mouse clicks to record your clickjacking attack, as this will involve performing the mouse clicks that the victim user needs to perform for making some desired action. We can also use the “disable click actions” checkbox to record clicks without the target page handling them. When you have finished recording, click the “Finish” button to enter review mode.
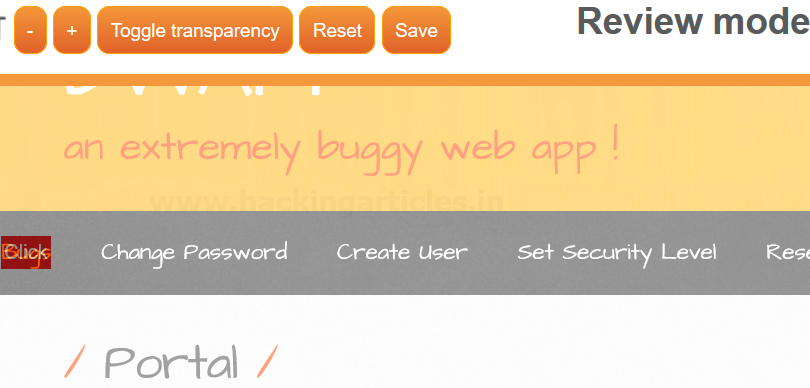
Review Mode
When you have finished recording your clickjacking attack, Burp Clickbandit enters into review mode. This lets you review the generated attack, with the attack user interface over the original page UI. You can click the buttons on the attack UI to verify that the attack works.
List of commands that are available in review mode:
- + And – buttons are used to zoom in and out.
- The “toggle transparency” button allows you to show or hide the original page UI.
- The “reset” button restores the generated attack, as it was before any further clicks were made.
- The “save” button is used to save an HTML file containing the attack. This can be used as a real-world exploit as clickjacking vulnerability.
- You can use the keyboard arrow keys to reposition the attack UI over the original page UI, if not correctly aligned with the original page UI.
Let’s start!!
Burp Clickbandit runs on the browser using JavaScript. It can work on all latest browsers except for Microsoft IE and Edge.
To run Clickbandit, go to the Burp menu and select “Burp Clickbandit”.
Click the “Copy Clickbandit to clipboard” button. This will copy the Clickbandit script to your clipboard.

In your browser, visit the web page that you want to test, in the same way, we regularly do. Then in your browser, open the web developer console. This might also be called “developer tools” or “JavaScript console”. Paste the Clickbandit script by editing allow pasting before pasting copied code into the web developer console, and press enter.
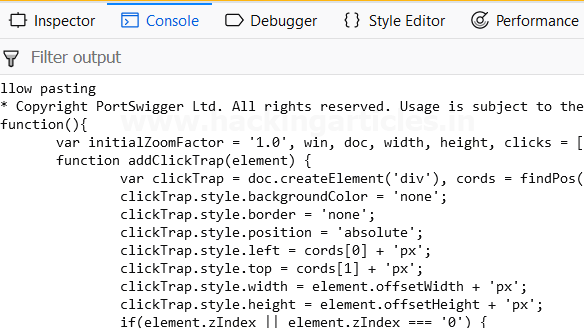
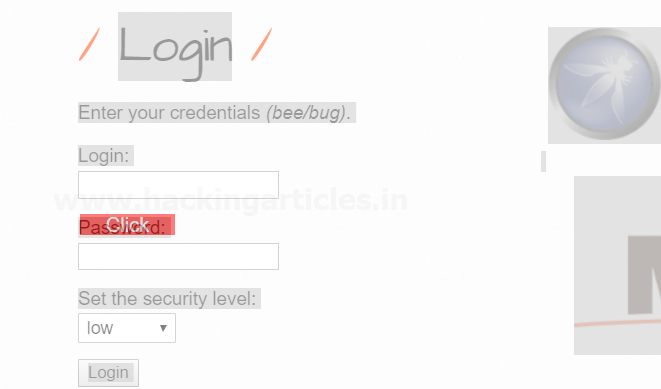
The Burp Clickbandit Logo will appear at the top of the browser window and the original page will be loaded within the frame which readies for the attack to be performed, this is said to be the record mode of burp clickbandit. Then we need to perform one or more mouse clicks to record your clickjacking attack, as this will involve performing the mouse clicks that the victim user needs to perform for making some desired action. We can also use the “disable click actions” checkbox to record clicks without the target page handling them. When you have finished recording, click the “Finish” button to enter review mode.
When you have finished recording your clickjacking attack, Burp Clickbandit enters into review mode. This lets you review the generated attack, with the attack user interface over the original page UI.
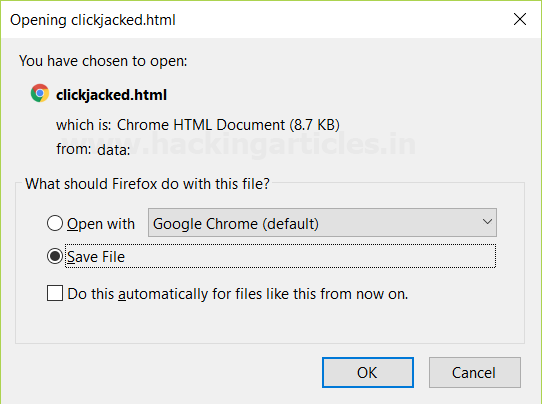
 Click on Save Button, allows you to save an html file containing the attack. This can be used as a real-world exploit as clickjacking vulnerability.
We have opened the saved html file which shows a transparent UI we have created over the original UI with a click button in the red box appearing on the page.
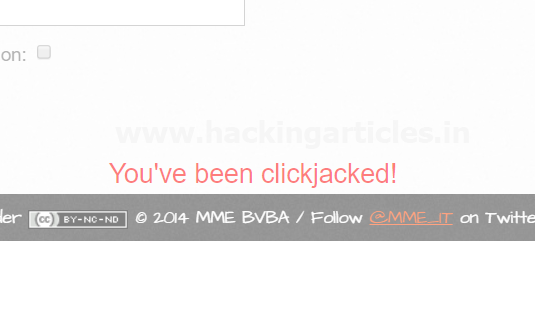
We can click the buttons on the attack UI to verify that the attack works. A message will appear the, you’ve been clickjacked as shown in the image.
Author: Ashray Gupta is a Researcher and Technical Writer at Hacking Articles. He is a certified ethical hacker, web penetration tester and a researcher in nanotechnology. Contact Here
great job Raj; enjoyed all your articles and saved my time in many ways
if we get u have been clickjacked that means its prone to click and edit attack? i am new to this